Deploy MOSTLY AI to an Azure AKS cluster
You can deploy MOSTLY AI to an Azure AKS cluster. This page covers the list of prerequisites and the pre-deployment and deployment steps for a successful installation.
Prerequisites
- Create an Azure account.
- Create an Azure subscription.
- Install Azure CLI.
- Install kubectl.
- Install helm.
- Prepare a fully-qualified domain name (FQDN). A TLS certificate is optional.
- Obtain deployment details from your Customer Experience Engineer.
- MOSTLY AI Helm chart. Required for Task 5.
- (Optional) MOSTLY AI image repository pull secret. Required only if you intend to use the MOSTLY AI image repository to pull the container images. Optional for Task 5.
- First-time log in credentials for the MOSTLY AI application. Required in Task 8.
Pre-deployment
Before you deploy MOSTLY AI to an Azure AKS cluster, you need to complete several pre-deployment tasks.
- Task 1: Create an AKS cluster
- Task 2: Log in to the Azure CLI
- Task 3: Connect to the Azure AKS cluster
- Task 4: Configure an ingress controler
Task 1. Create an AKS cluster
Use the Create Kubernetes cluster wizard in Azure to create your AKS cluster.
Steps
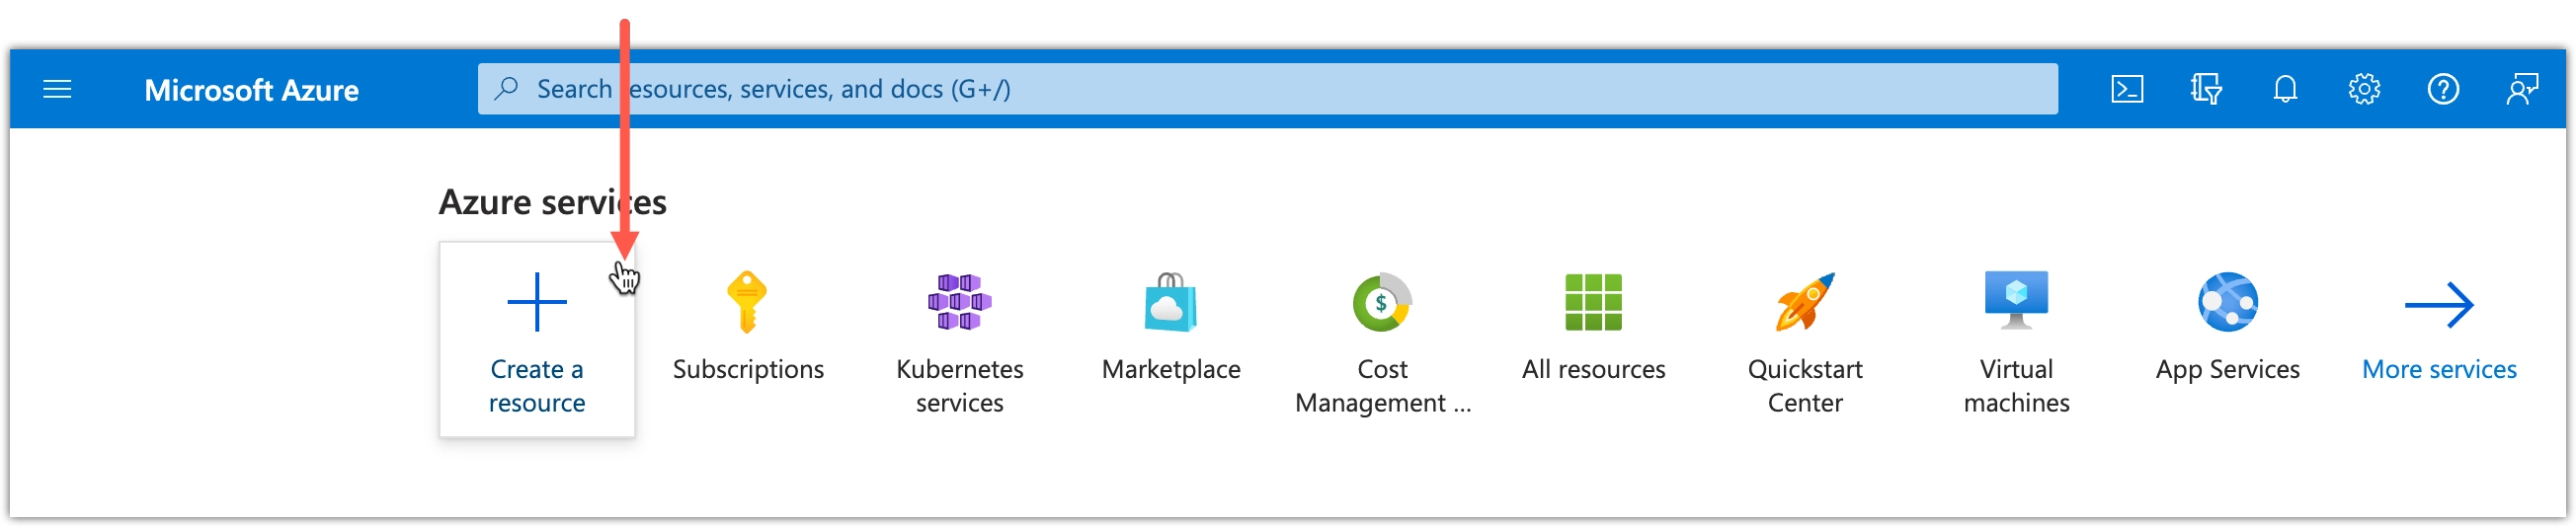
- Log in to Microsoft Azure and select Create a resource.
- In the services search bar, type
aksand press Enter.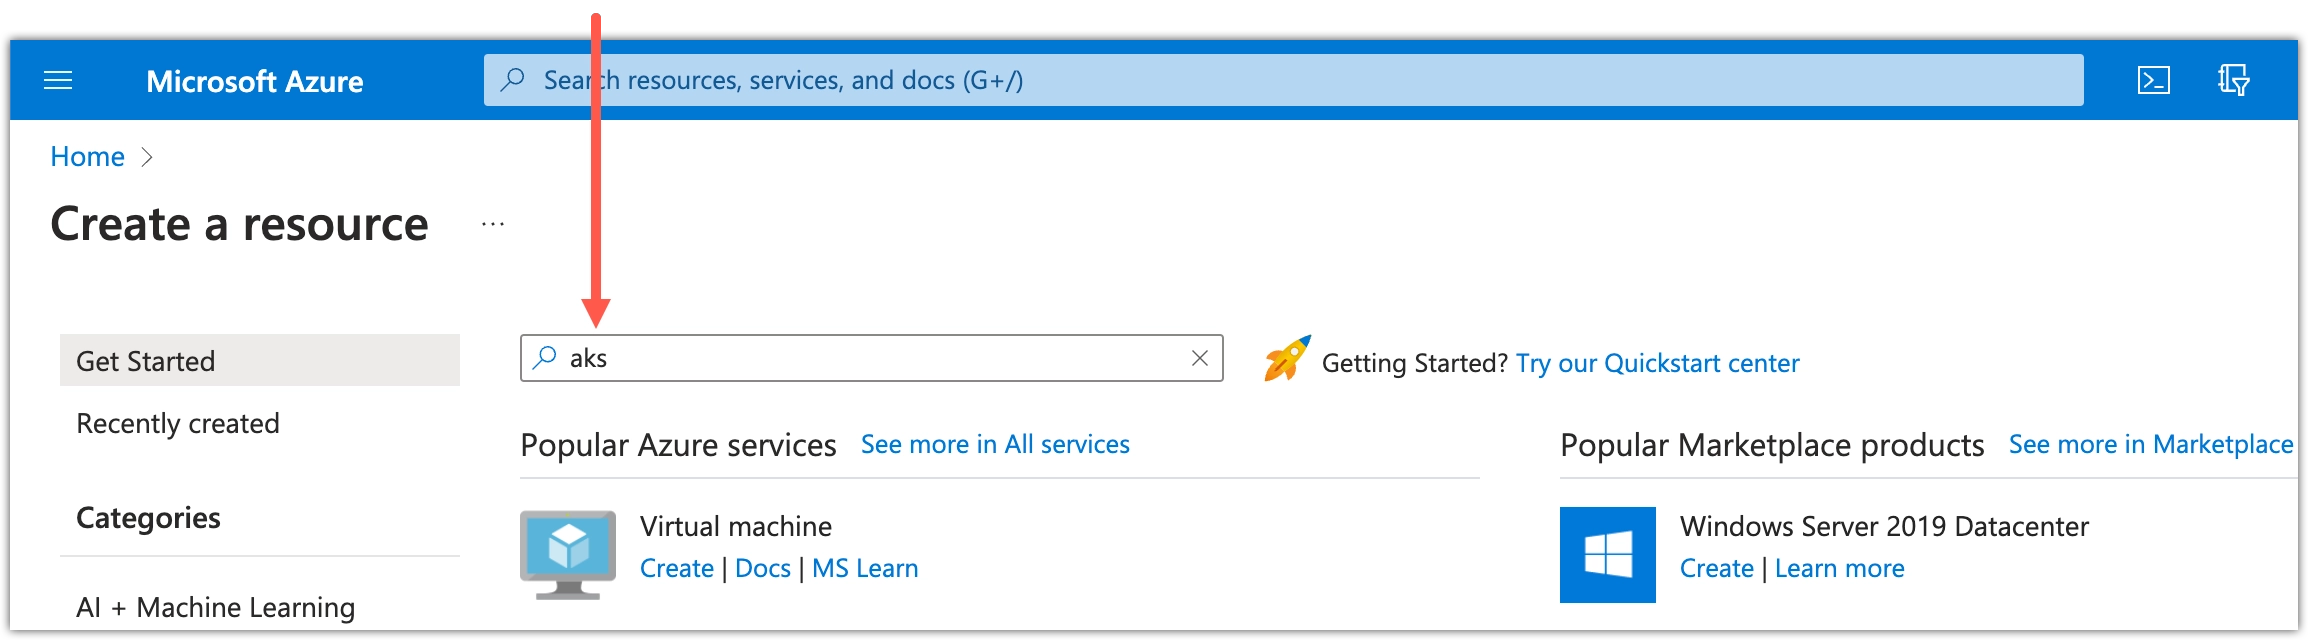
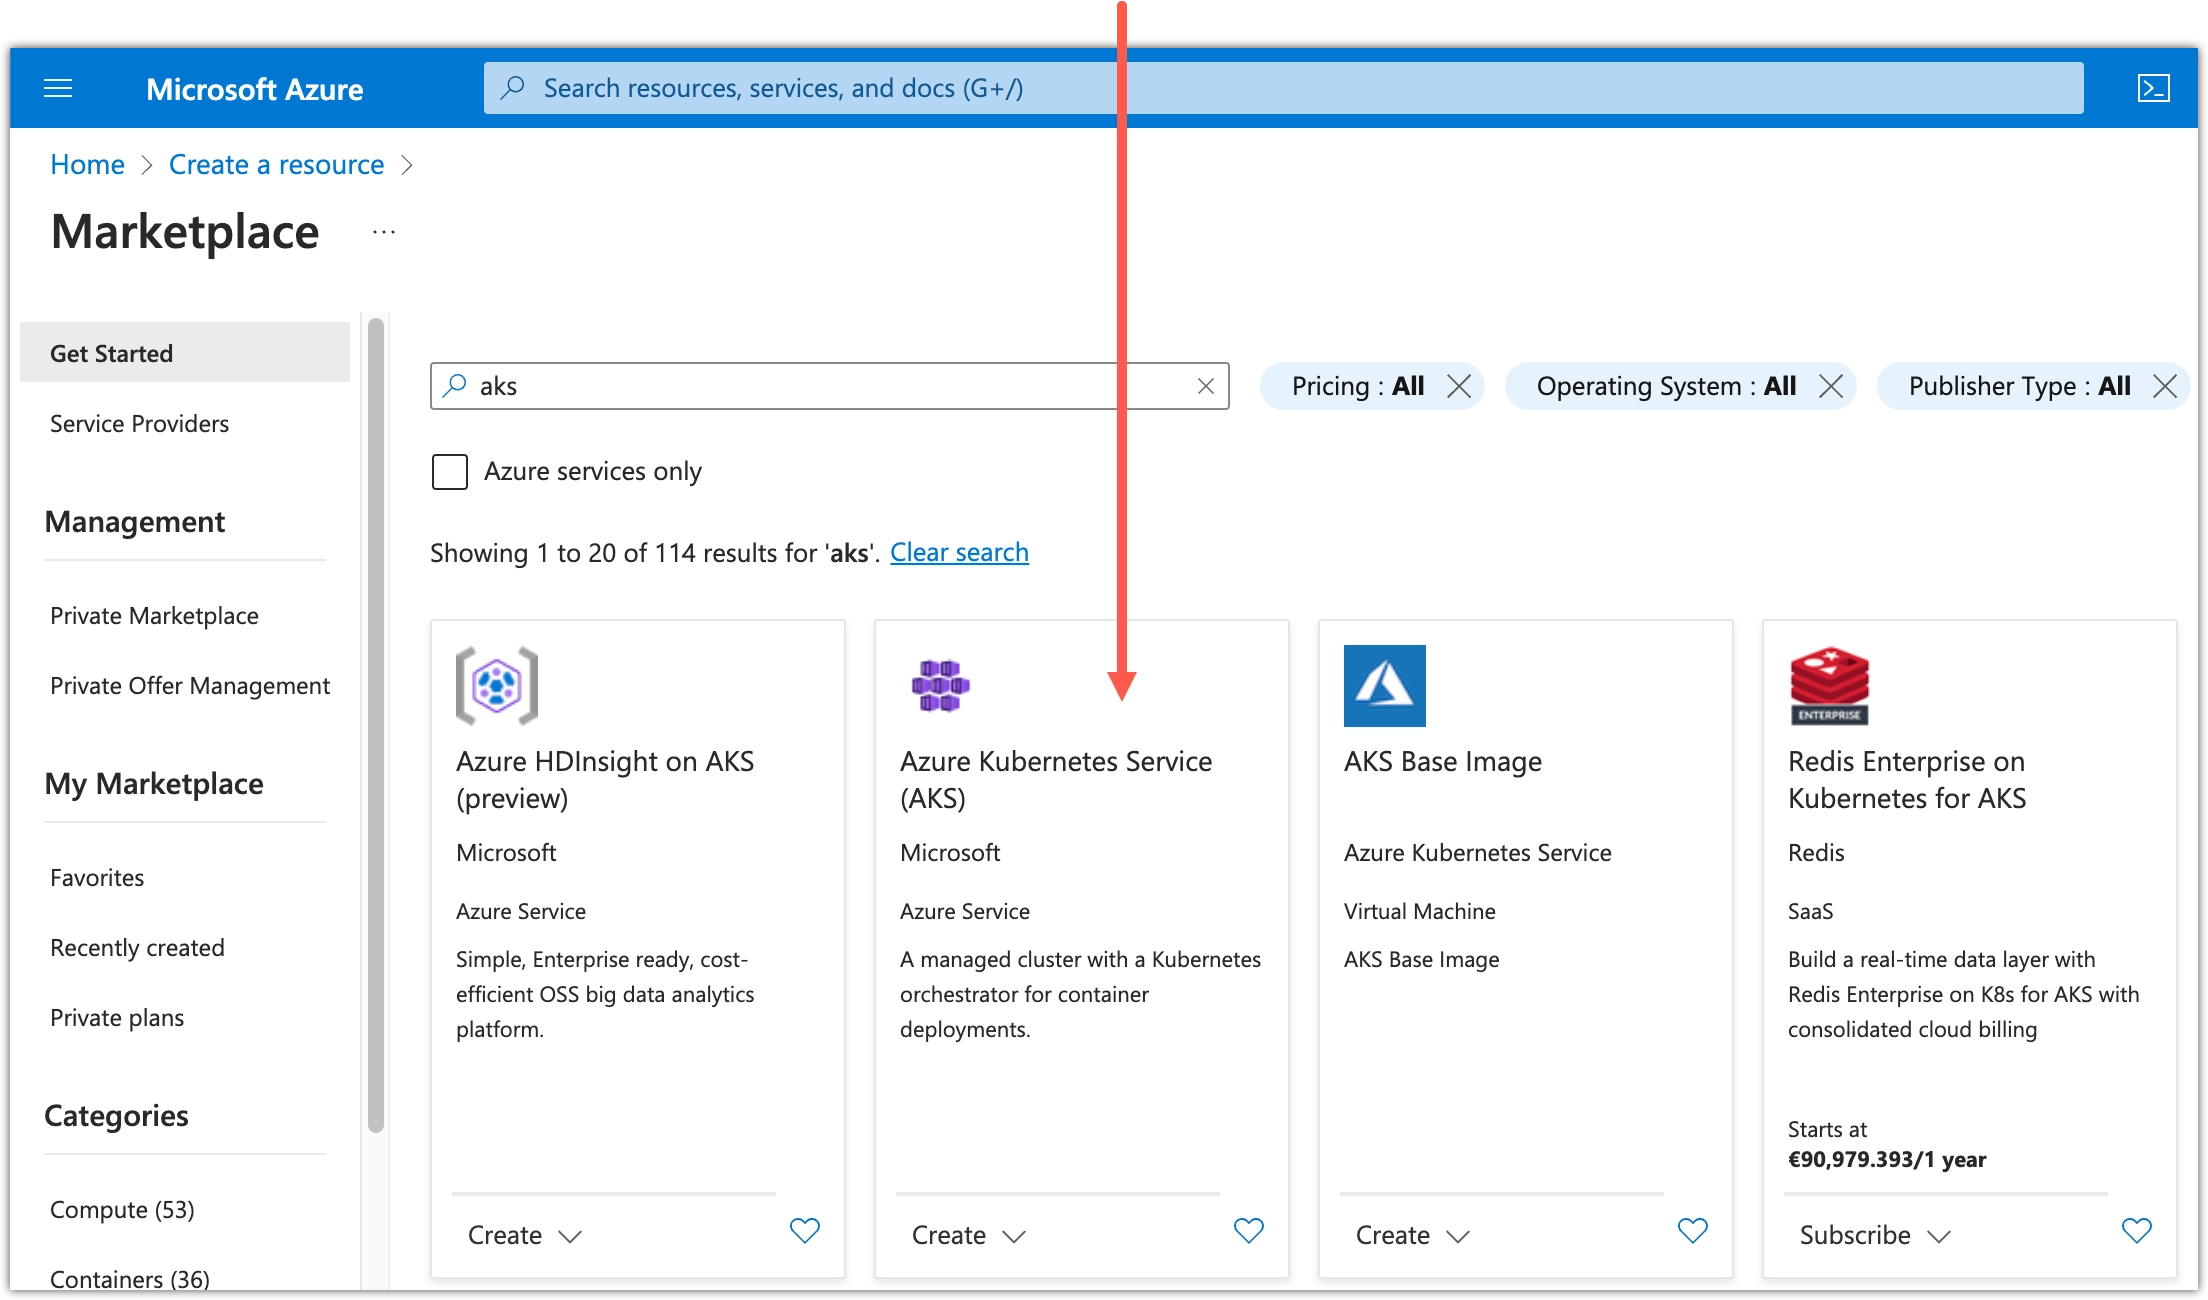
- From the results, select Azure Kubernetes Service (AKS).
- Click Create.
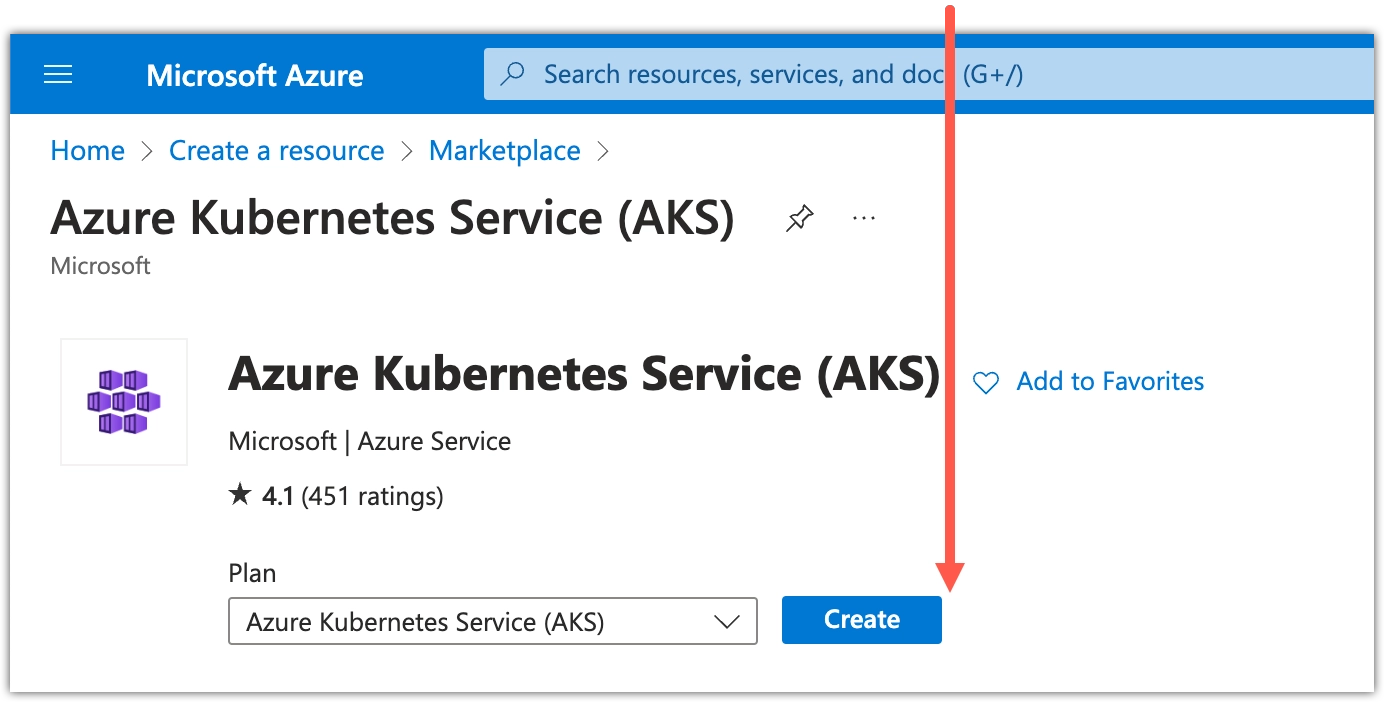 Step result: The Create Kubernetes cluster wizard starts.
 - Configure the Basics page of the wizard.
💡You can change the settings below to suit your needs. The steps provide a minimal configuration to help you set up a new cluster quickly.
- For Subscription, select the Azure subscription you want to use for the cluster.
For more information, see the Prerequisites. 2. For Resource group, define a new resource group for your MOSTLY AI cluster.
For more information, see Manage resource groups in the Azure documentation. 3. For Cluster preset configuration, select Production Standard. 4. For Kubernetes cluster name, define the cluster name.
For example,MOSTLYAI-AKS. 5. (Optional) For Region, select the region to use for the cluster.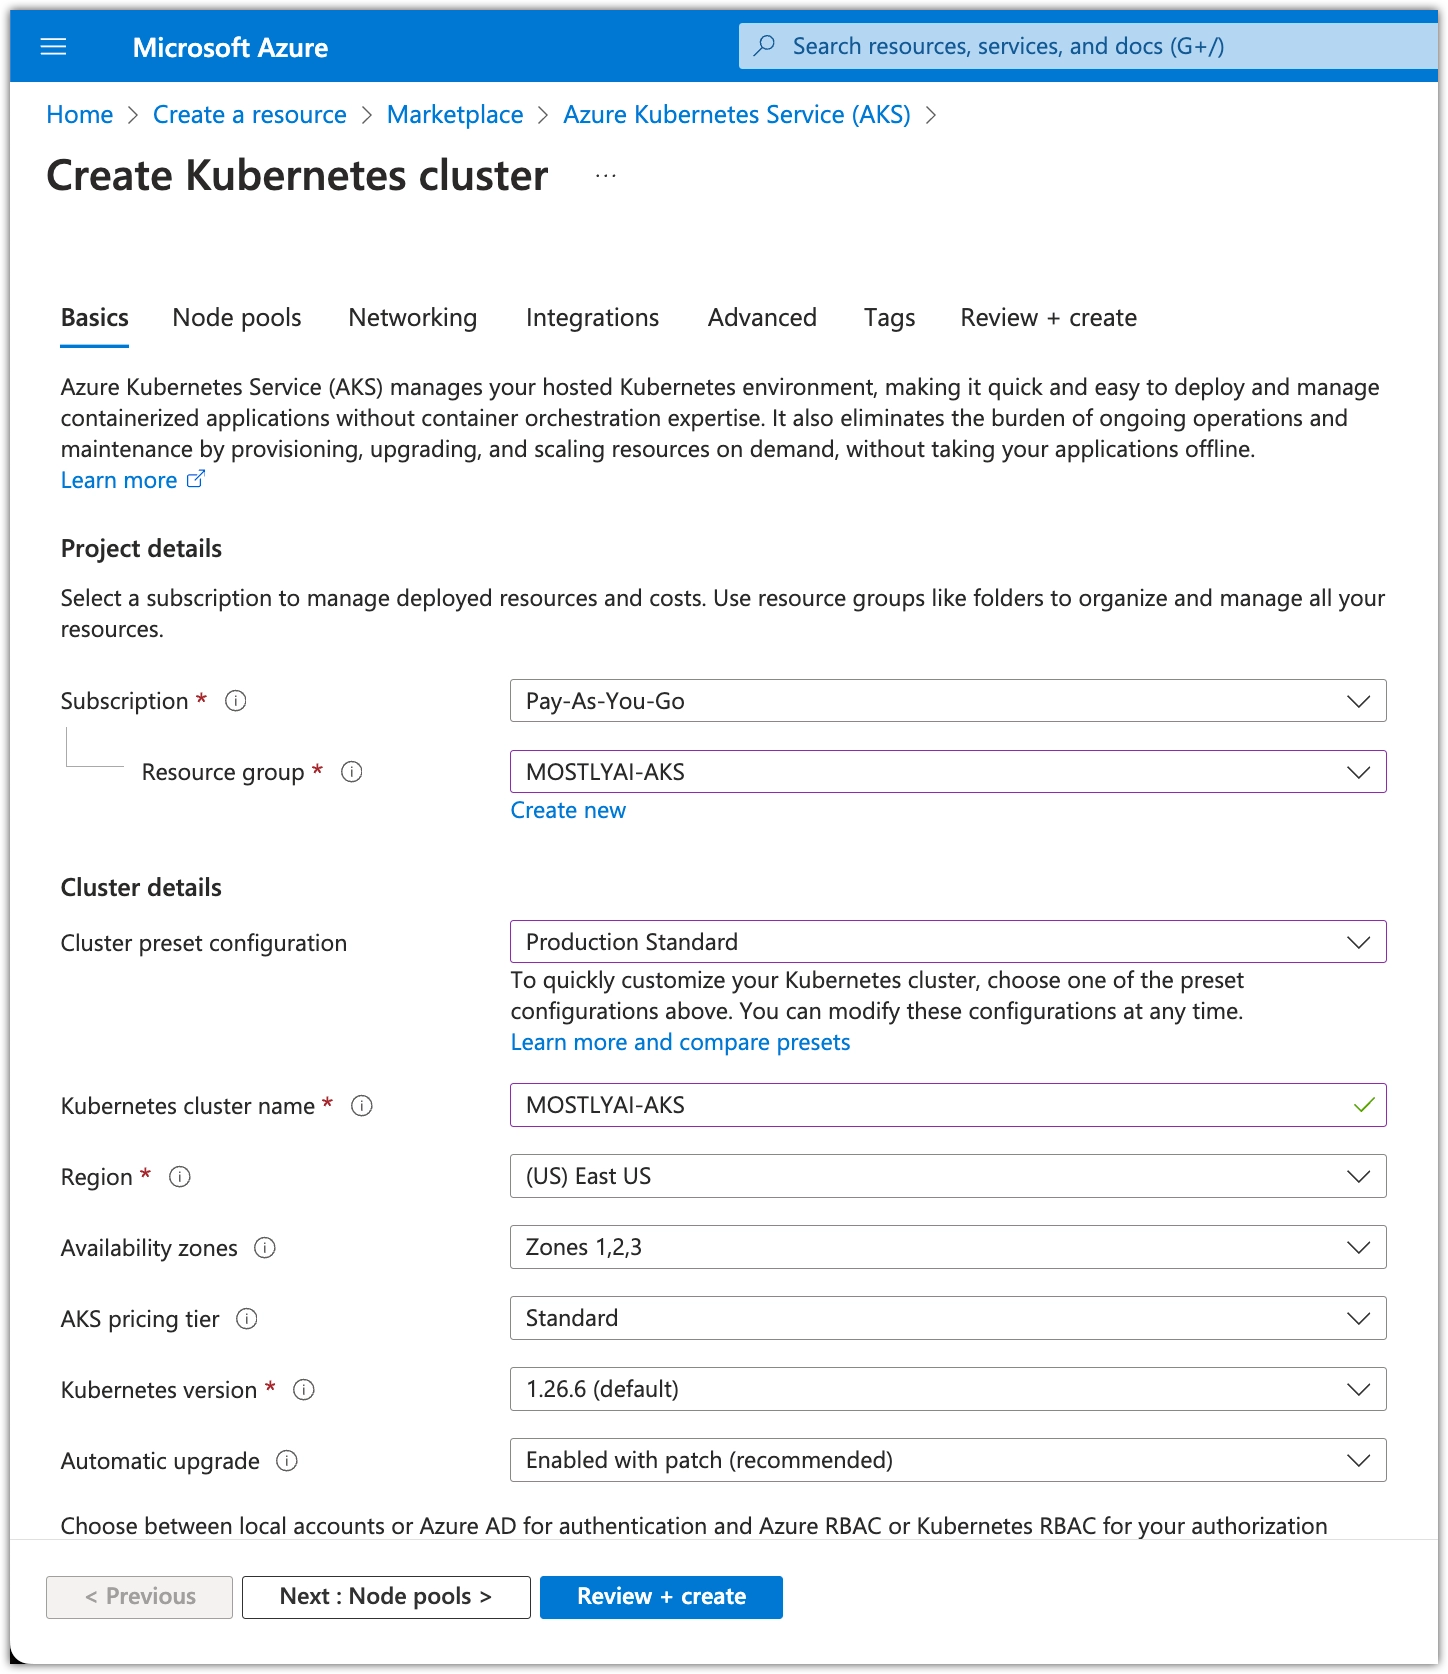
- Retain the remaining default options and click Next.
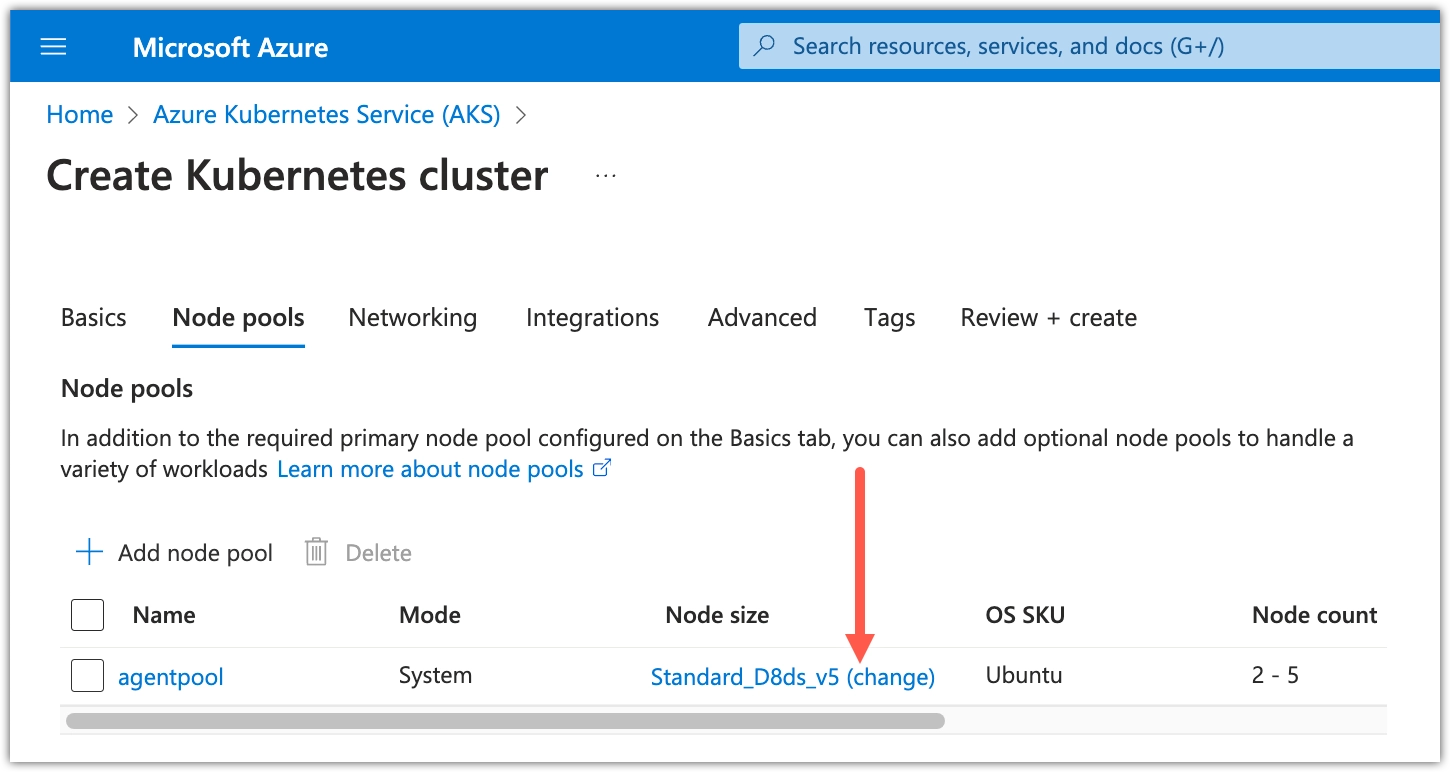
- Configure the Node pools page of the wizard.
- For the agentpool node pool, click the Node size entry.
- On the Update node pool page, for Node size click Choose a size.
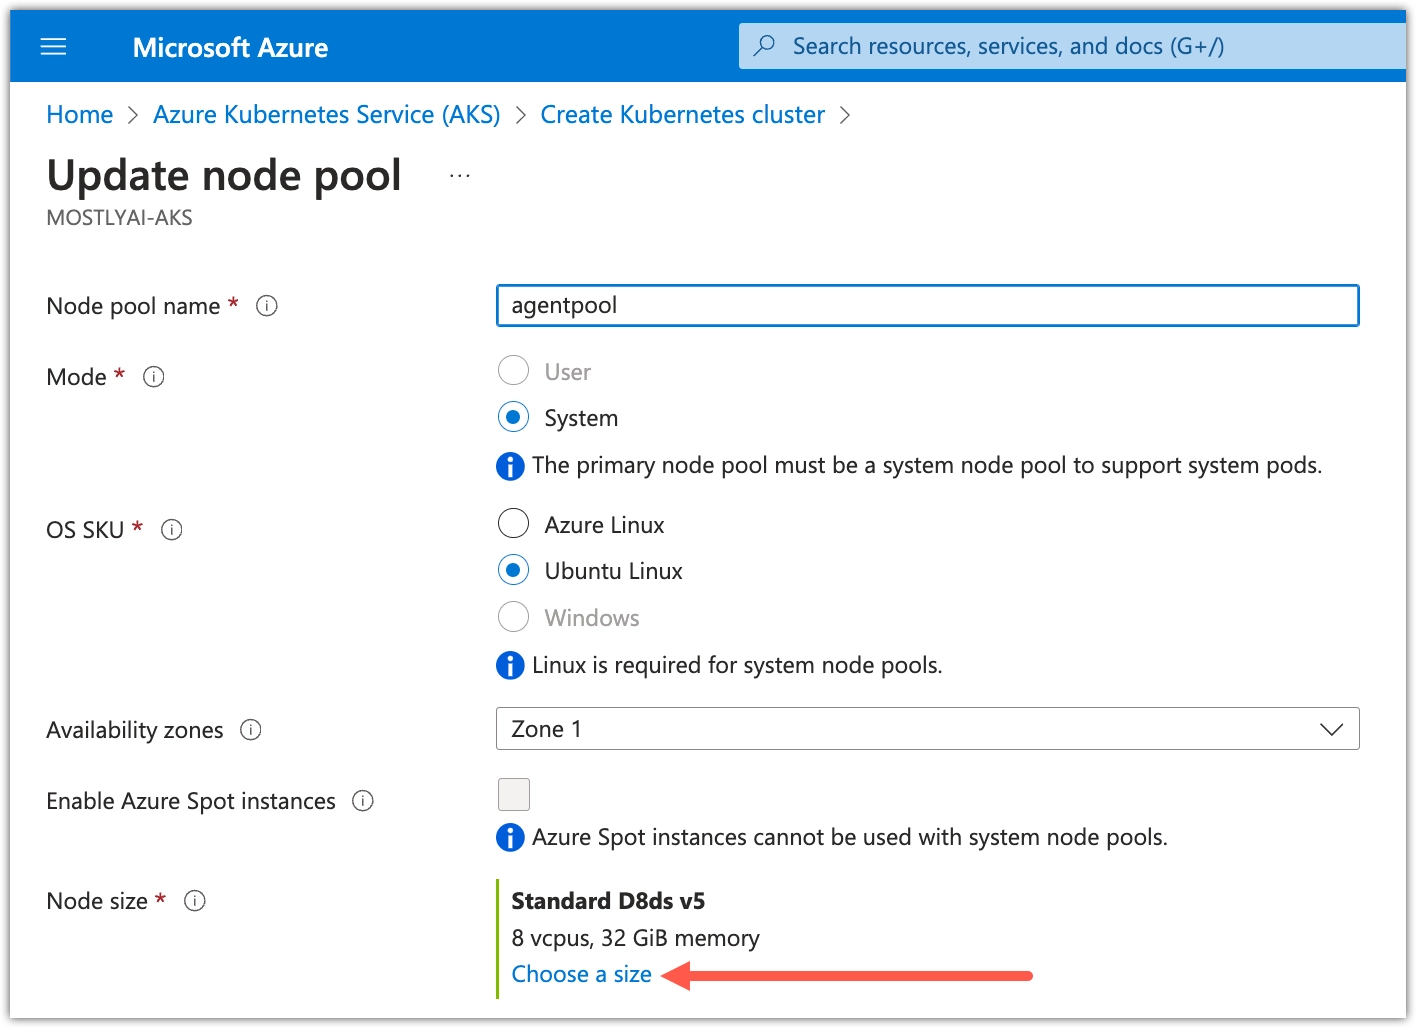
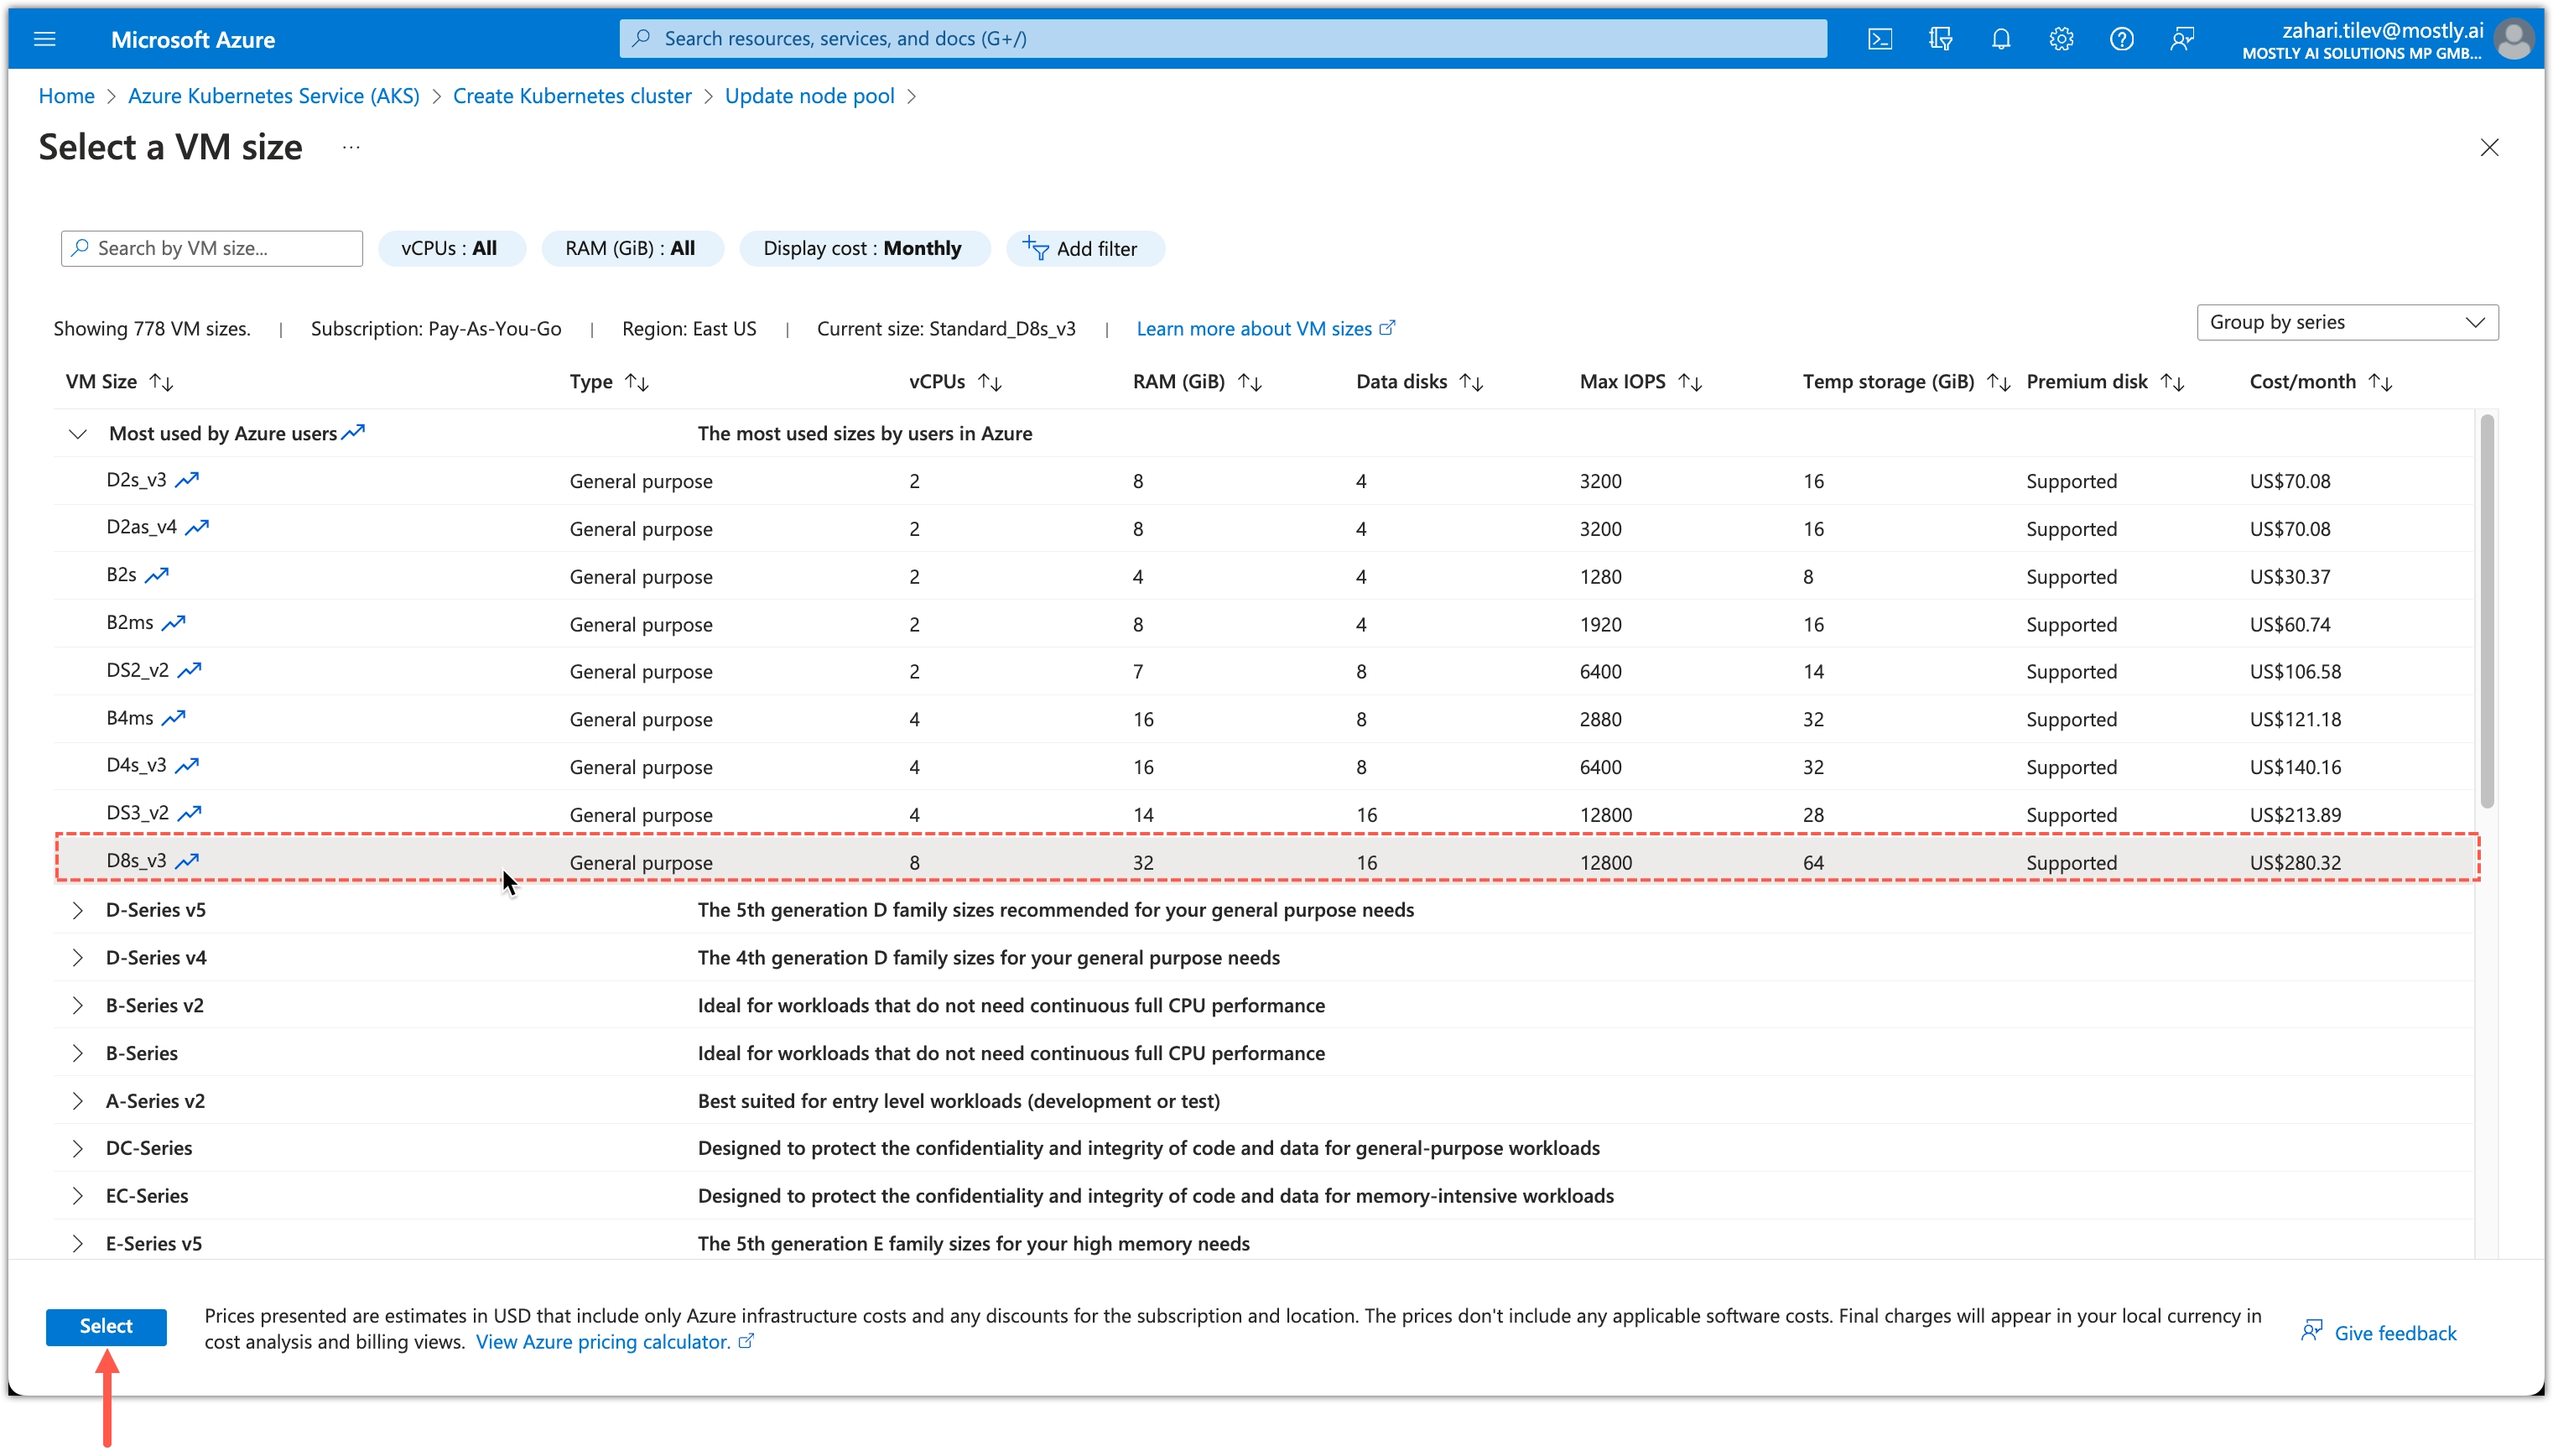
- On the Select a VM size page, select D8s_v3 and click Select.
- Back on the Update node pool page, for Scale method, select Manual and leave Node count to 1.

- For the userpool node pool, click the Node size entry.

- On the Update node pool page, for Node size click Choose a size.
- On the Select a VM size page, select Standard_D16ls_v5 and click Select.
- Back on the Update node pool page, for Scale method, select Manual and leave Node count to 2.
- Click Next.
- For the agentpool node pool, click the Node size entry.
- Configure the Networking page of the wizard.
- For Network policy, select None.
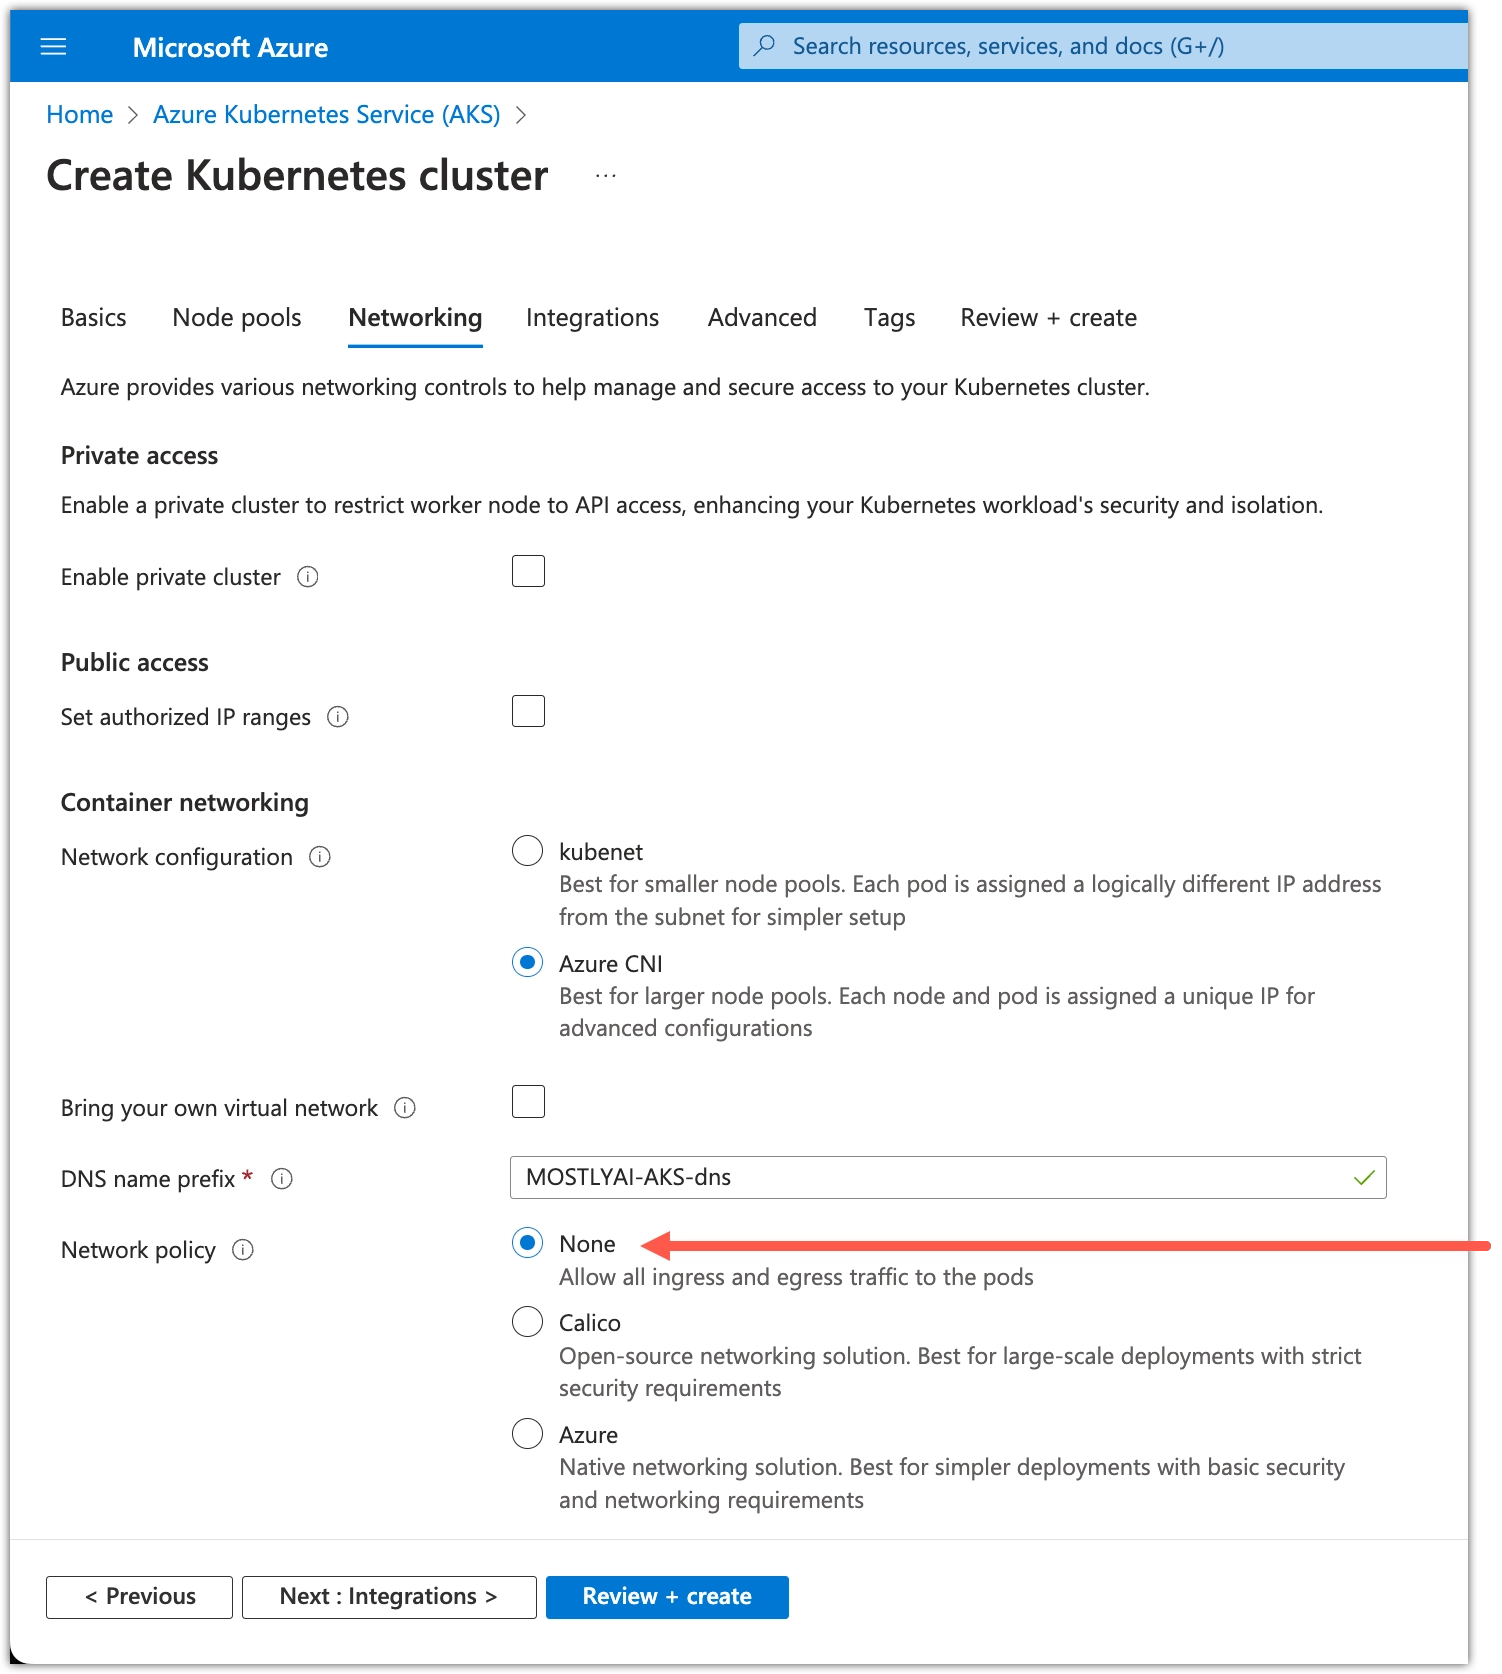
- For Network policy, select None.
- (Optional) Review the Integrations, Advanced, and Tags pages.
- Click Review + Create.
- If the final configuration validation completes, click Create.
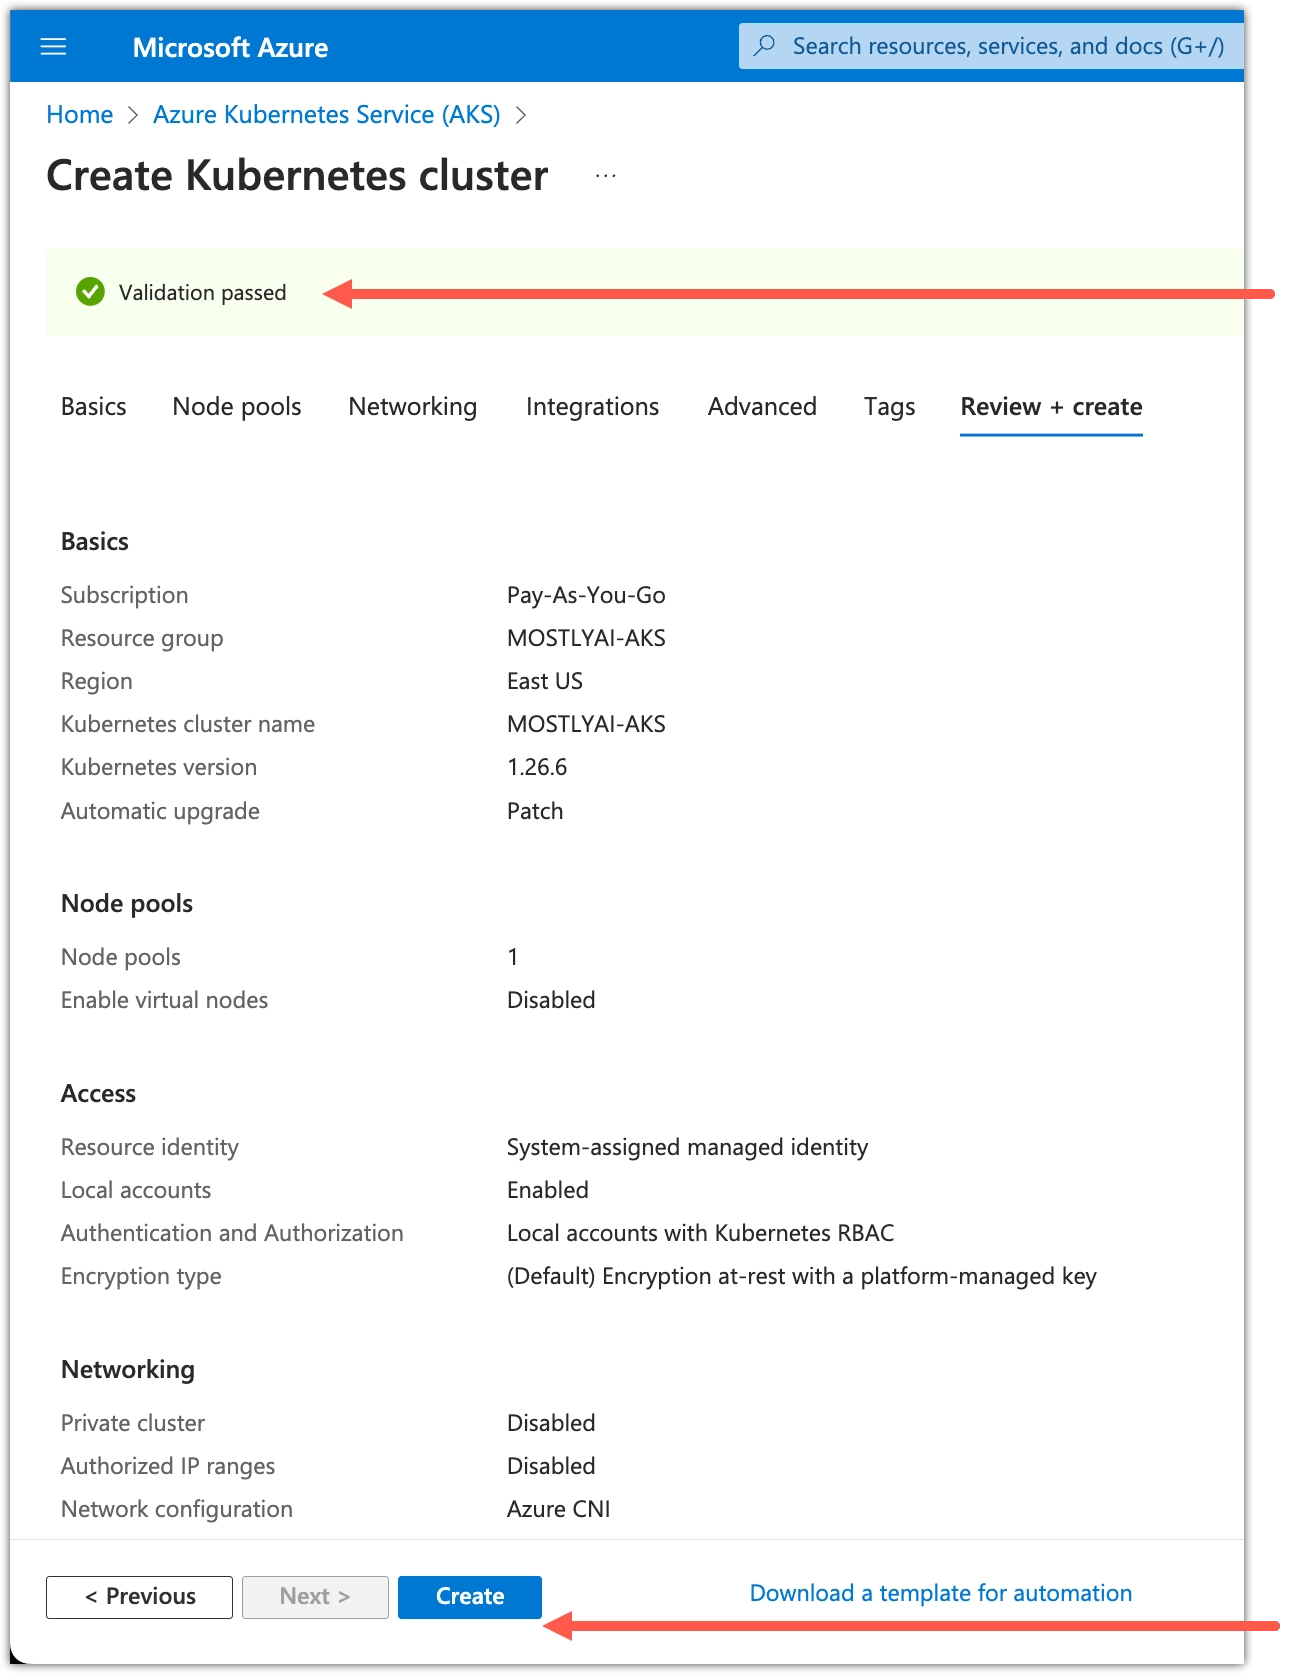
Result
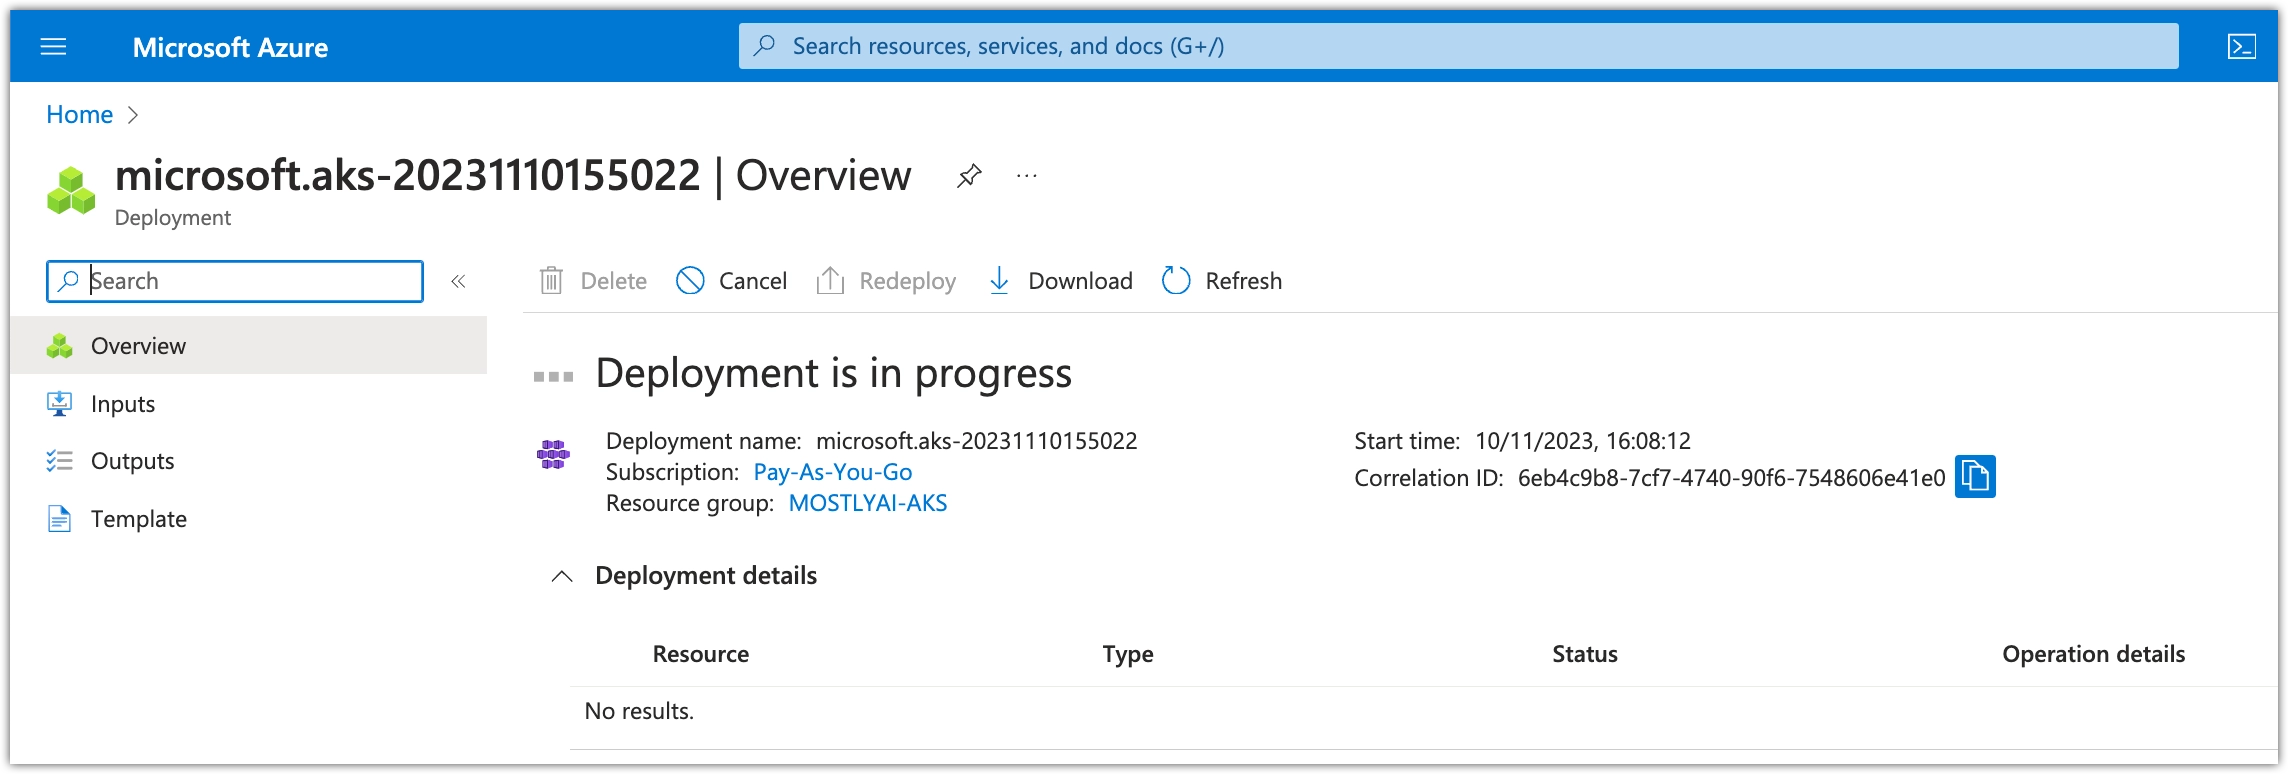
The cluster deployment starts. Wait several minutes until Azure creates your AKS cluster.
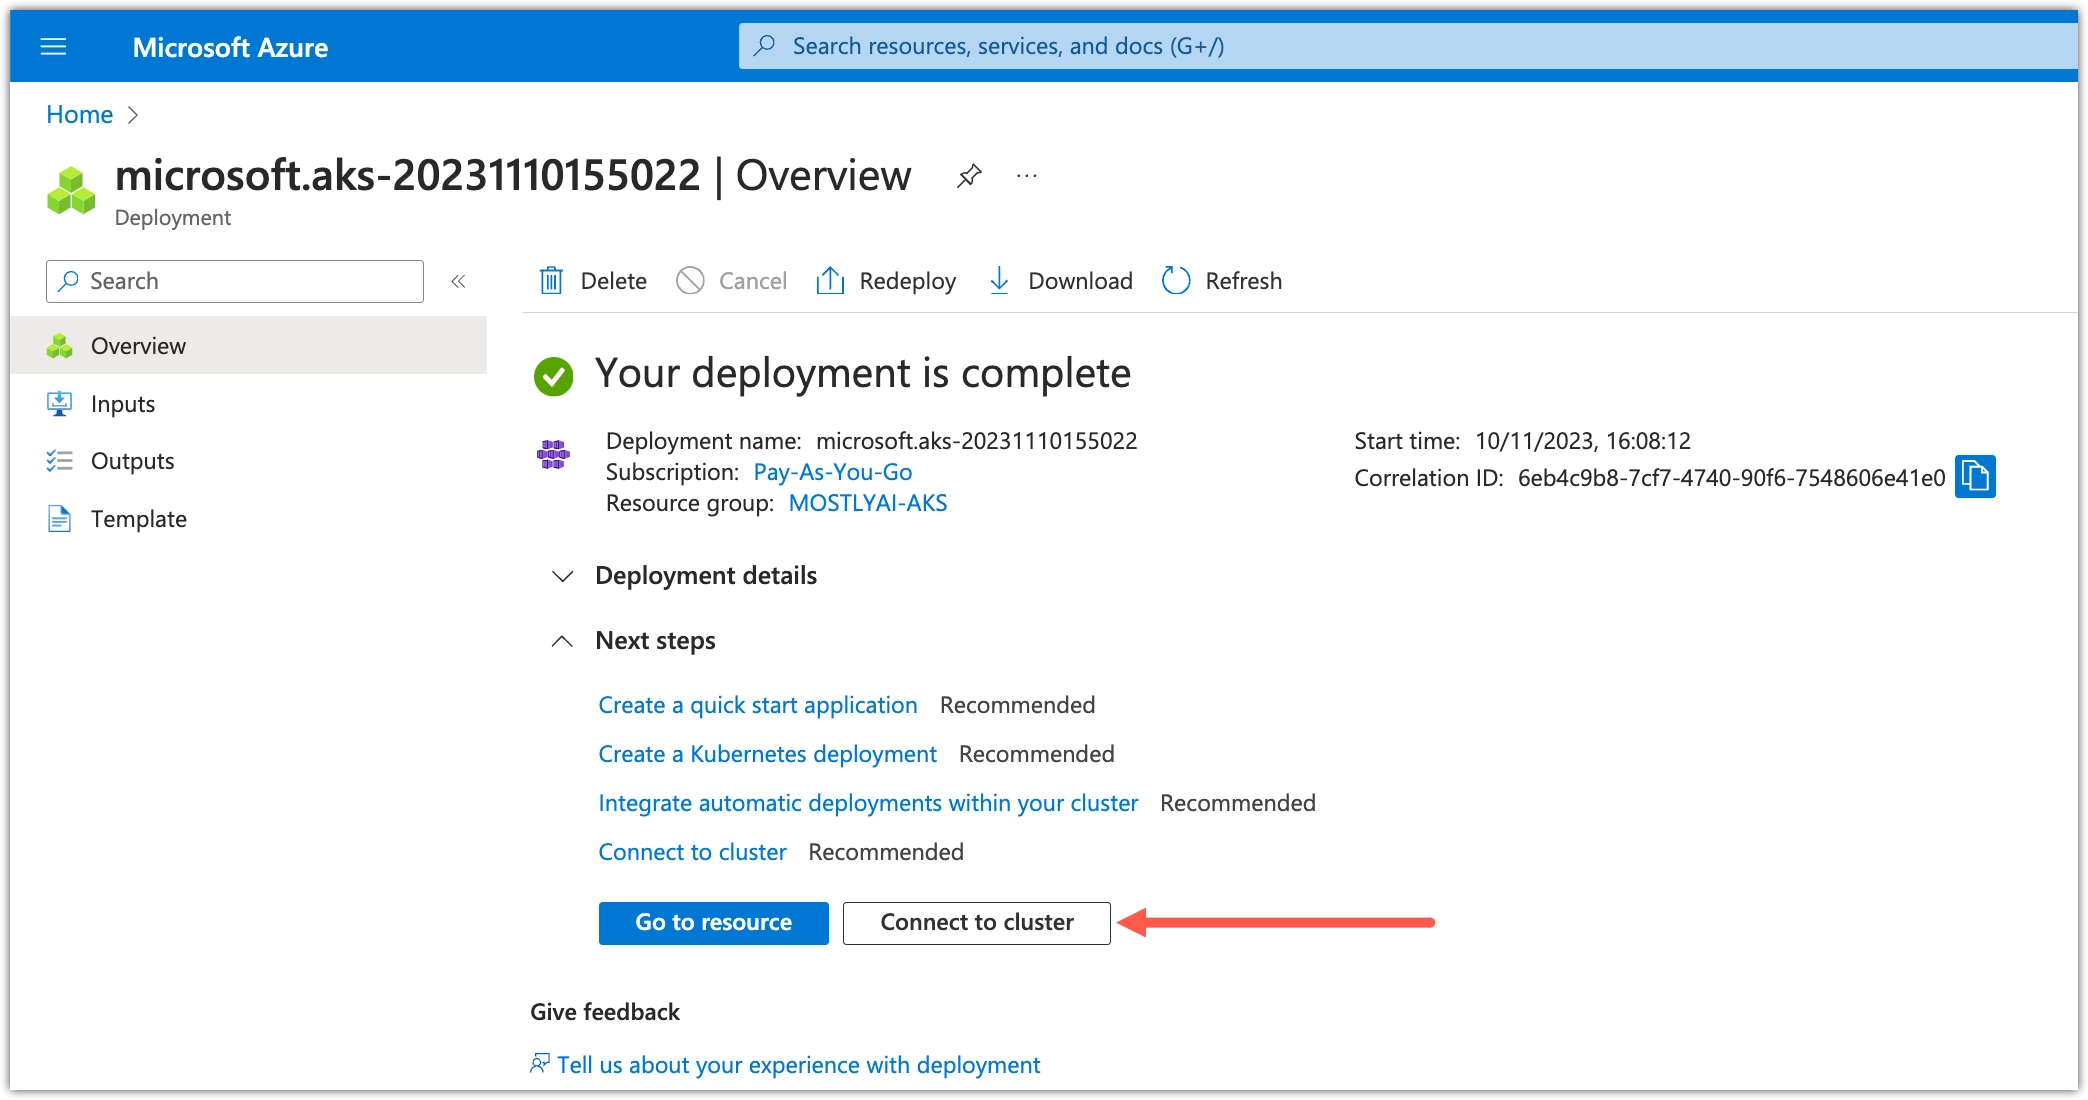
When the cluster is created, Azure reports that the deployment is complete.

Task 2. Log in to the Azure CLI
As listed in the Prerequisites, install the Azure CLI and use it to log in to your account.
Steps
- In a web browser, log in to your Azure account.
- Log in to the Azure CLI.
bash copy az loginResult
The command opens a browser window where it authenticates the Azure CLI.
In the command line, you should see output similar to the following:
Real values are obfuscated with asterisks (*).
A web browser has been opened at https://login.microsoftonline.com/organizations/oauth2/v2.0/authorize. Please continue the login in the web browser. If no web browser is available or if the web browser fails to open, use device code flow with `az login --use-device-code`.
[
    {
        "cloudName": "AzureCloud",
        "homeTenantId": "********",
        "id": "********",
        "isDefault": true,
        "managedByTenants": [],
        "name": "Pay-As-You-Go",
        "state": "Enabled",
        "tenantId": "********",
        "user": {
        "name": "******@mostly.ai",
        "type": "user"
        }
    }
]
Task 3. Connect to the Azure AKS cluster
You can find the exact Azure CLI commands to connect to your AKS cluster from the cluster web page.
Steps
- From the AKS cluster page, click Connect to cluster.
- Copy and run the commands to connect to your cluster.
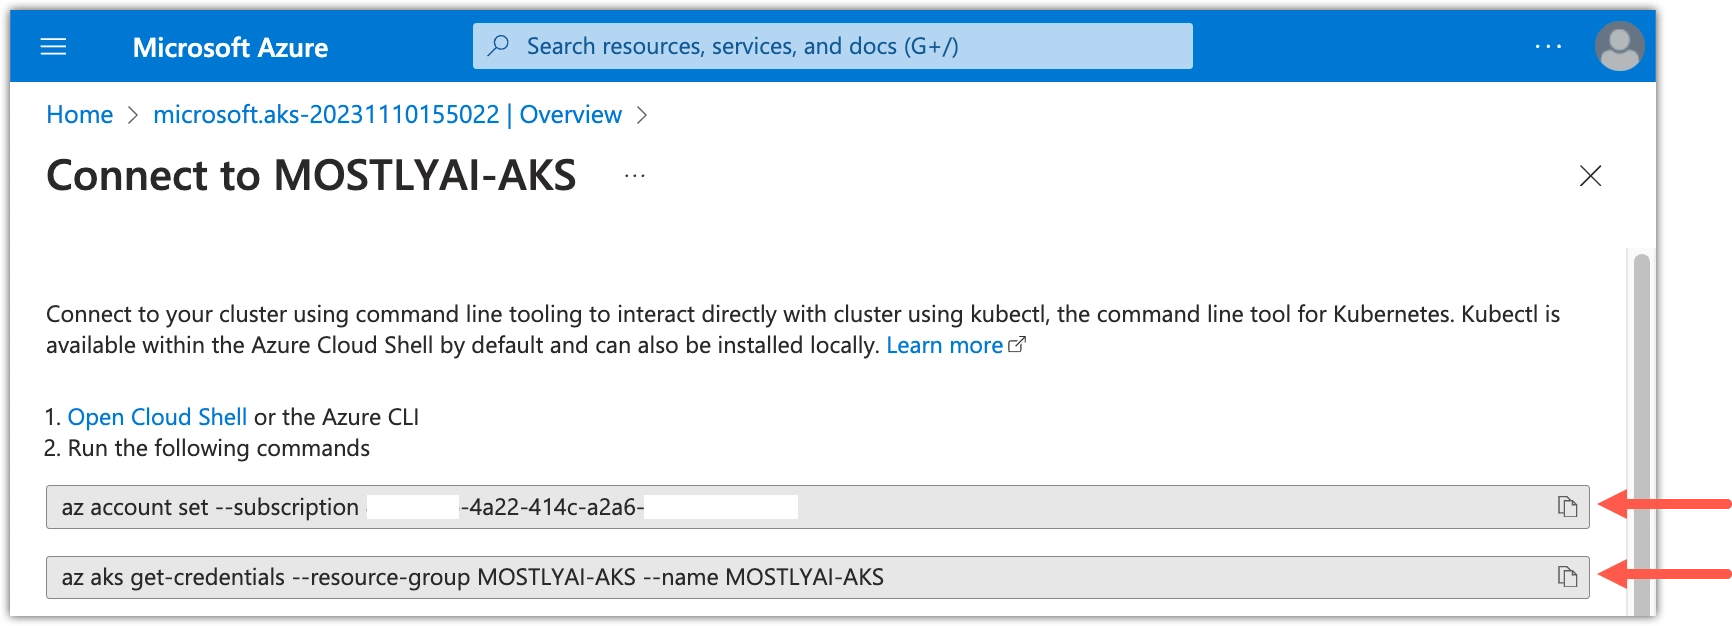
- Use the Azure CLI to set the account subscription.
💡Real values are obfuscated with asterisks (
*).bash copy az account set --subscription ********-4a22-414c-a2a6-************2. Set the credentials to register your AKS cluster as the current CLI context.bash copy az aks get-credentials --resource-group MOSTLYAI-AKS --name MOSTLYAI-AKSYou should see output similar to the following:cli Merged "MOSTLYAI-AKS" as current context in /Users/mostlyzach/.kube/config
- Use the Azure CLI to set the account subscription.
- (Optional) Check the cluster name of your current CLI context.
Depending on the cluster name you defined (in our case
kubectl config view --minify -o jsonpath='{.clusters[].name}'MOSTLYAI-AKS), you should see output similar to the following:MOSTLYAI-AKS%
Result
Your CLI is now set up to use the new Azure AKS cluster as the default K8S context. You can now run kubectl and helm command against this context.
Task 4: Configure an ingress controller
MOSTLY AI supports HAProxy by default as the ingress controller. NGINX and Istio virtual services are also supported.
For details on how to configure each, see Ingress controllers.
Deployment
When you are ready with the pre-deployment tasks, you can configure your deployment in the values.yaml file and use the helm command to start the deployment process.
- Task 5. Configure MOSLTY AI Helm chart
- Task 6. Add taints to the worker nodes pool
- Task 7. Deploy MOSTLY AI
Task 5. Configure MOSTLY AI Helm chart
The MOSTLY AI Helm chart defines default configurations for your MOSTLY AI Kubernetes deployment. Before you can deploy, you need to configure some of the default values to match your cluster configuration.
As mentioned in the Prerequisites, you need to obtain the MOSTLY AI Helm chart from your Customer Experience Engineer.
Steps
- Open the
values.yamlfile in a text editor. - At the start, set the application domain name to an FQDN.
💡
miniois the shared storage service.values.yaml_customerInstallation: domainNames: mostly-ai: &fqdn yourfqdn.com ``` - (Optional) Apply one of the configurations below depending on whether you intend to use TLS-encrypted access to the MOSTLY AI application.
➡️ You use an TLS certificate. Replaceyour-tls-secretwith the TLS secret name as defined in your cluster configuration.💡Your IT department or Kubernetes administrator creates the FQDN and its TLS certificate and adds it to the configuration of your cluster. When added, it comes with a TLS secret name that you can define in thevalues.yamlfile. For details, see Configure your domain TLS certificate.values.yaml_customerInstallation: ... deploymentSettings: tlsSecretName: &tlsSecretName your-tls-secret ... ``` **➡️ You do not use an TLS certificate**. Replace the `your-tls-secret` with an empty string and, for `global.tls`, set `enabled` to `false`. ```yaml filename="values.yaml" copy {(4, 9)} _customerInstallation: ... deploymentSettings: tlsSecretName: &tlsSecretName [] # your-tls-secret ... global: ... tls: enabled: false ... ``` - (Optional) If you host third-party container images in an internal repository, replace
docker.ioinregistryFor3rdPartyComponents.values.yaml_customerInstallation: ... deploymentSettings: ... registryFor3rdPartyComponents: ®istryFor3rdPartyComponents docker.io ... - (Optional) If you need to host MOSTLY AI container images in an internal repository, replace
quay.io/mostlyaiinmostlyRegistry.values.yaml_customerInstallation: ... deploymentSettings: ... mostlyRegistry: &mostlyRegistry quay.io/mostlyai ... - (Optional) If you intend to use the MOSTLY AI image repository at
quay.io/mostlyai, set its secret inmostlyRegistryDockerConfigJson.💡To obtain the secret, contact your MOSTLY AI Customer Experience Engineer.
_customerInstallation:
...
  deploymentSettings:
  ...
    mostlyRegistryDockerConfigJson: &mostlyRegistryDockerConfigJson <HARBOR_SECRET>
...
Result
Your values.yaml file is now configured with the required settings for your MOSTLY AI deployment.
Task 6. Add taints to the worker nodes pool
The MOSTLY AI worker pods can only run on nodes with the engine-jobs taint. You need to add this taint to the worker nodes pool.
Steps
- For your Azure AKS cluster, select Settings > Node pools.
- Select the
userpoolnode pool.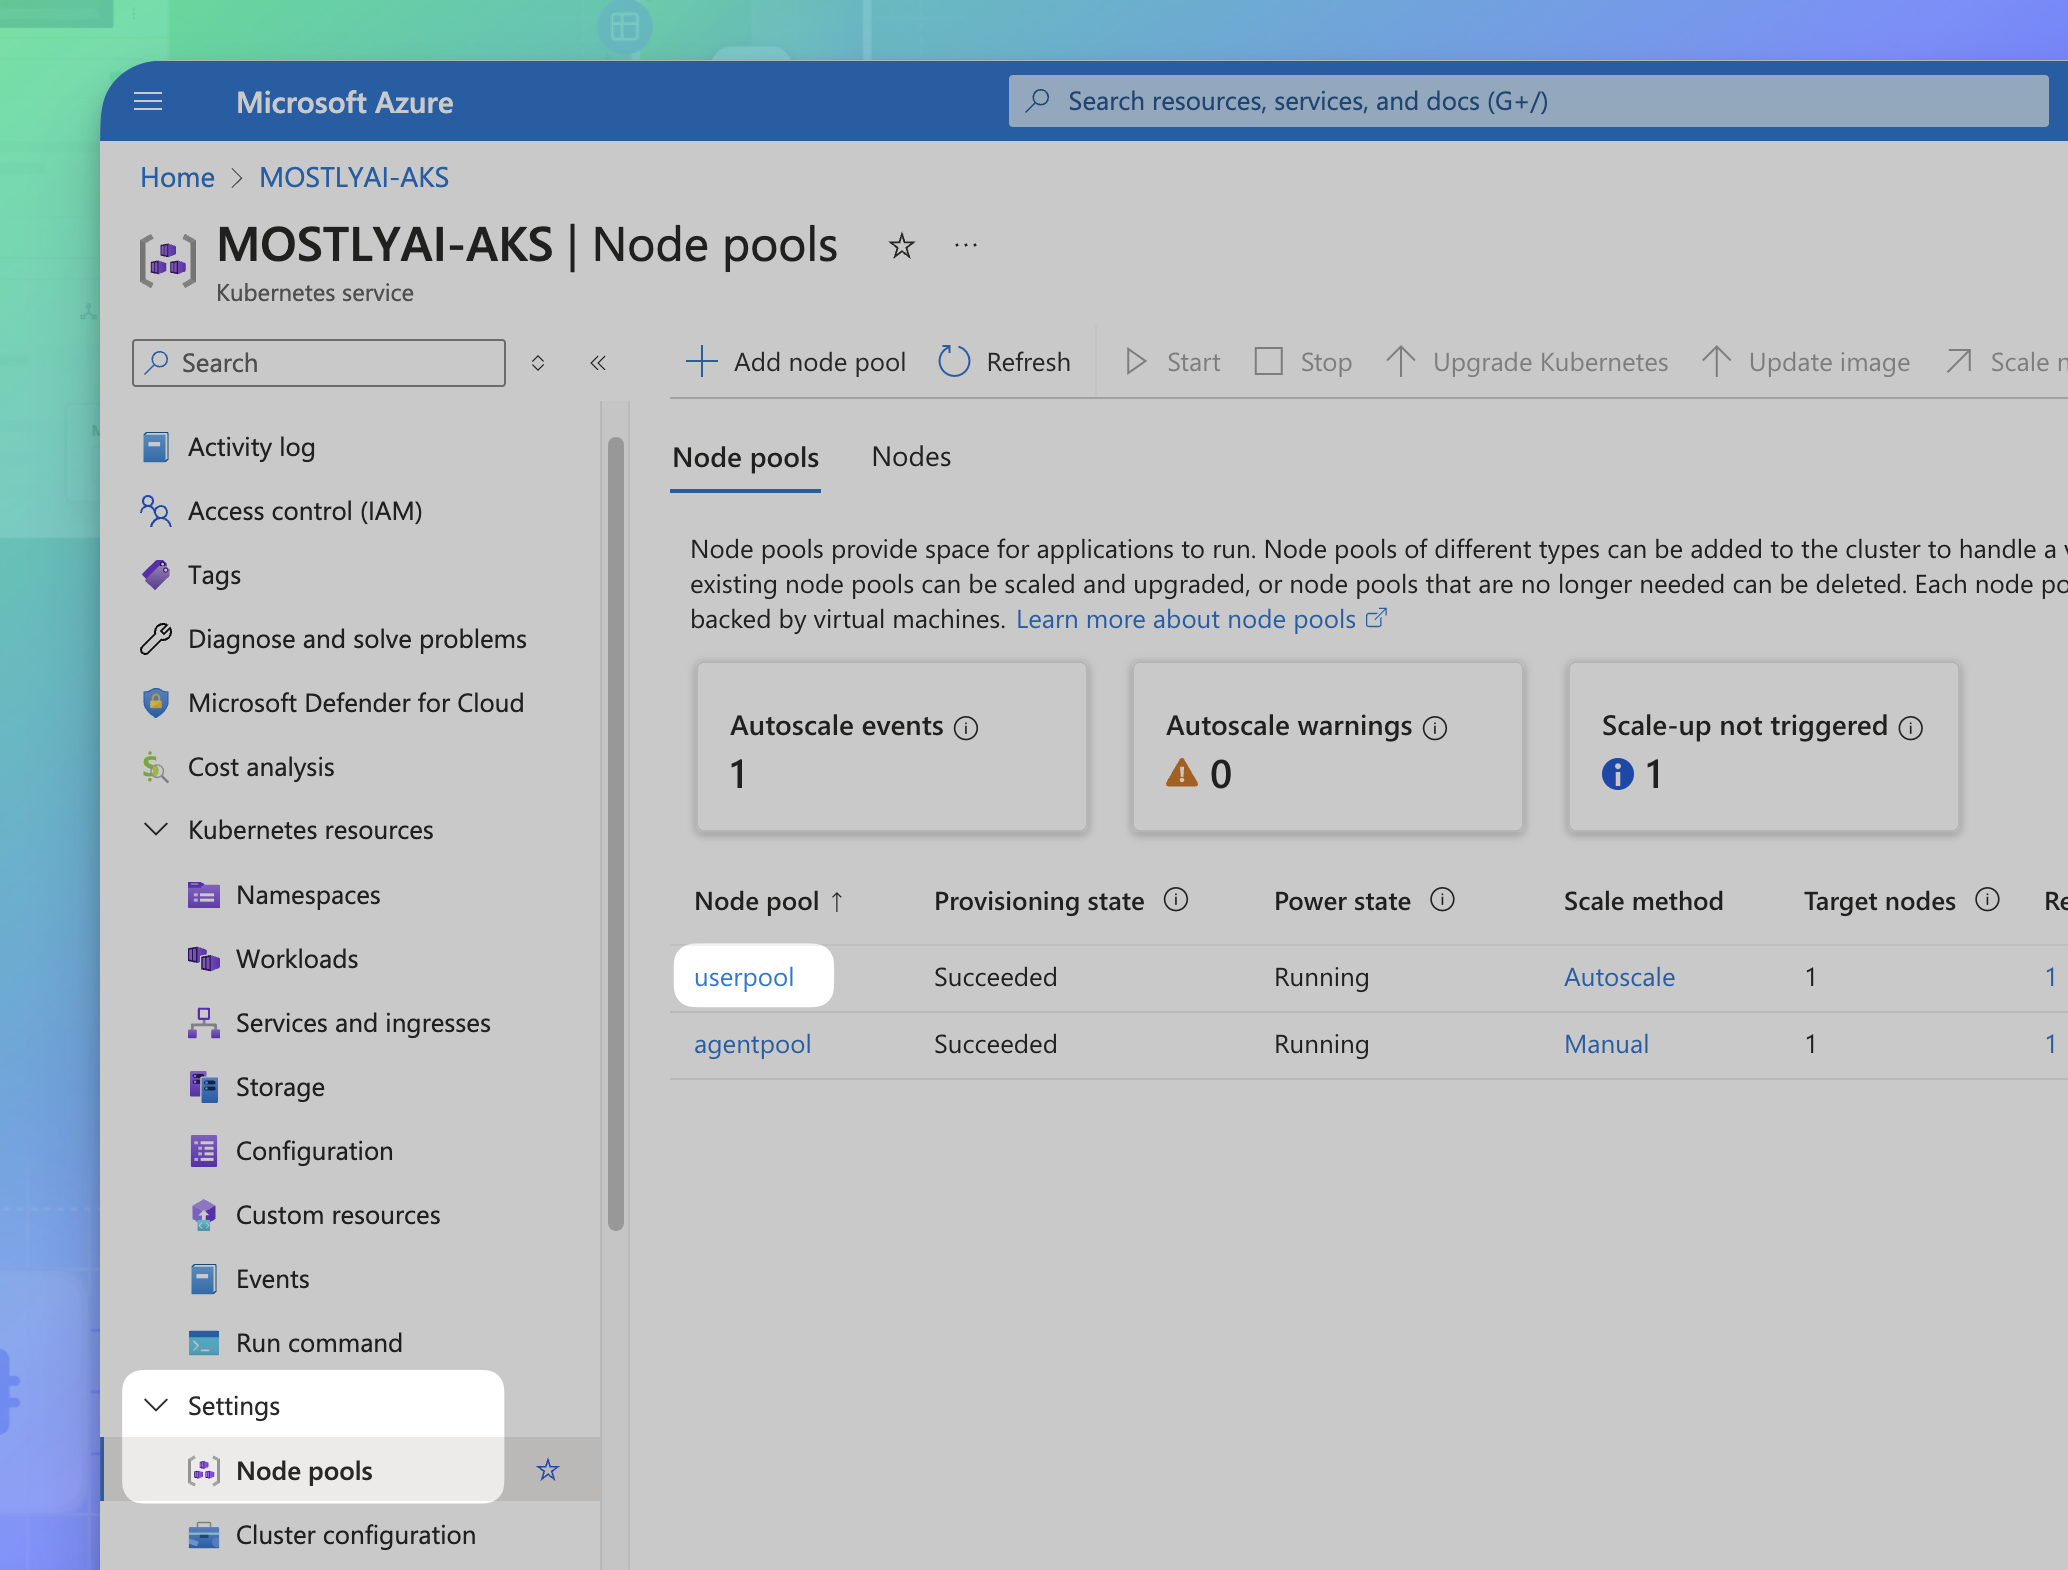
- For Taints, click edit.

- Add the
engine-jobstaint with theNoScheduleeffect.- For Key, enter
scheduling.mostly.ai/node. - For Value, enter
engine-jobs. - For Effect, select
NoSchedule. - Click Save.
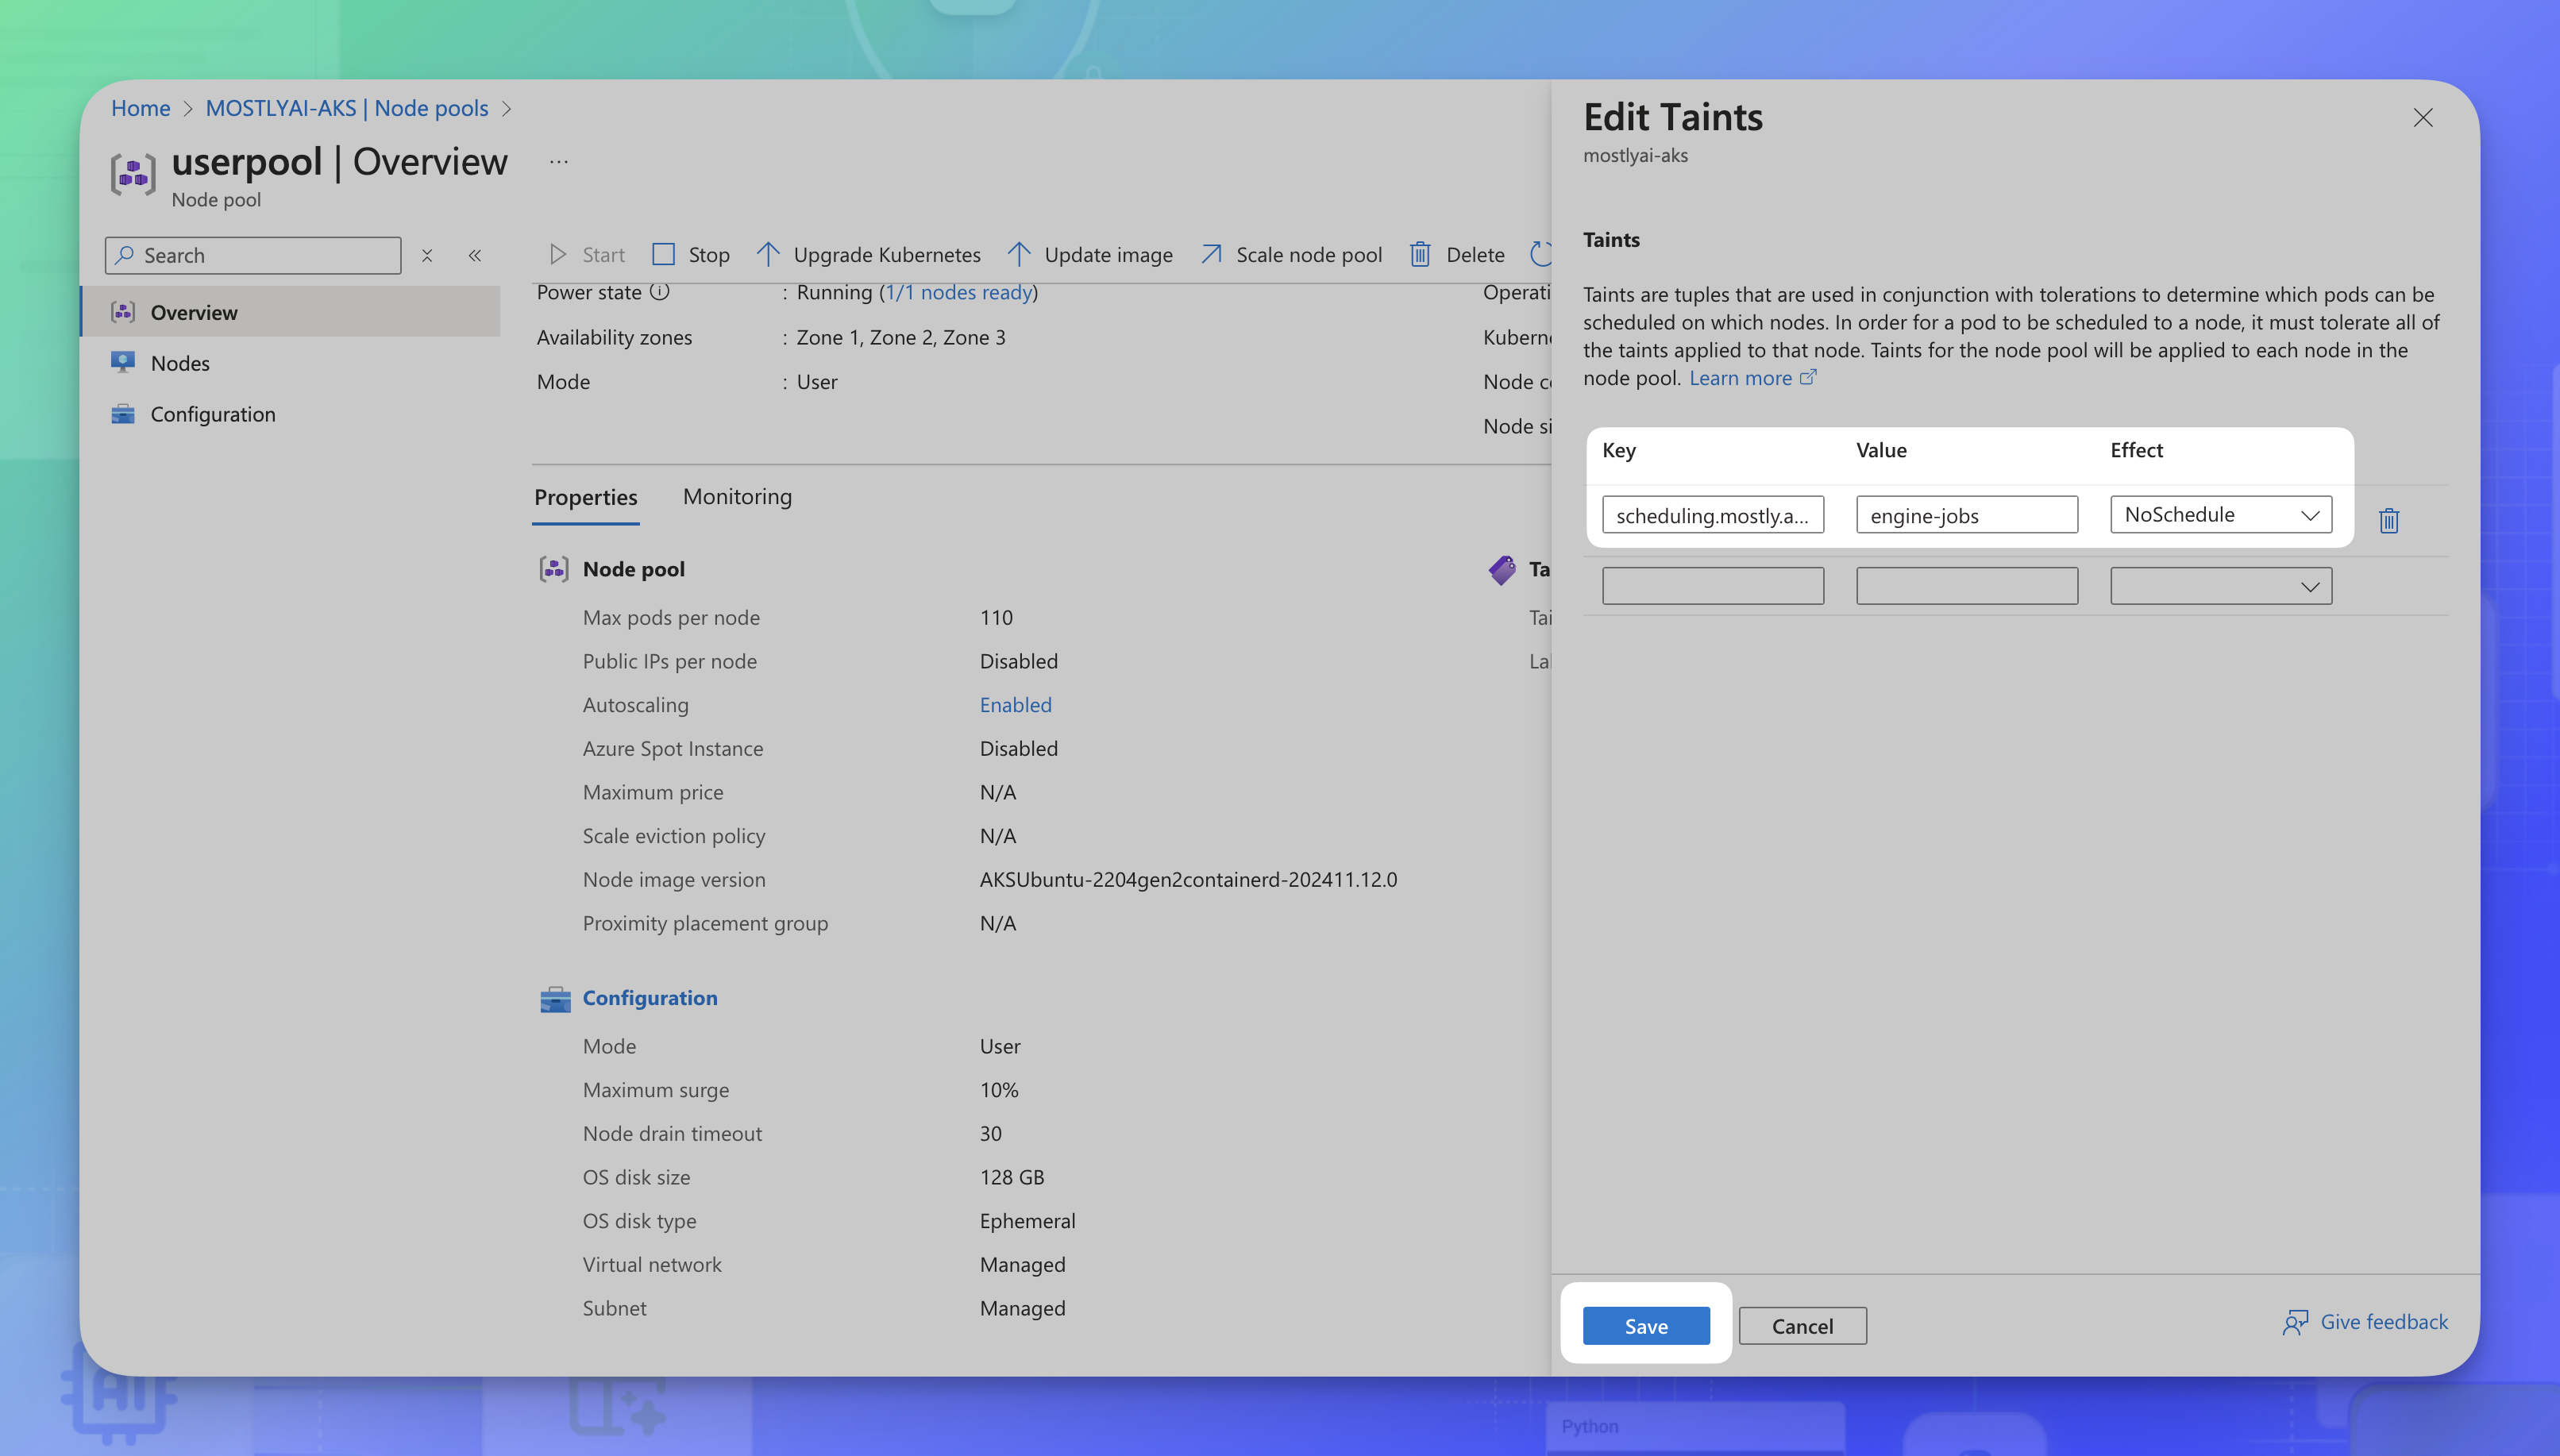
- For Key, enter
Result
The worker nodes for the generator training and synthetic dataset generation jobs will be tainted correctly with the engine-jobs taint.
Task 7. Deploy MOSTLY AI
With all required configurations made in the values.yaml and worker nodes tainted correctly, you can now create a separate namespace and deploy MOSTLY AI to it.
Steps
- Create the
mostly-ainamespace.kubectl create ns mostly-ai - Deploy the MOSTLY AI Helm chart.
The result from the command should be similar to the following. If you see errors, see the Troubleshooting section.
helm upgrade --install mostly-ai ./mostly-combined --values values.yaml --namespace mostly-aiRelease "mostly-ai" does not exist. Installing it now. NAME: mostly-ai LAST DEPLOYED: Fri Nov 10 18:45:58 2023 NAMESPACE: mostly-ai STATUS: deployed REVISION: 1 TEST SUITE: None - In Azure, go to your AKS cluster and select Workloads.
Initially, all of the MOSTLY AI pods are in progress of starting and connecting to storage and to each services. Wait for a few minutes until AKS provisions pods and all pods connect successfully to all required services.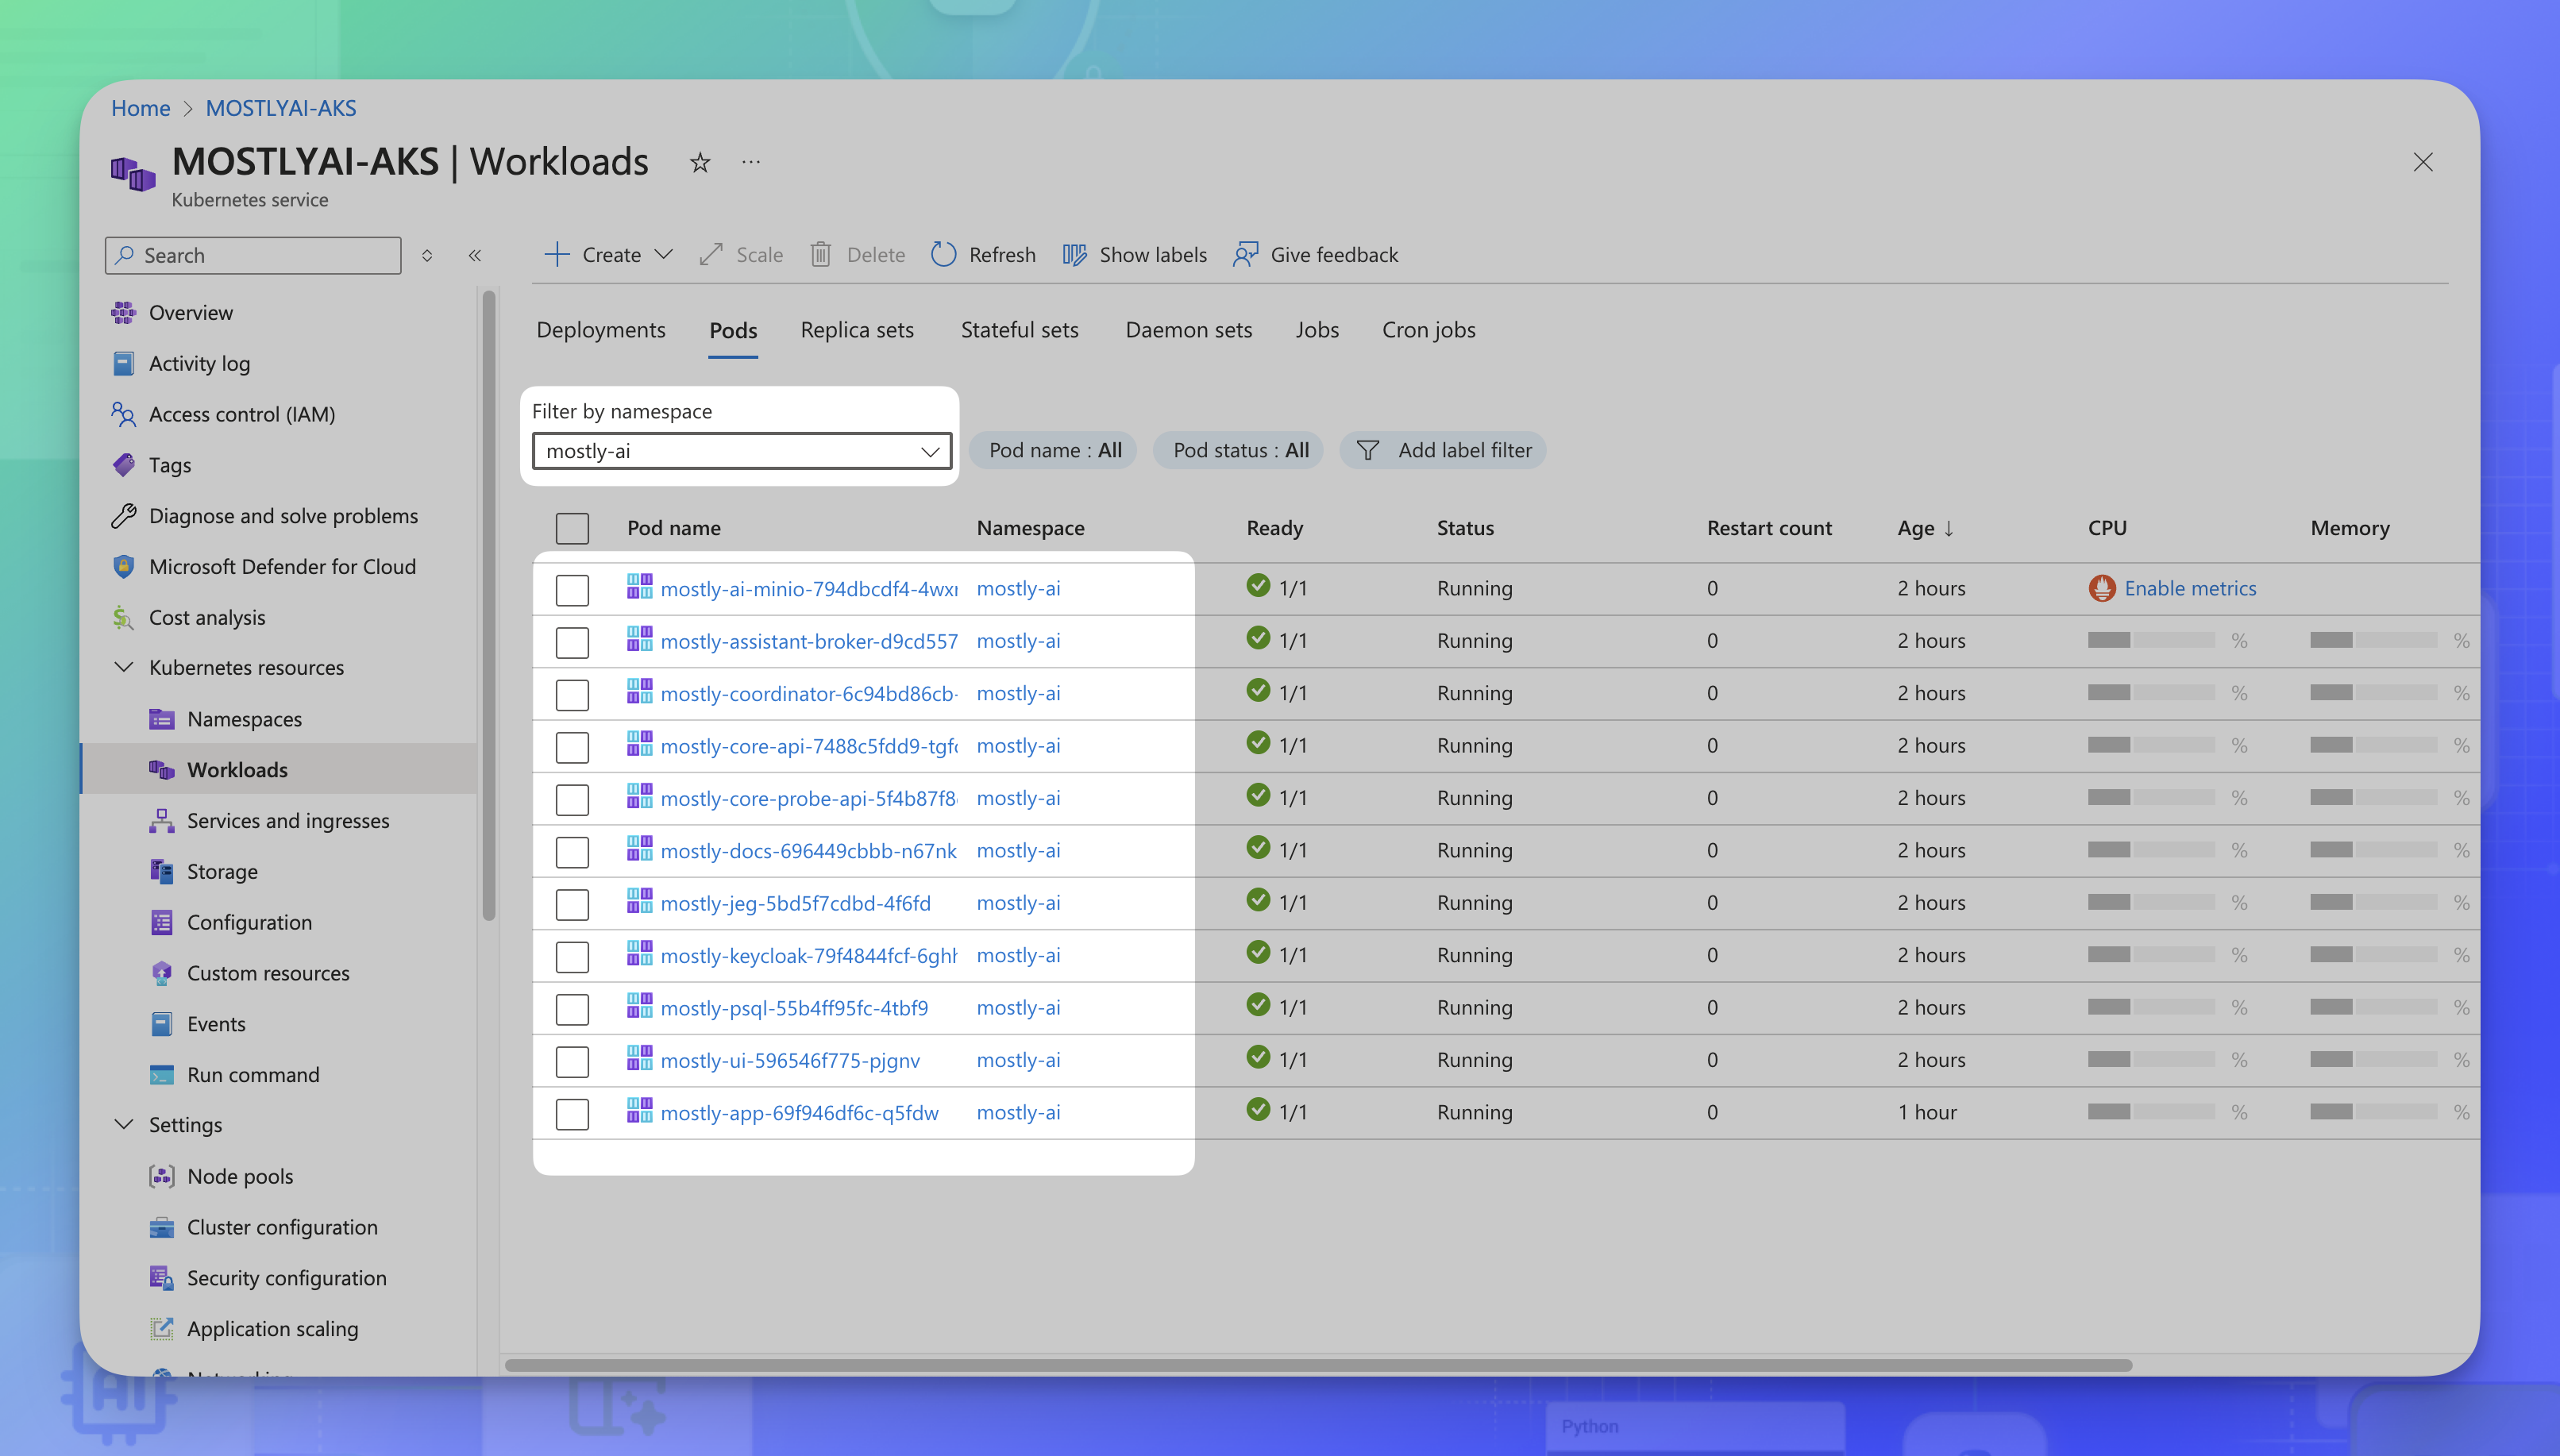
Post-deployment
With the MOSTLY AI pods running, you can now log in to your MOSTLY AI deployment for the first time.
Task 8: Log in to your MOSTLY AI deployment
Log in for the first time to your MOSTLY AI deployment to set a new password for the superadmin user.
Prerequisites
Contact MOSTLY AI to obtain the superadmin credentials. You need them to log in for the first time.
Steps
- Open your FQDN in your browser.
Step result: You Sign in page for your MOSTLY AI deployment opens.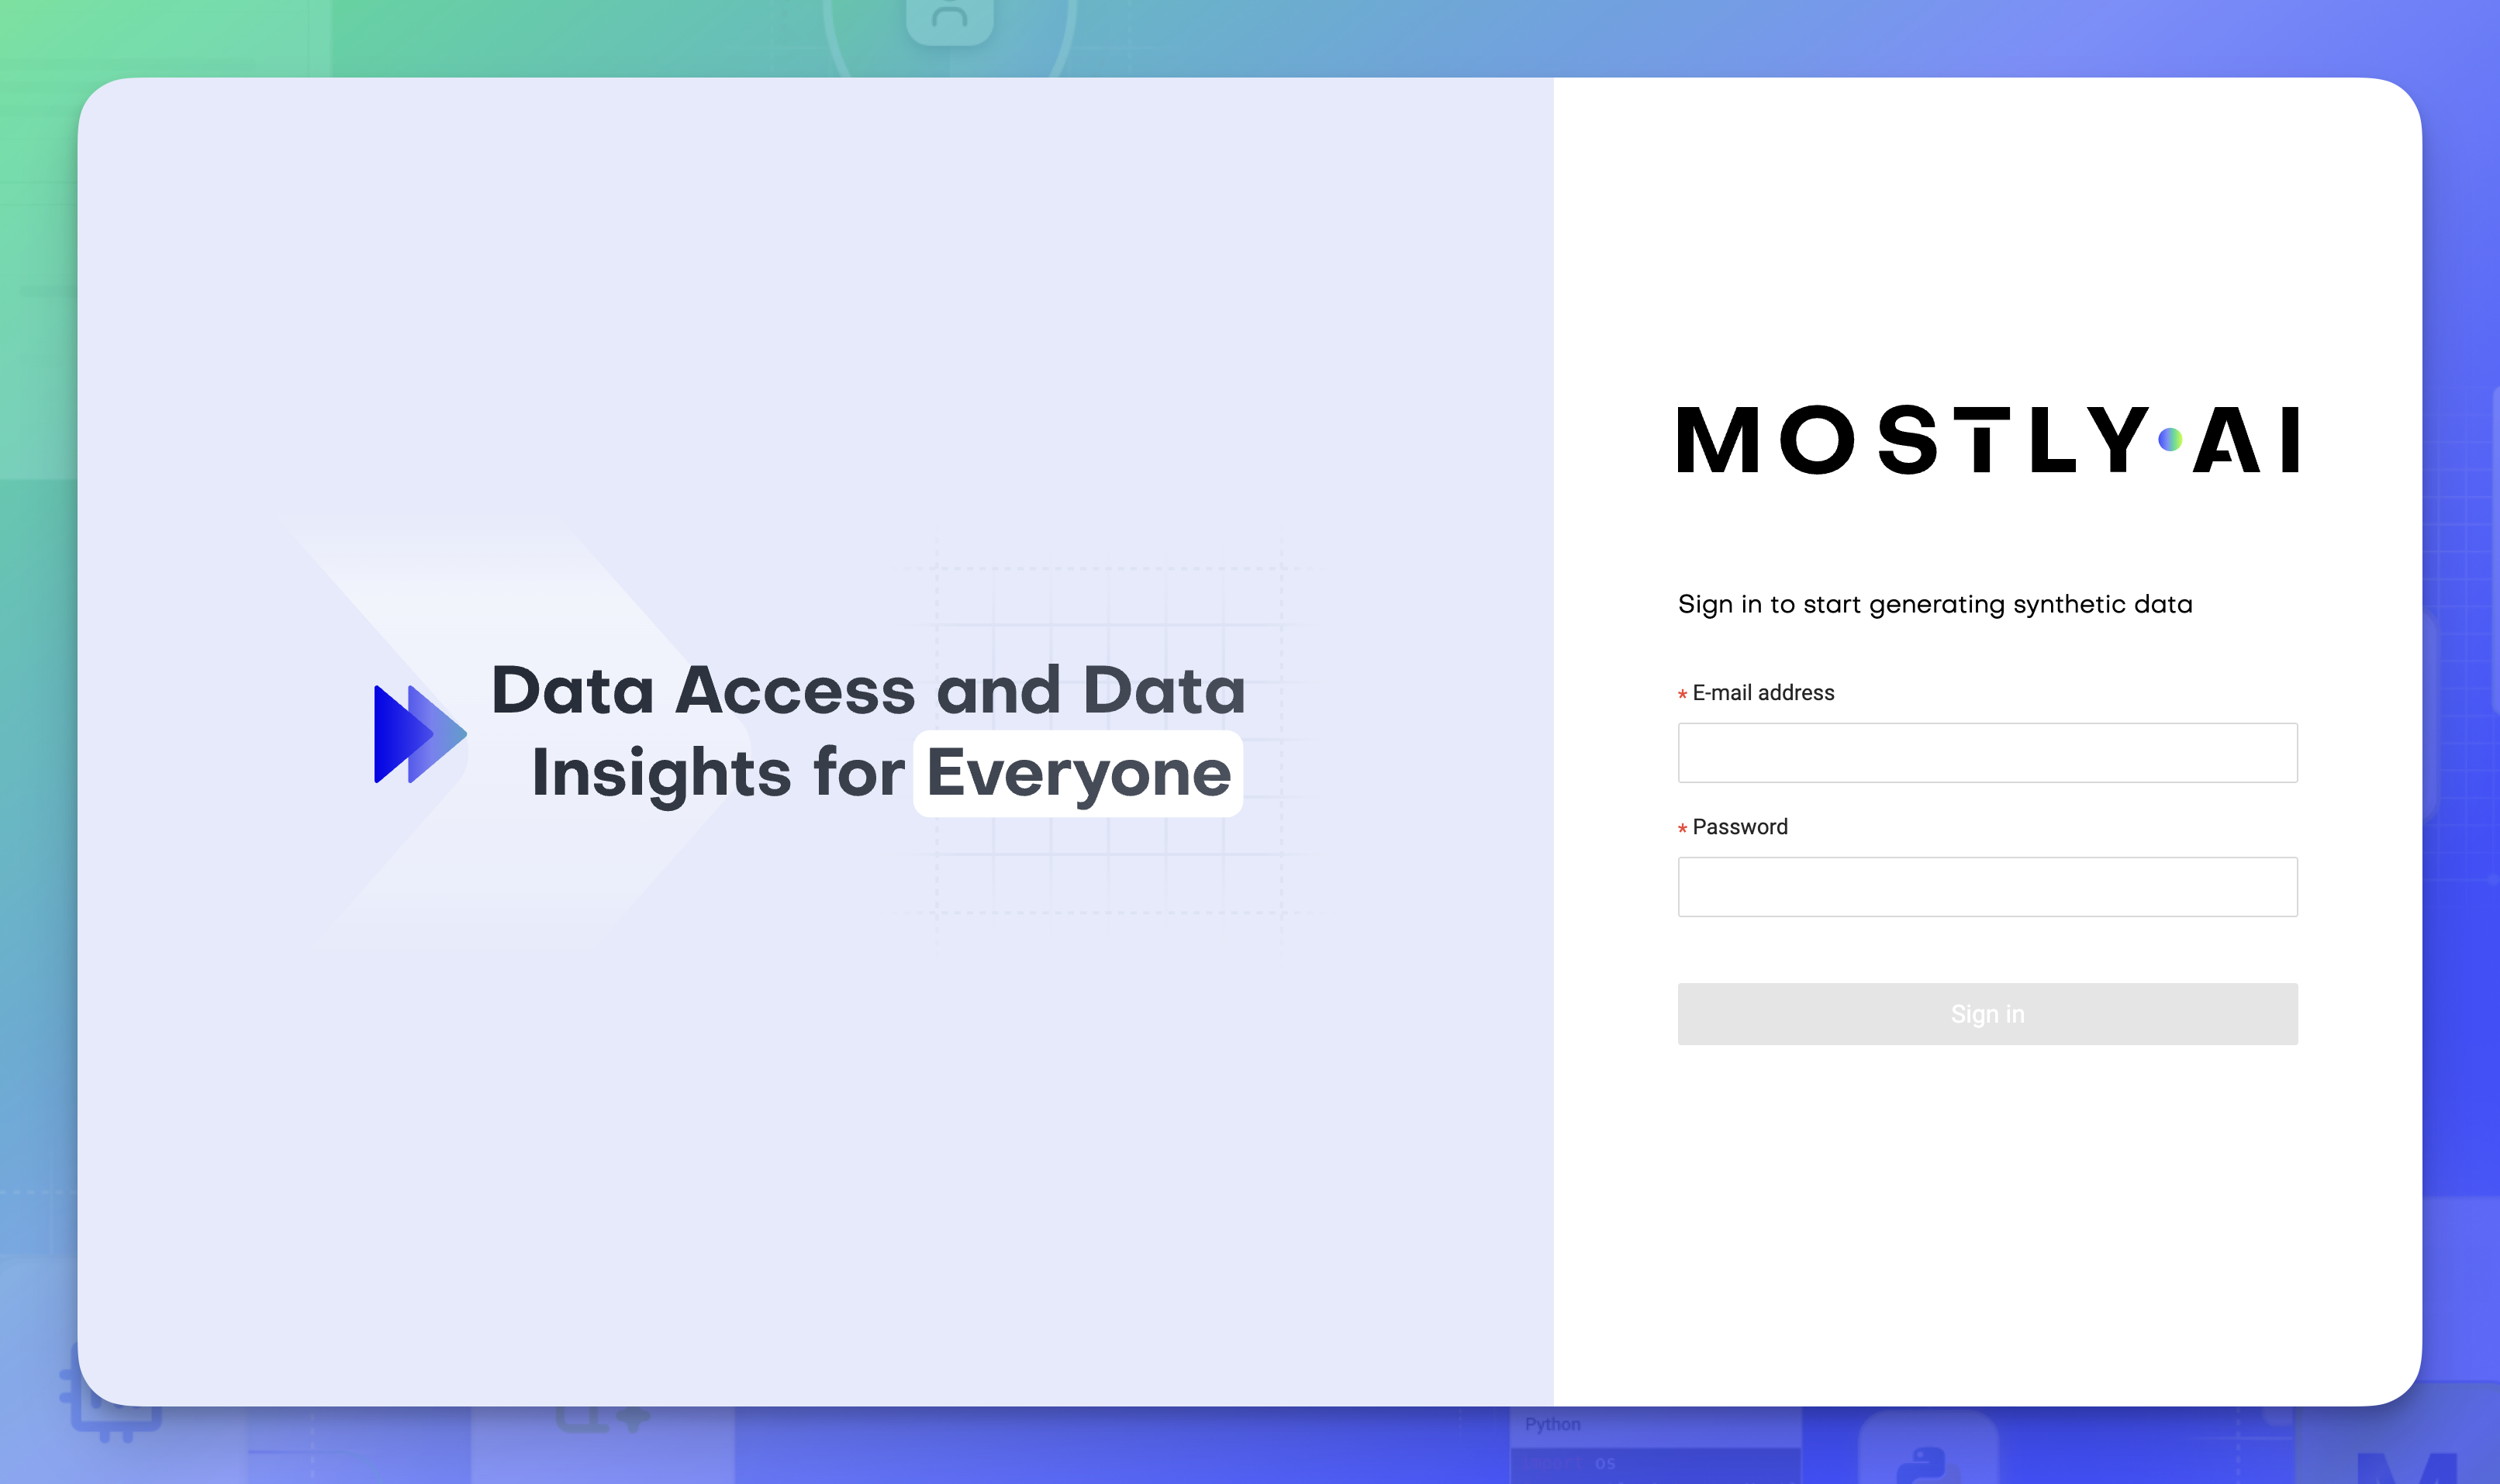
- Enter the superadmin credentials and click Sign in.
- Provide a new password and click Change password.
Result
Your superadmin password is now changed and you can use it to log in again to your MOSTLY AI deployment.
Uninstall and cleanup
To uninstall, you can delete the Kubernetes namespace that holds all MOSTLY AI pods (by default, we suggest that you name this namespace mostly-ai). To clean up, you can delete your AKS cluster afterwards.
Delete MOSTLY AI namespace
kubectl delete namespace mostly-aiDelete AKS cluster
Use the Azure CLI to delete your AKS cluster.
Steps
-
Obtain your cluster name and resource group name in Azure.

-
Delete your cluster with the following command.
az aks delete --name MyClusterName --resource-group MyResourceGroup -
Enter
yand press Enter at the prompt.Are you sure you want to perform this operation? (y/n): y