Deploy MOSTLY AI to a Google GKE cluster
Welcome to the guide on how to deploy MOSTLY AI to a Google Kubernetes Engine (GKE) cluster!
Follow the tasks and steps outlined below to configure, deploy, and run MOSTLY AI in Google Cloud.
Prerequisites
- Install gcloud CLI.
- Install kubectl.
- Install helm.
- Obtain deployment details from your Customer Experience Engineer.
- MOSTLY AI Helm chart. Optional and required only if you intend to Deploy manually with MOSTLY AI Helm chart.
- First-time log in credentials for the MOSTLY AI application. Required in Log in to your MOSTLY AI Deployment.
Pre-deployment
Before you deploy MOSTLY AI to a GKE cluster, go over the pre-deployment tasks and complete any that are not yet available when you deploy.
- Task 1: Create a GCP project
- Task 2: Create a GKE cluster
- Task 3: Connect to the GKE cluster from your CLI
- Task 4: Configure an ingress controler
Task 1. Create a GCP project
To create a GKE cluster, you need a project in Google Cloud Platform. The project is the logical container for your GKE cluster. Your Google Cloud Platform monthly billing is accumulated based on the usage of services in a project.
As a best practice, create a dedicated project for MOSTLY AI.
Steps
- Open the Google Cloud Console.
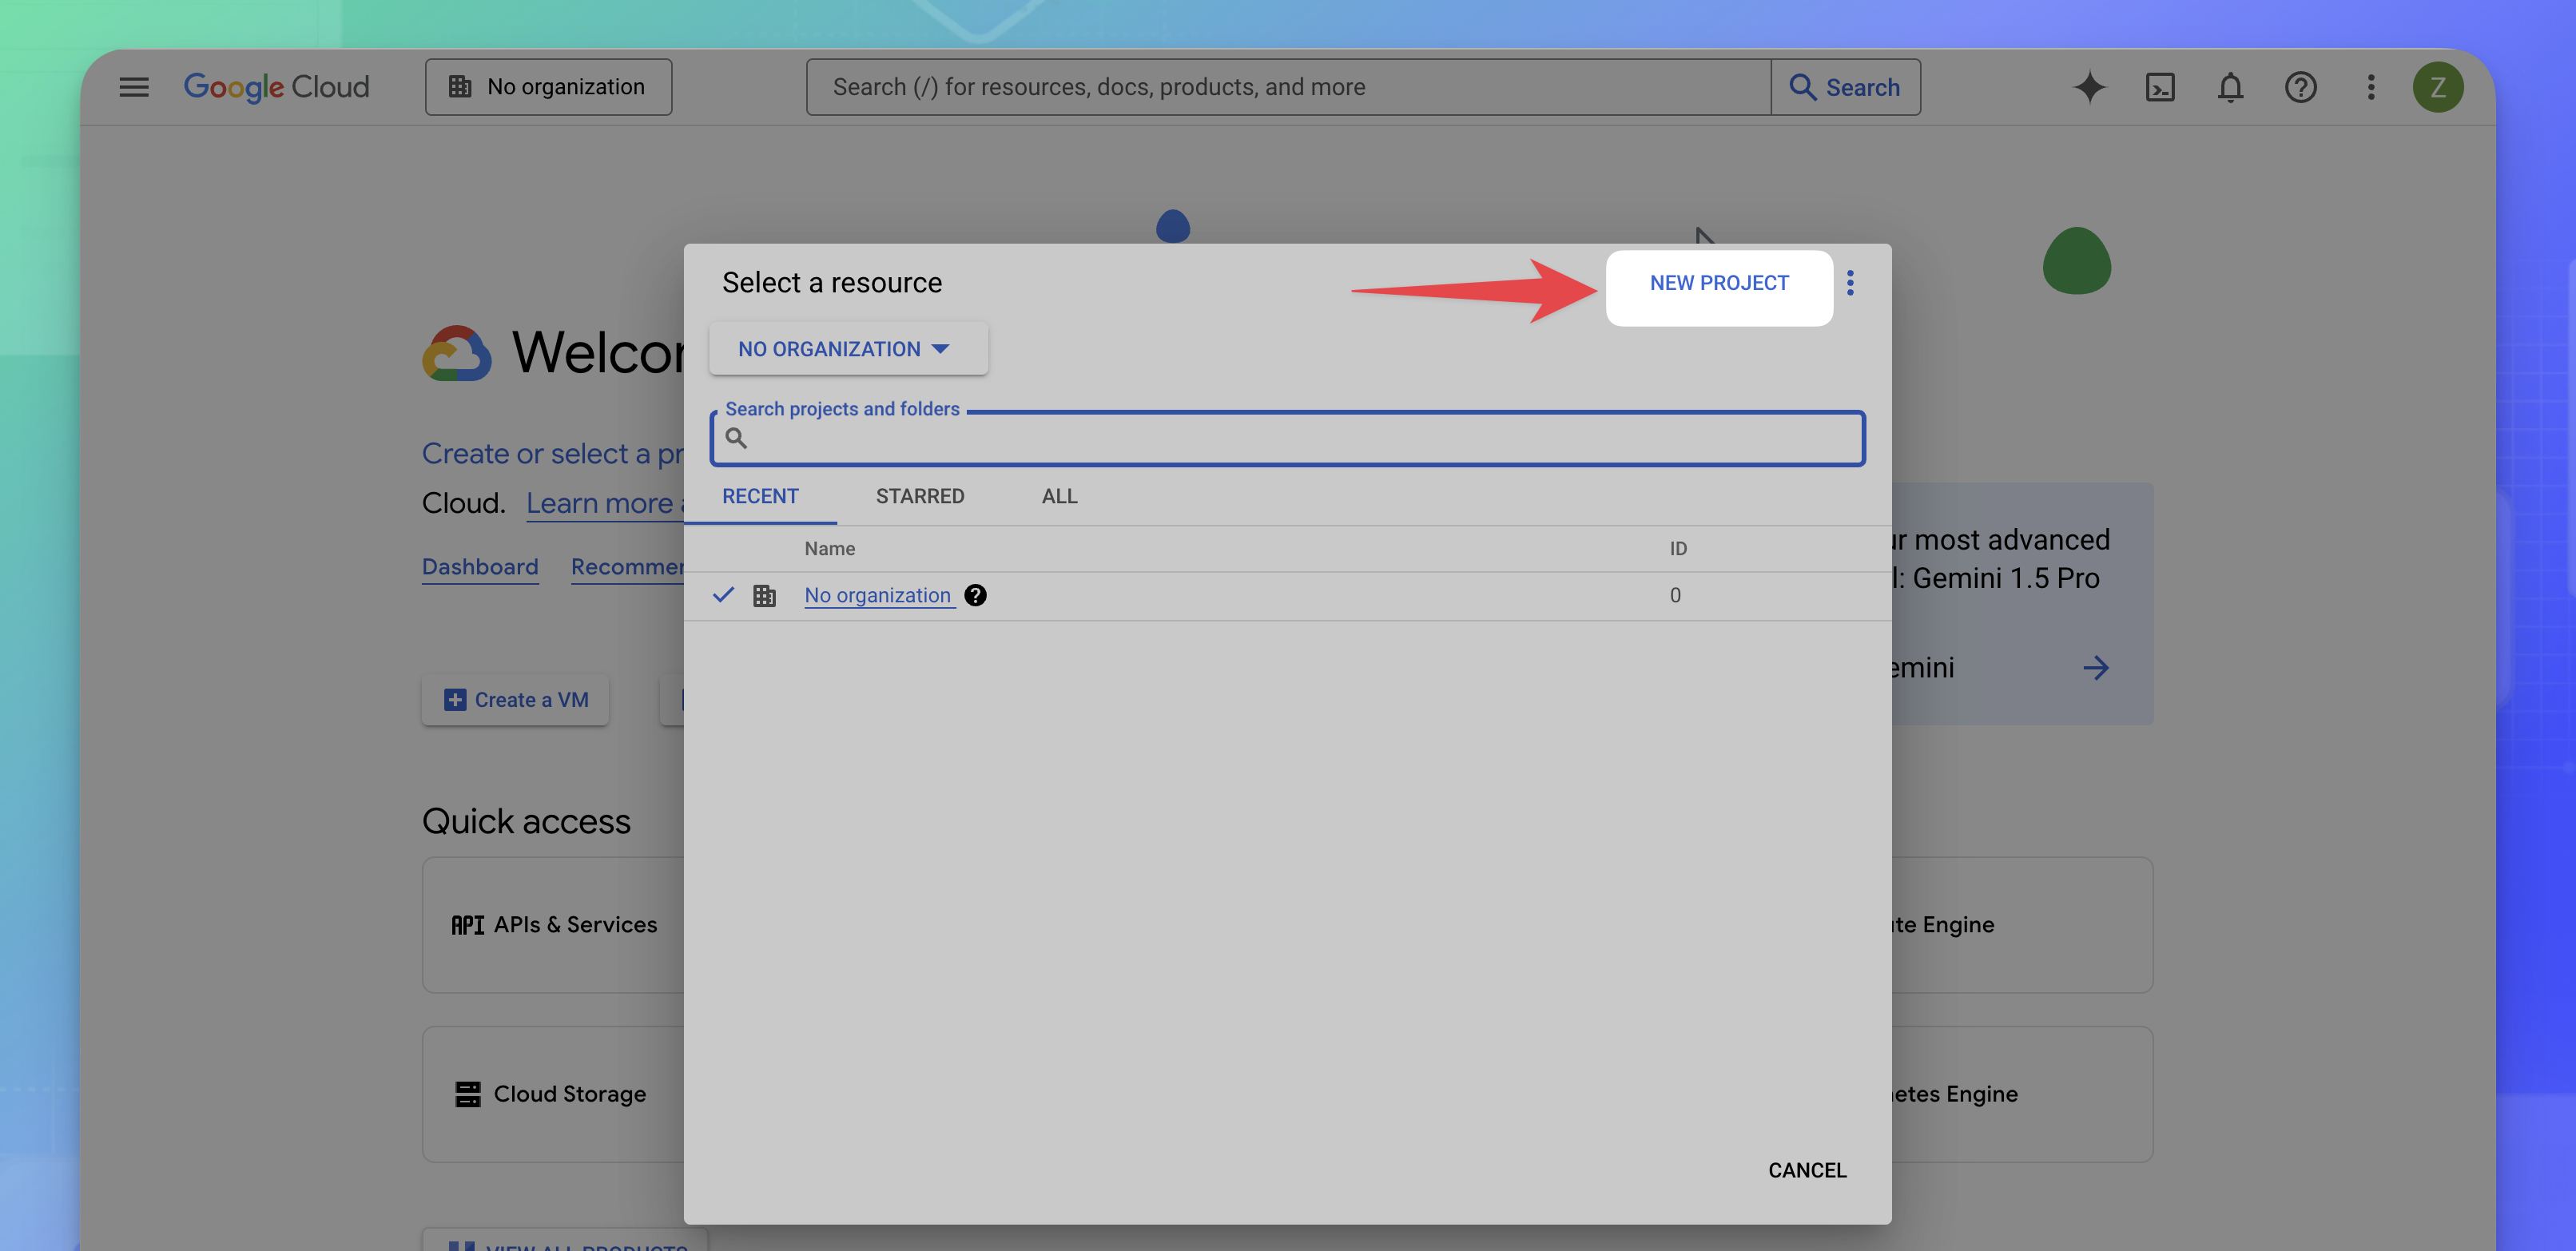
- Click the project menu at the top.
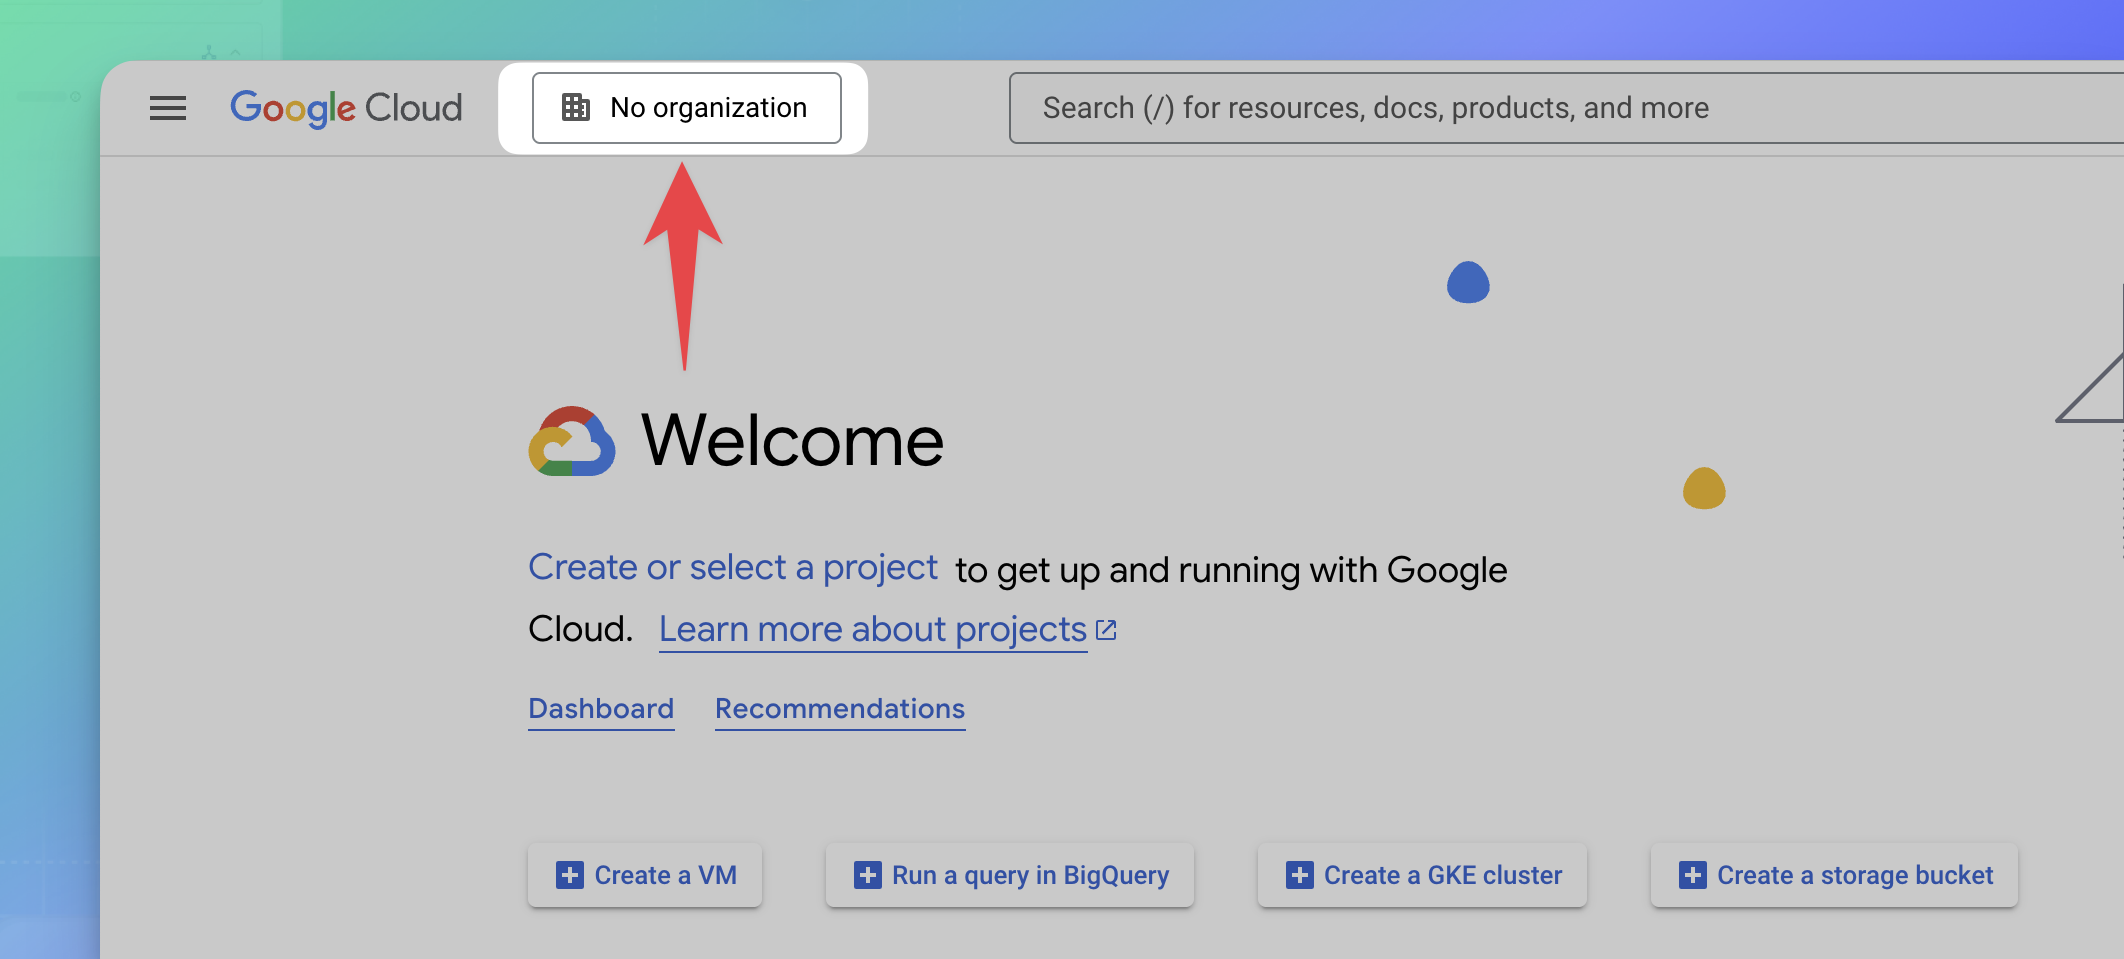
- Click NEW PROJECT.
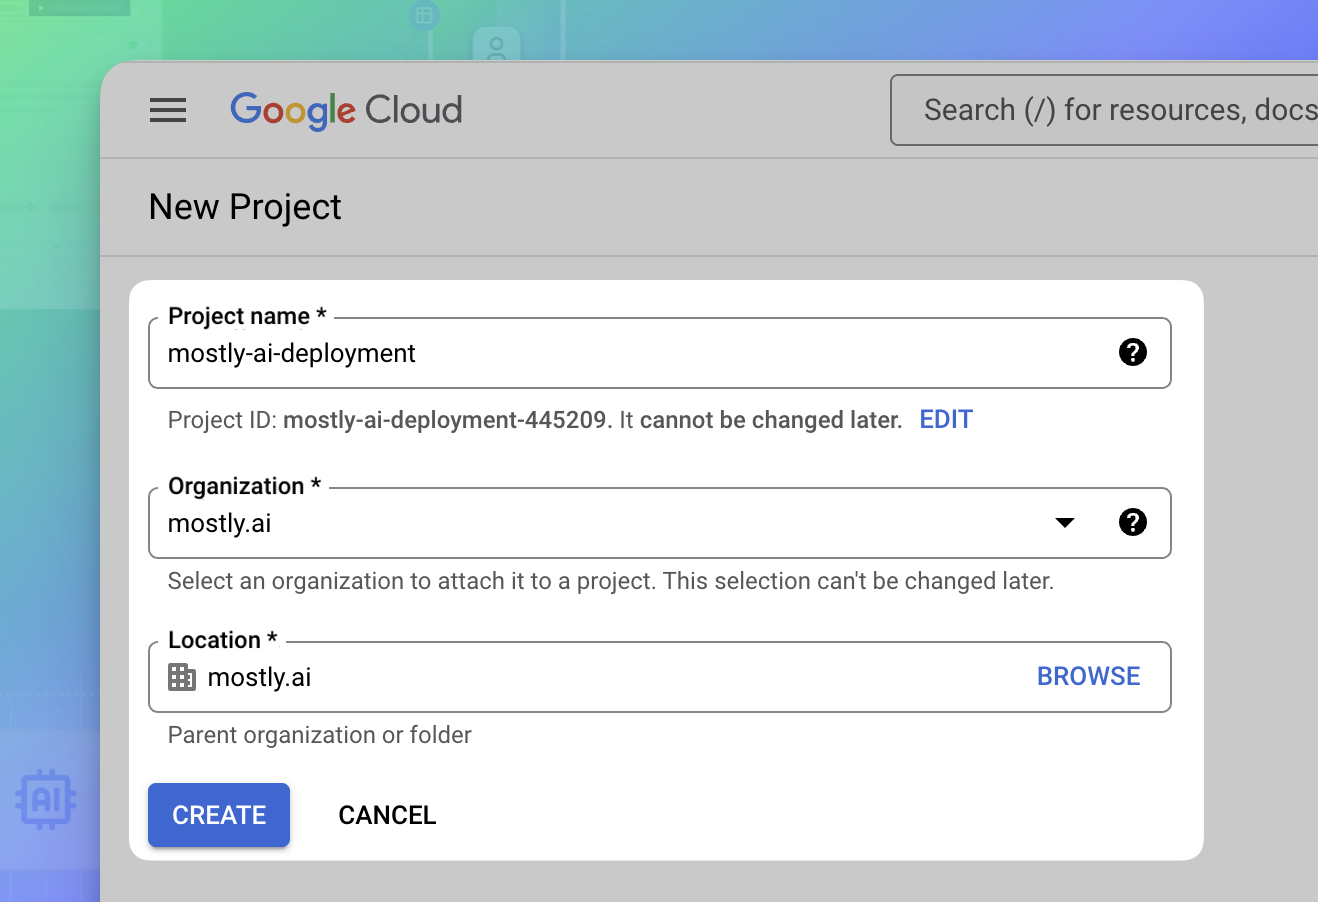
- On the New Project page, configure the new project.
- For Project name, enter a name for the project.
- For Organization, select your organization or select to use another billing account.
- For Location, select again your organization or click BROWSE to select another.
- Click CREATE.
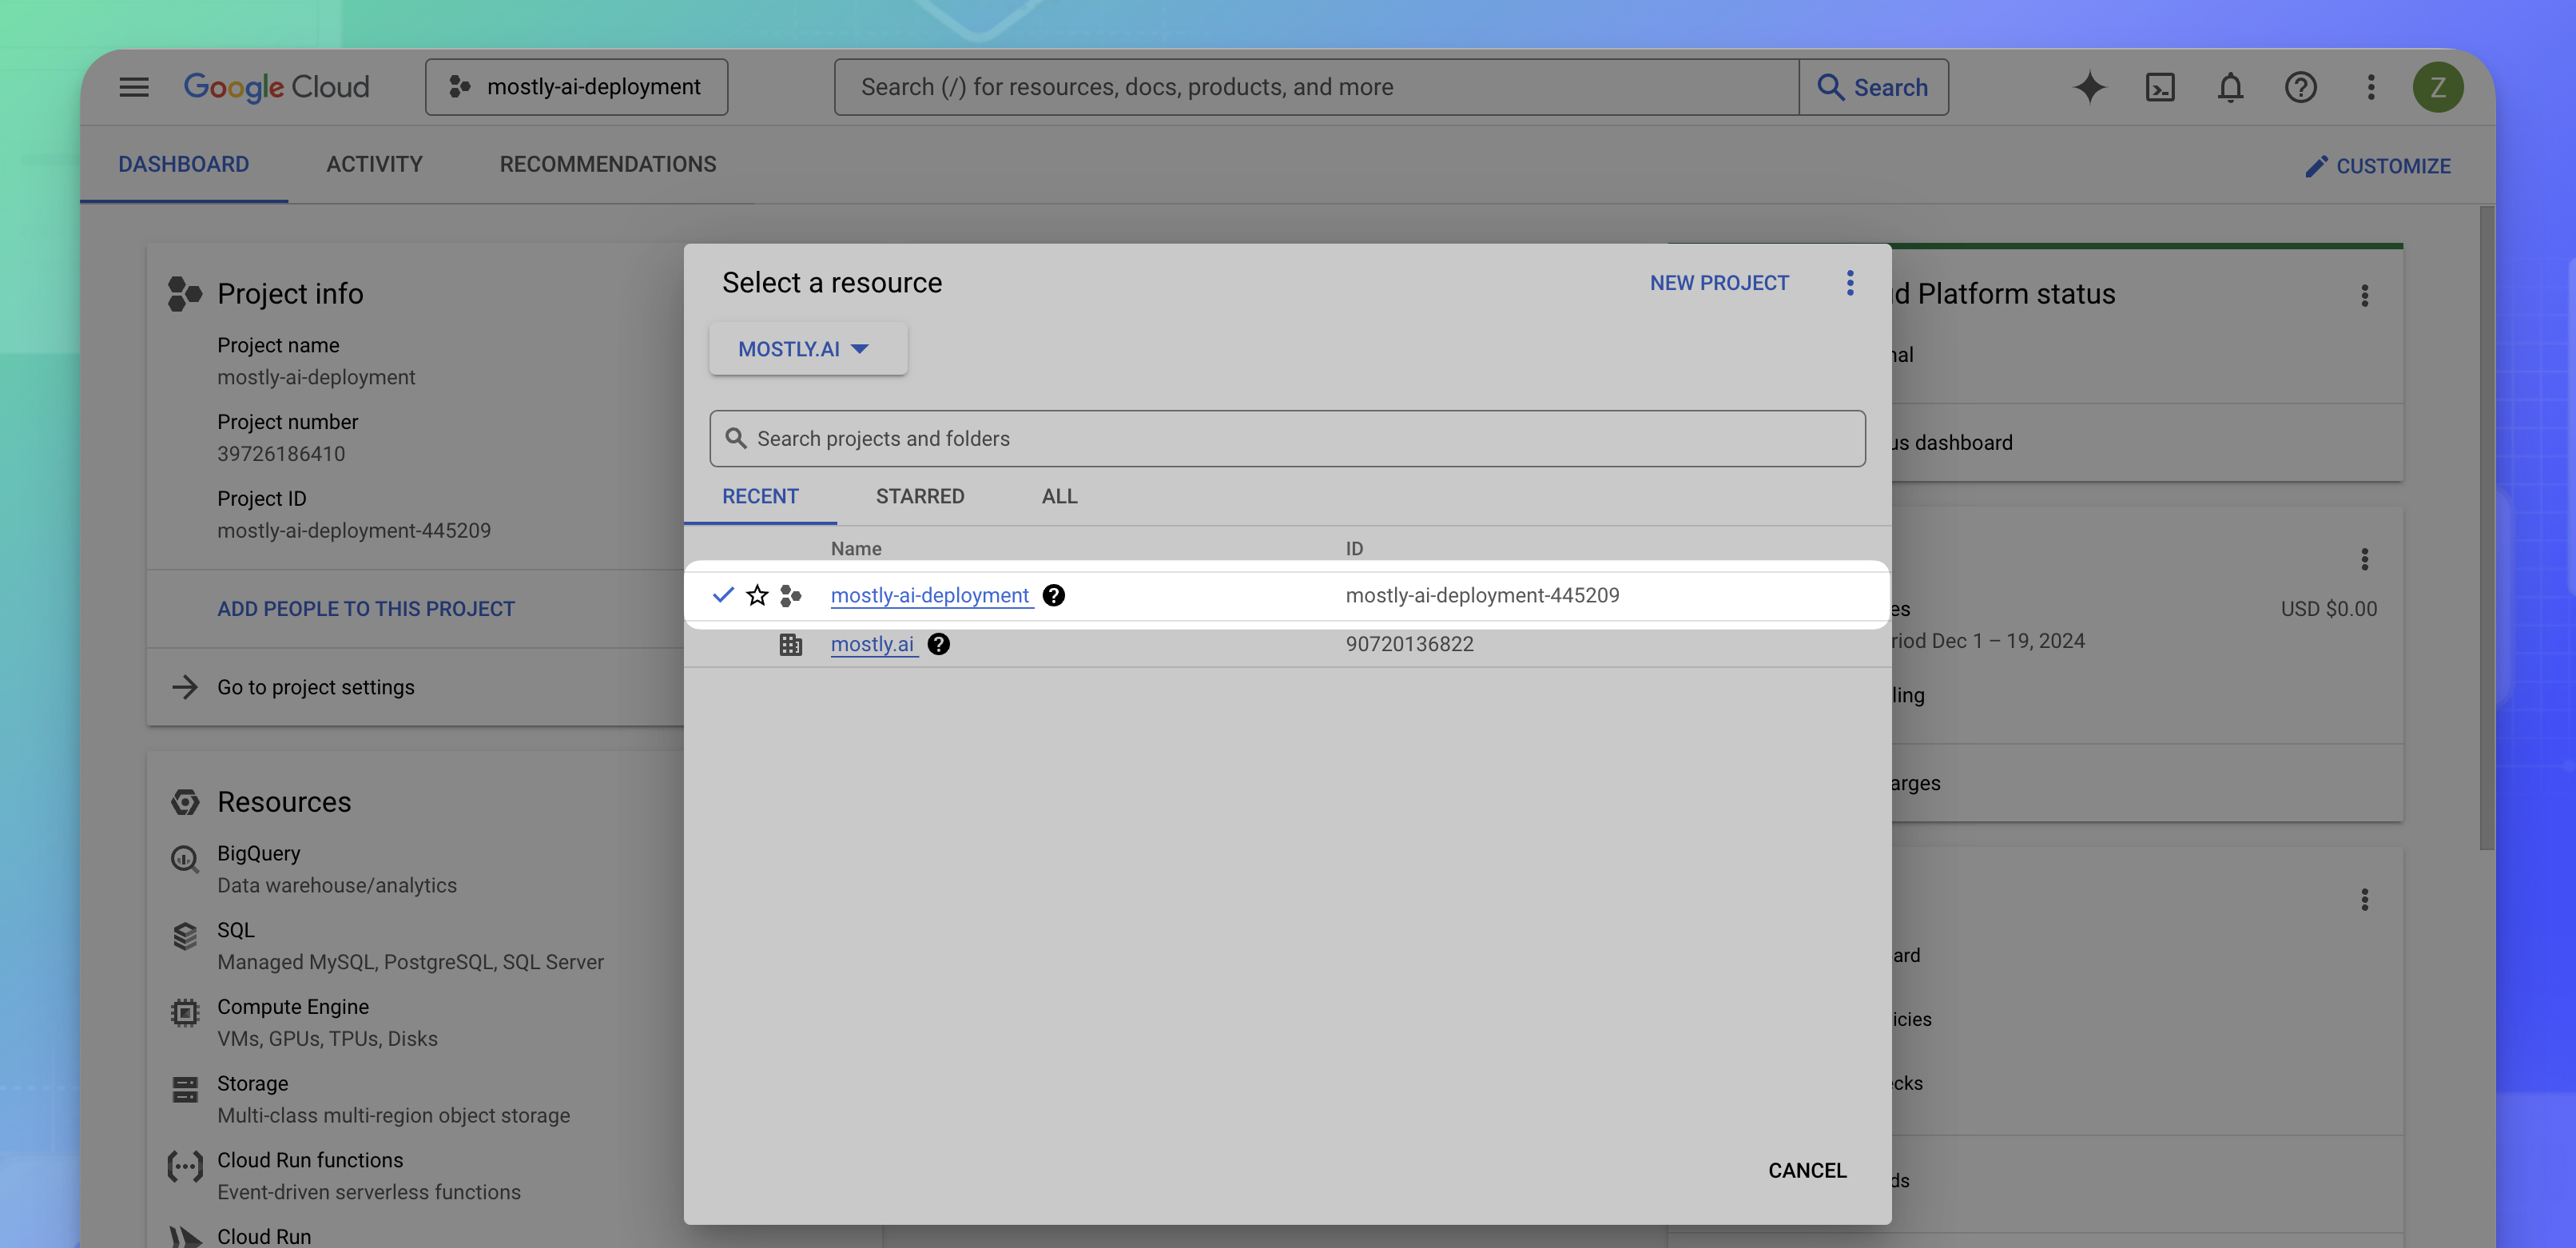
- Select the newly created project to work with.
Result
You can now create a GKE cluster dedicated to the MOSTLY AI application in the project.
Task 2. Create a GKE cluster
The GKE cluster is the container for your MOSTLY AI application. When you create the cluster, you define the number of nodes in the cluster and the type of nodes in the cluster. The type of nodes defines the compute resources that your cluster will have.
Steps
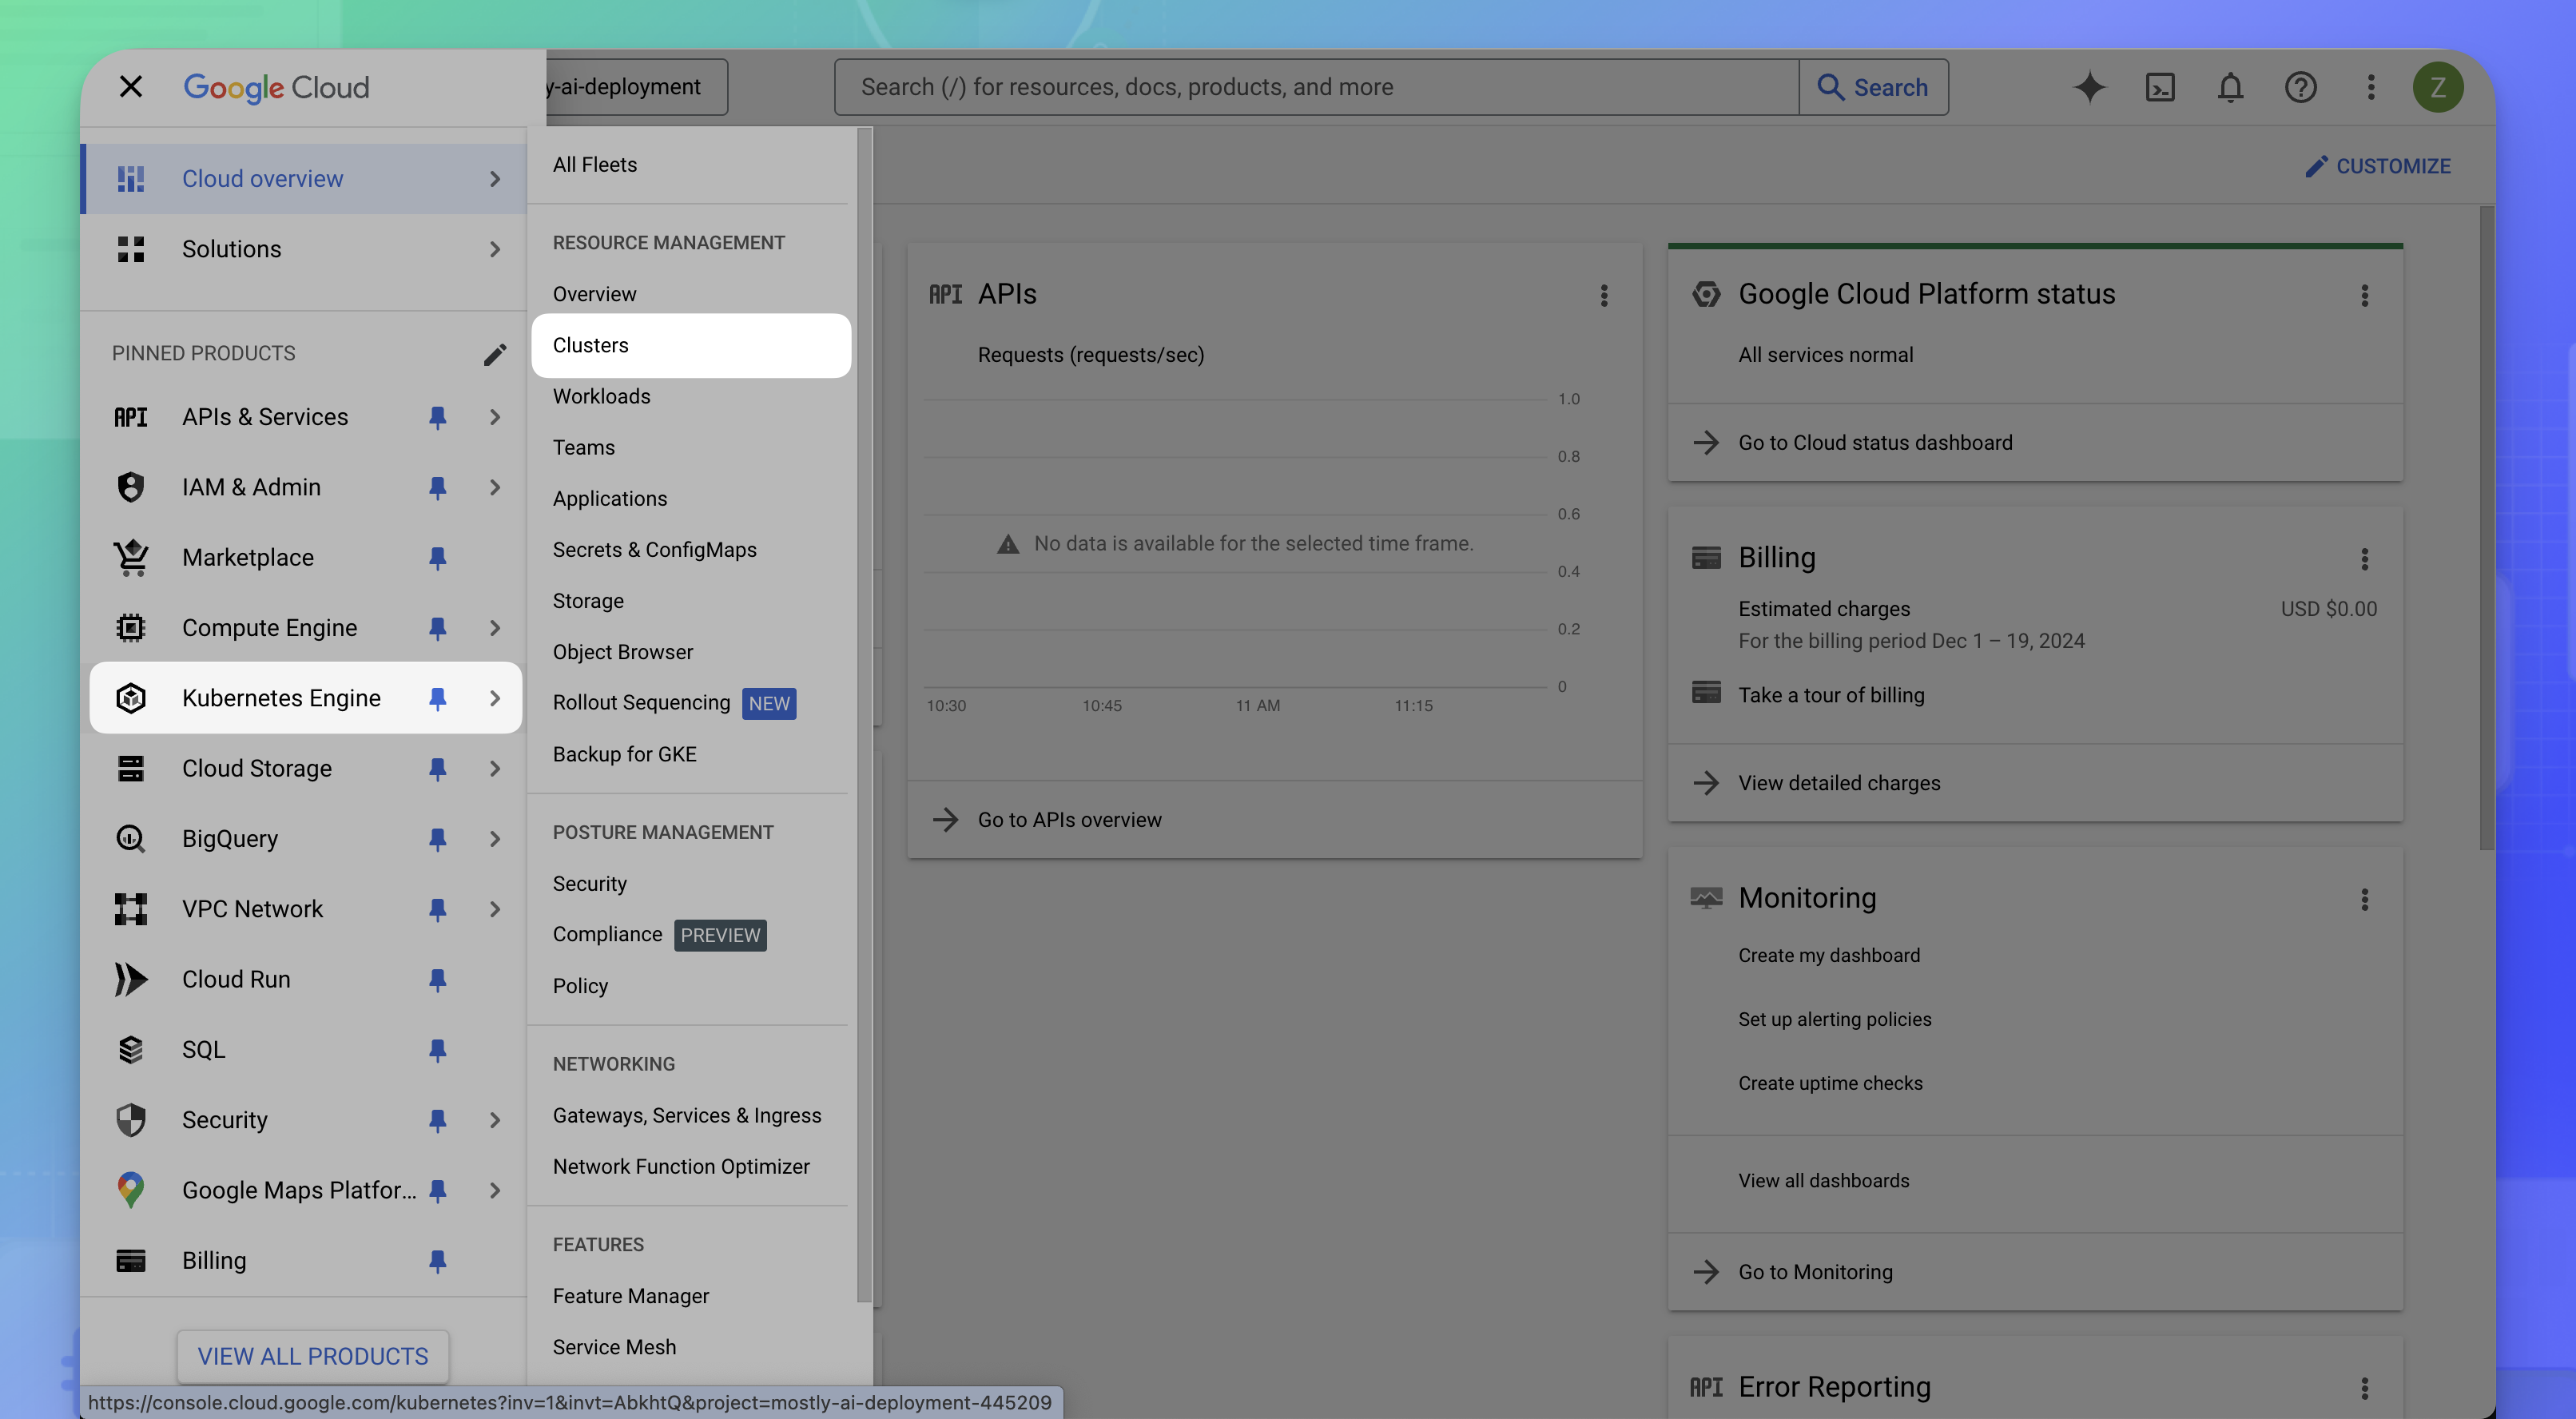
- From the Google Cloud Console, select Kubernetes Engine from the sidebar.
- If not already enabled, click ENABLE to enable the Kubernetes Engine API.

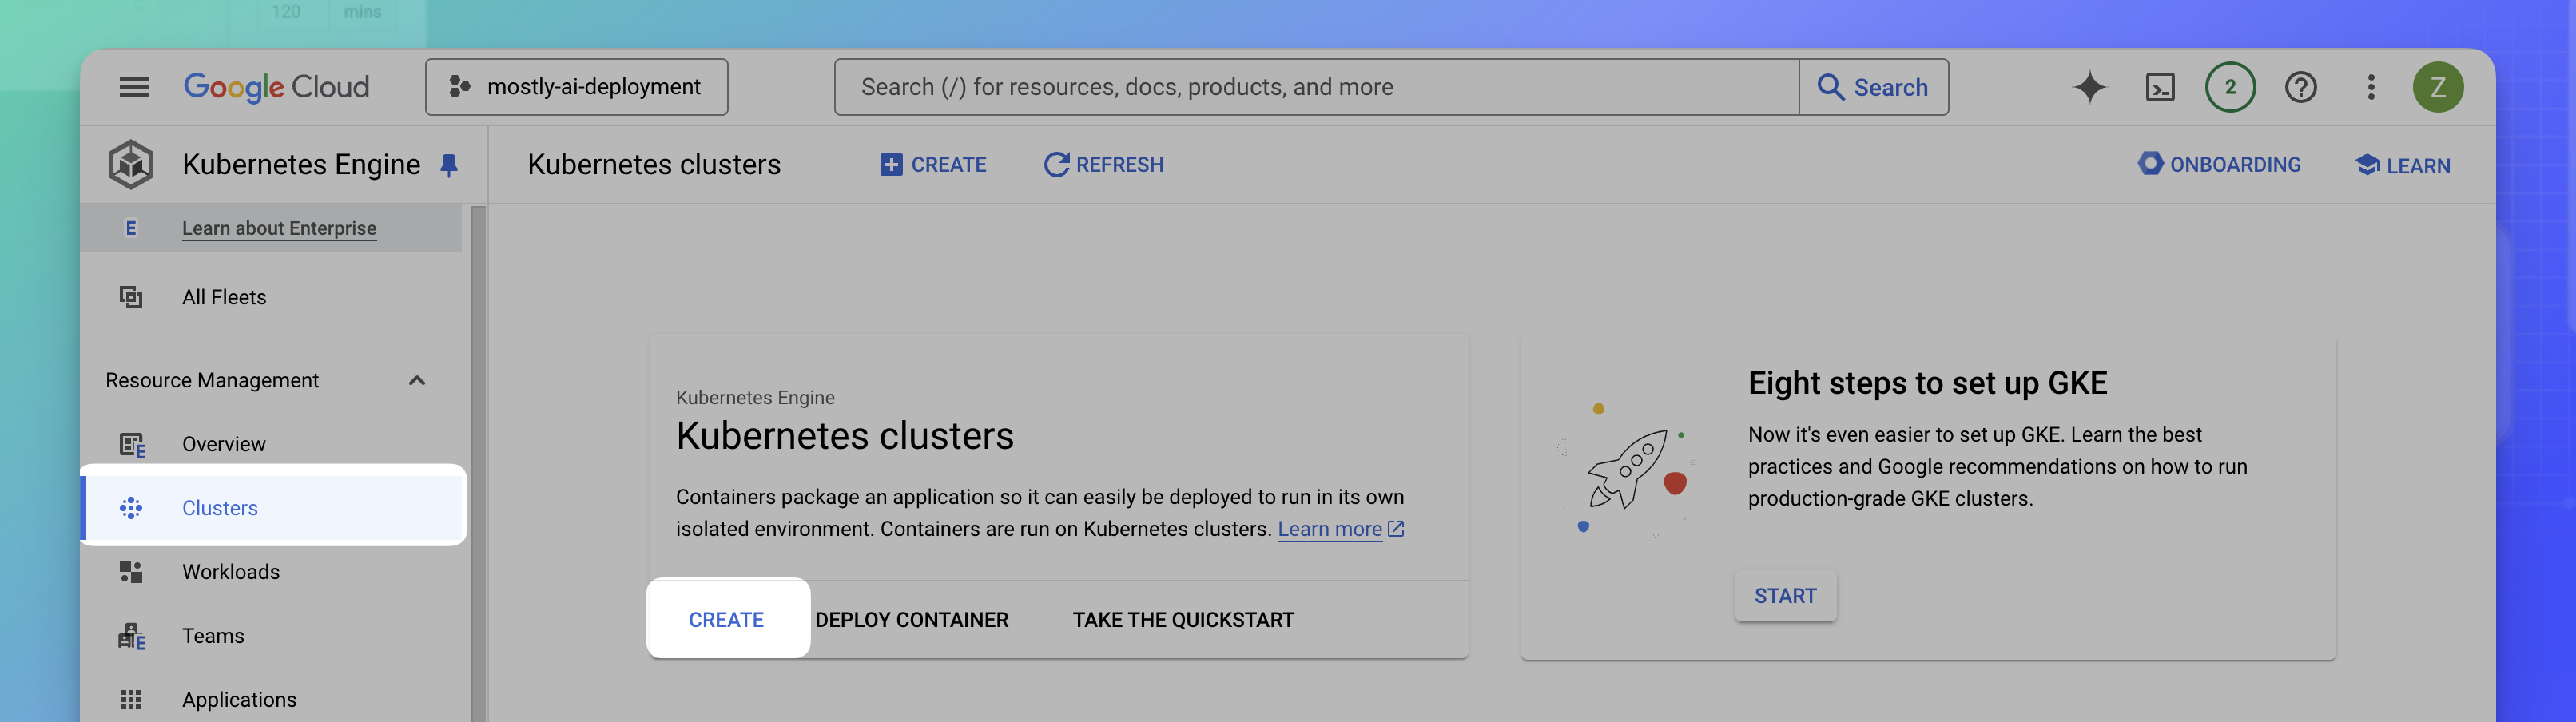
- From the sidebar, select Clusters and click CREATE.
- Switch to standard cluster creation.
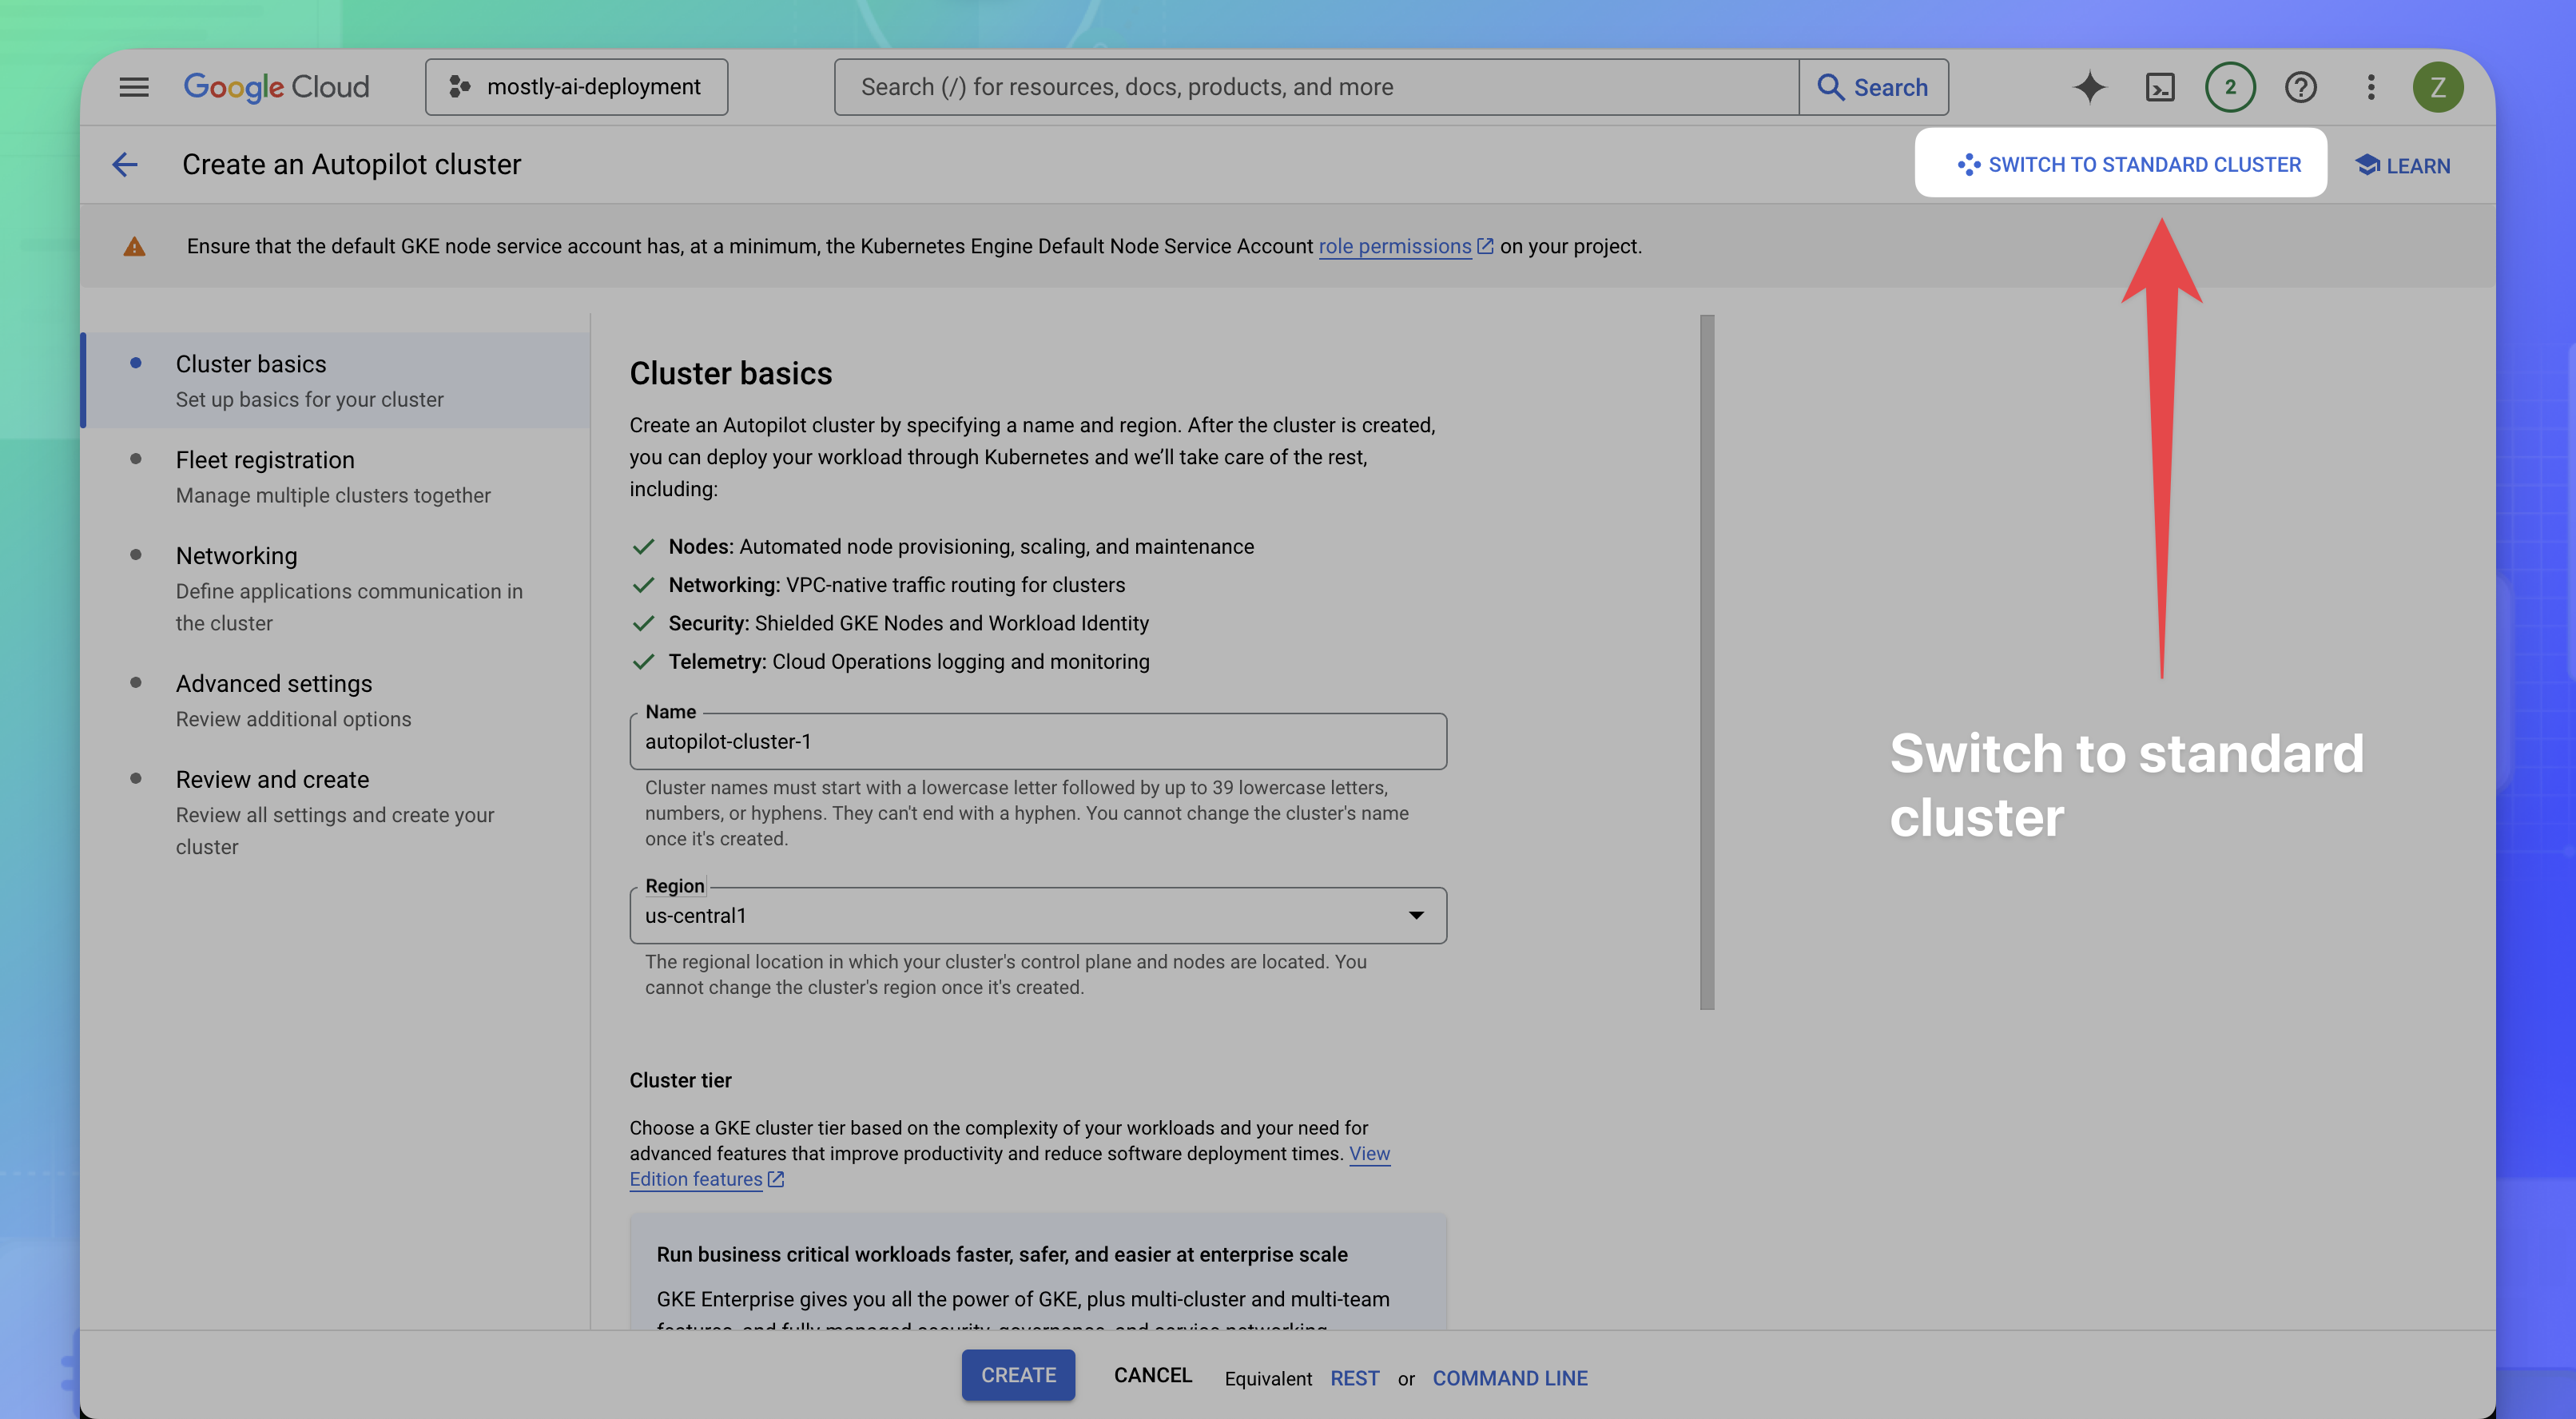
- Click SWITCH TO STANDARD CLUSTER in the dialog box.
- Configure the number of nodes in the cluster.
- From the sidebar under NODE POOLS, select the default-pool.
- Under Size, set the Number of nodes to 1.

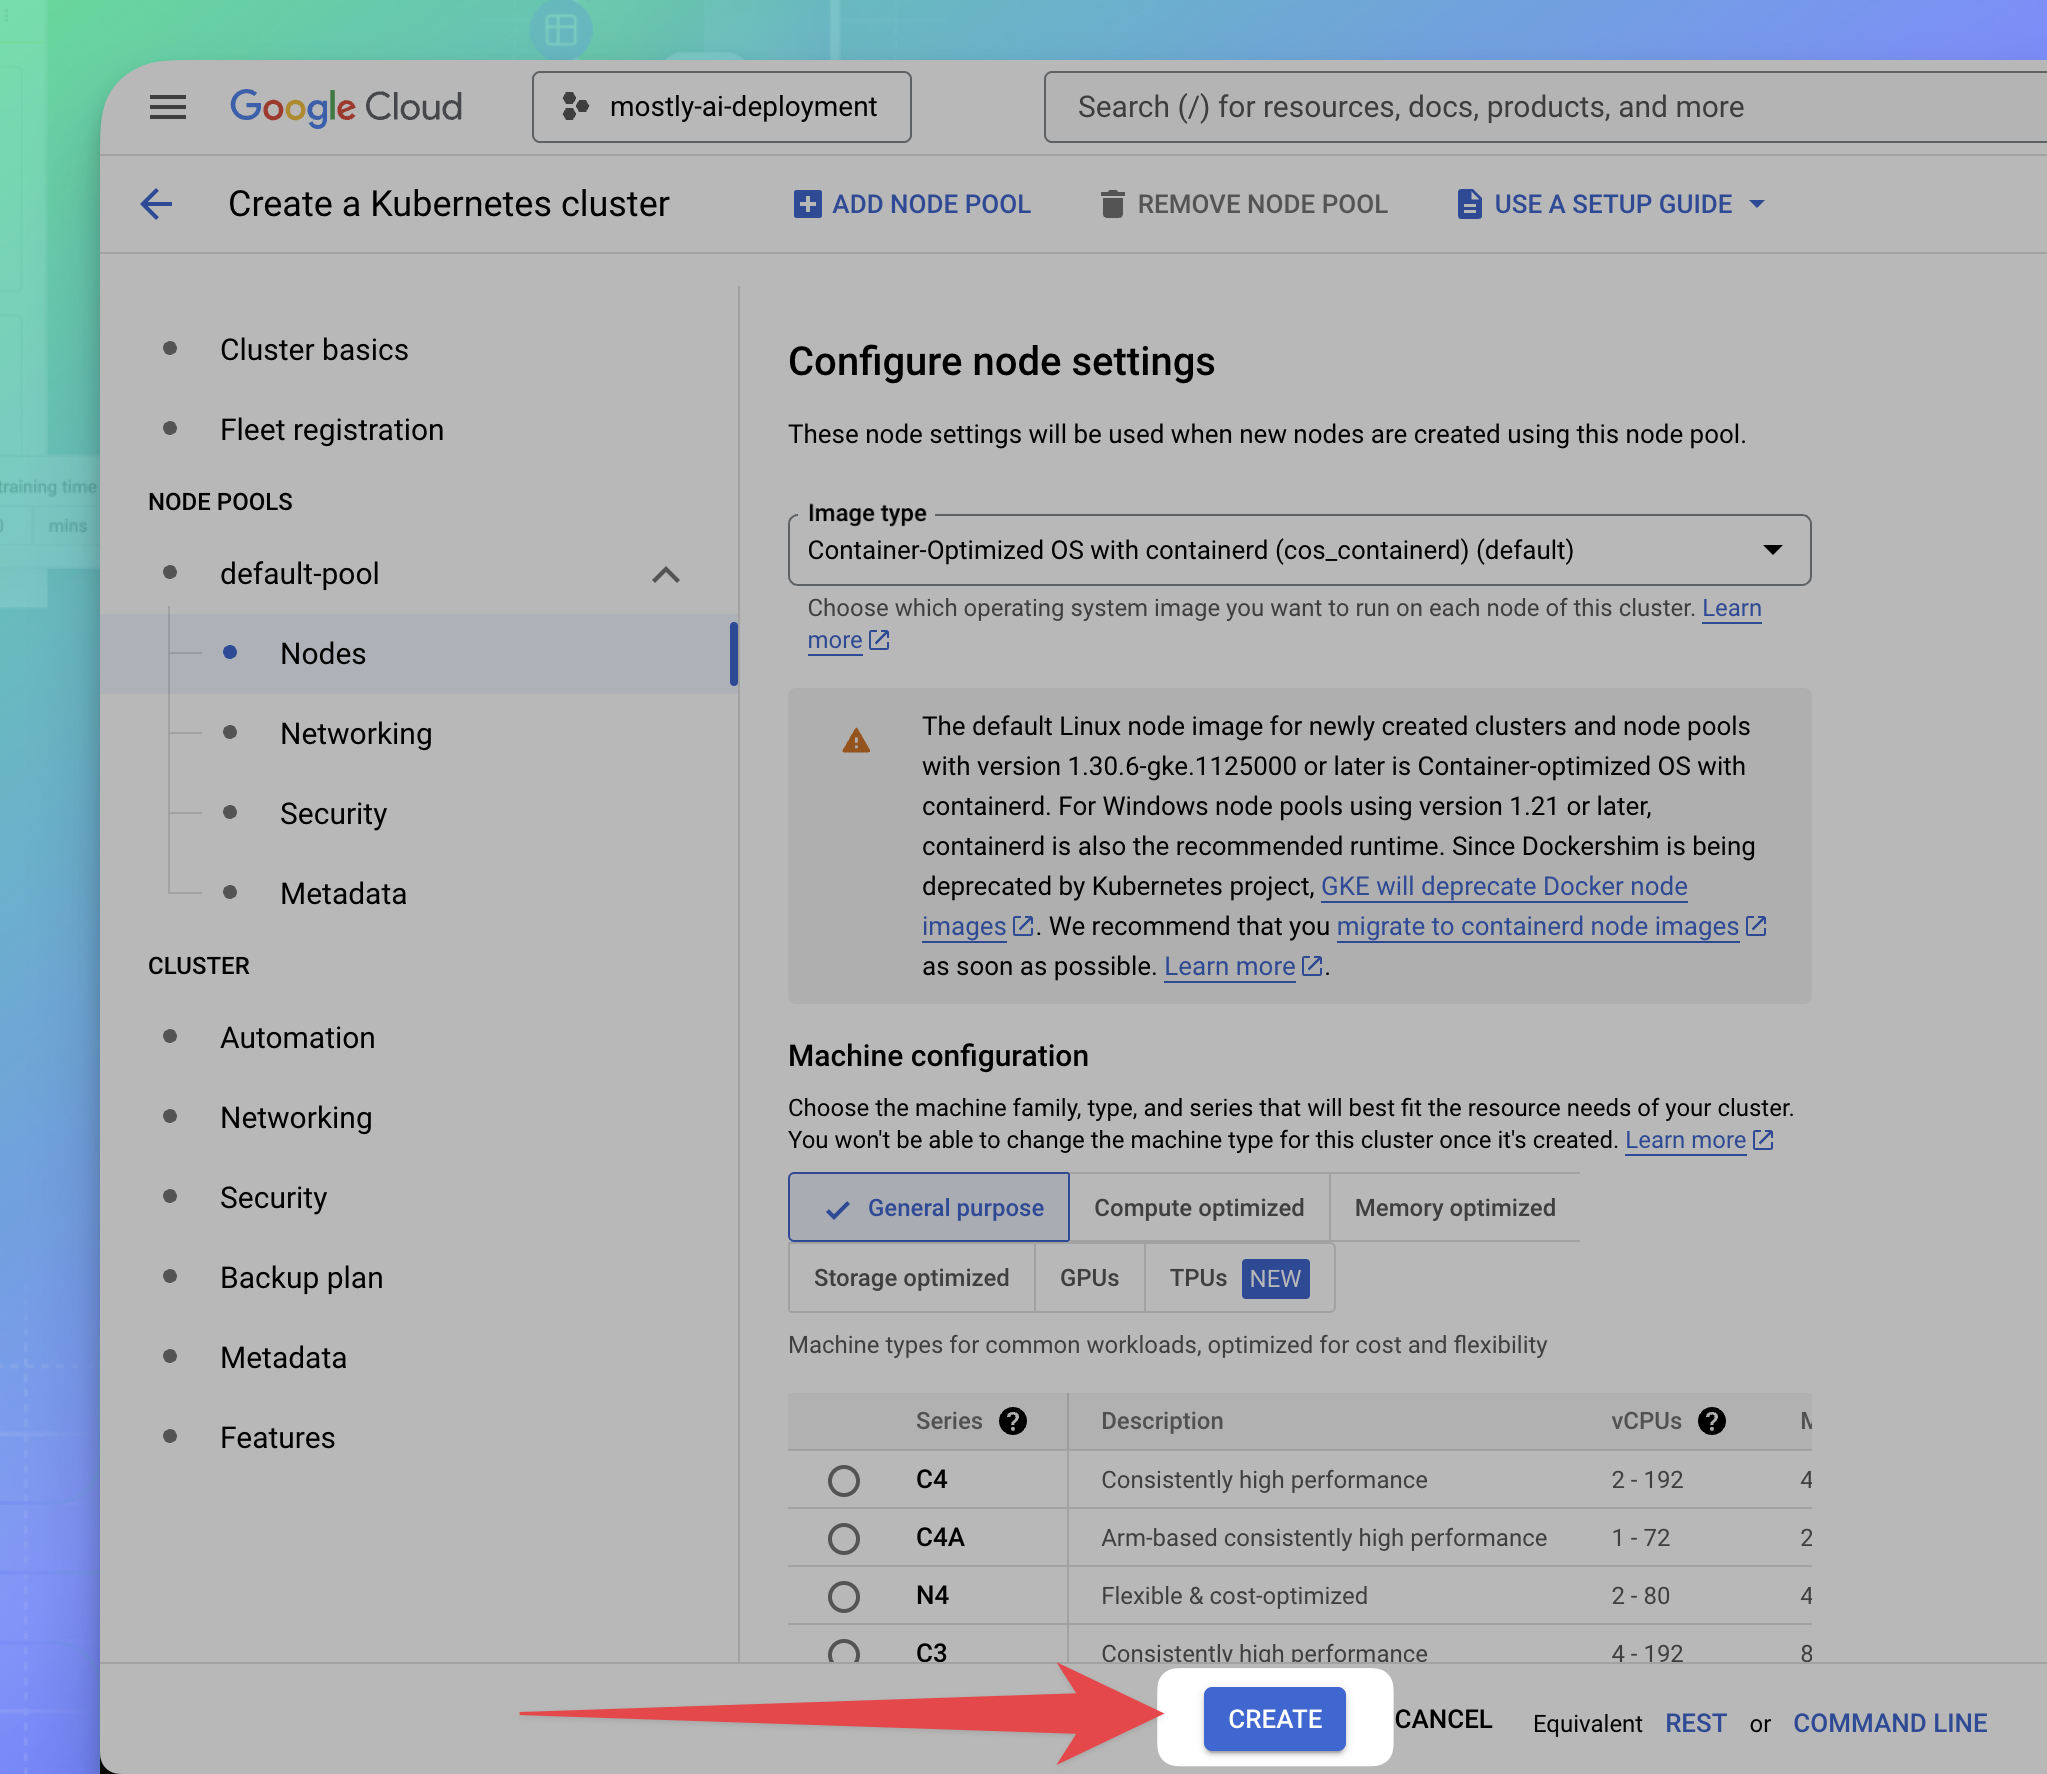
- Select a node type and configure the disk size.
- From the sidebar on the left, expand default-pool and select Nodes.
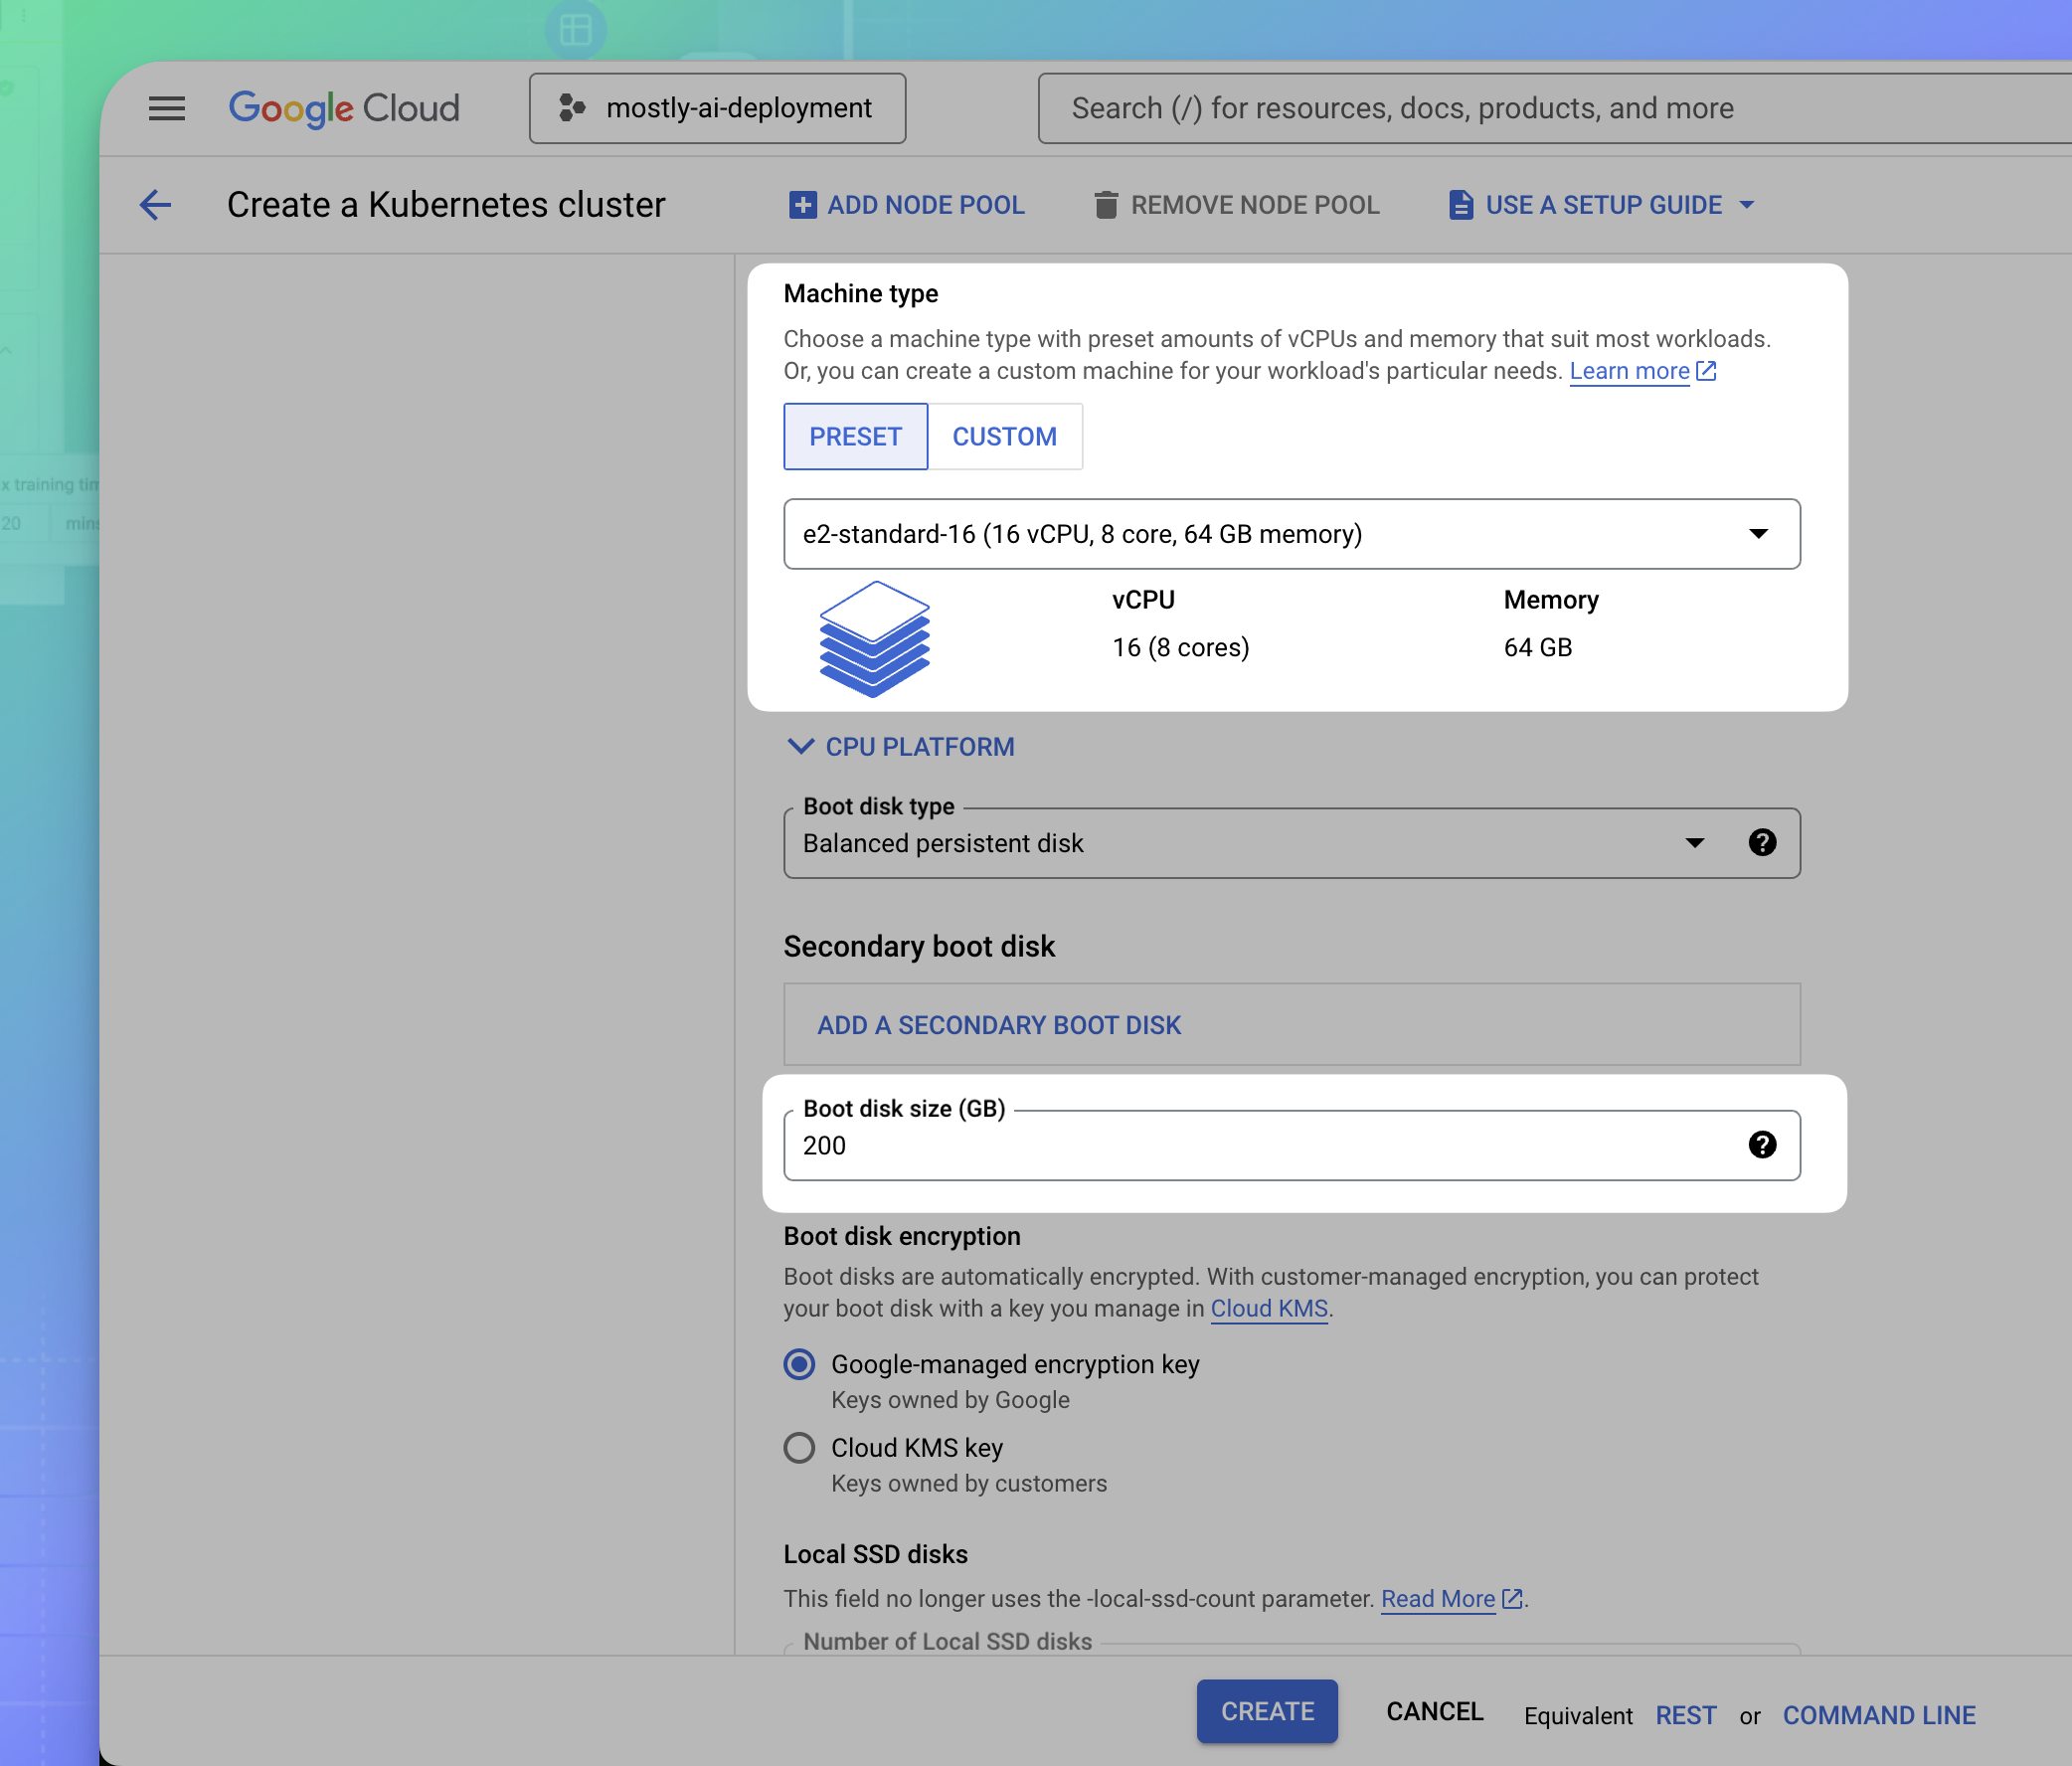
- Under Machine configuration, select a powerful node to power your MOSTLY AI synthetic data workloads.
- For Machine type, select the e2-standard-16 type with 16 vCPUs, 8 cores, and 64GB memory.
- For Boot disk size, define at least 200GB.
- Leave the remaining default configurations.
- Click CREATE at the bottom.
Result
The cluster creation starts. When complete, your cluster status turns green in the list.
What’s next
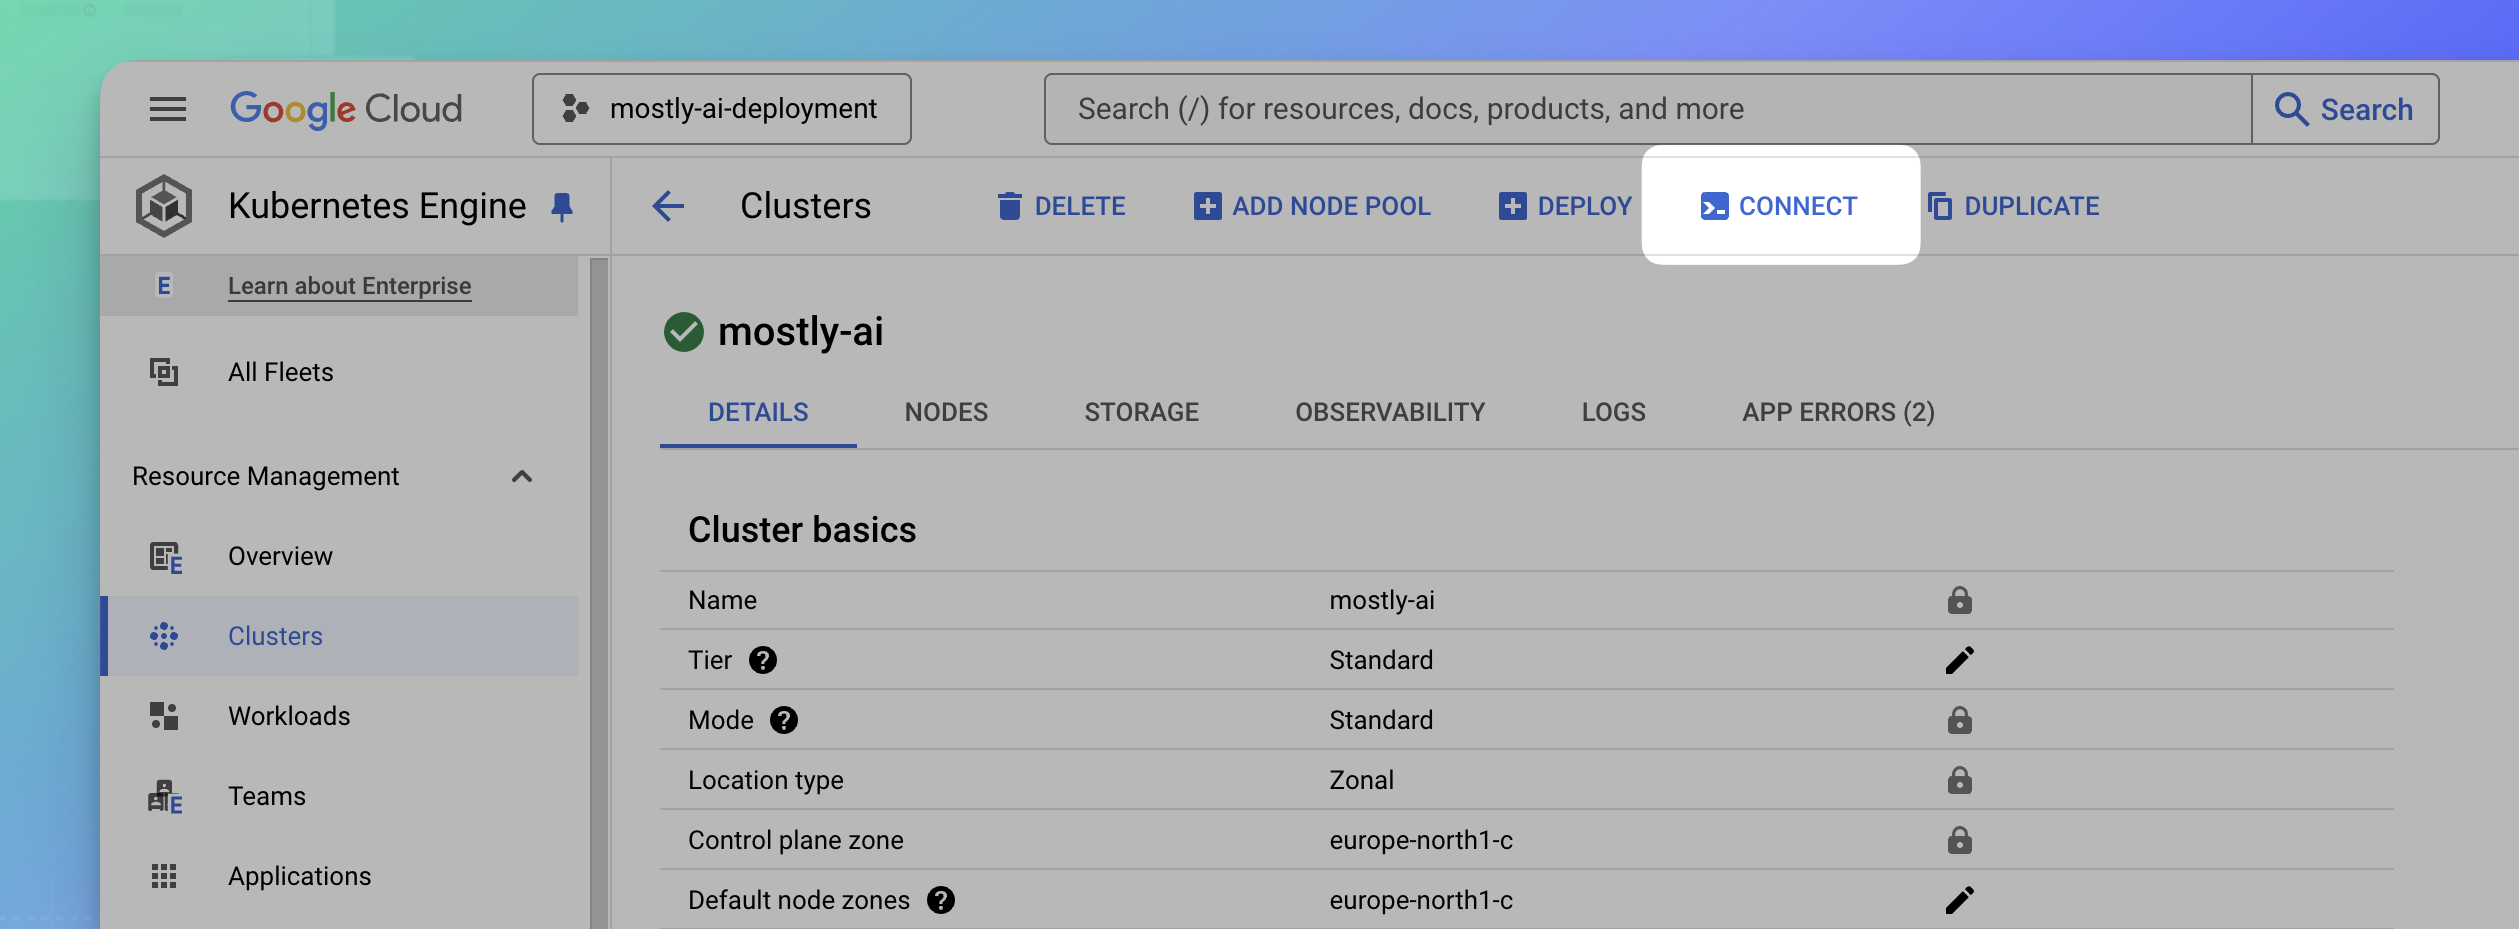
Select your cluster after its status turns green. You can then connect to the cluster using your CLI.

Task 3: Connect to the GKE cluster
With the GKE cluster created, you can now use your command-line to connect to the cluster.
Make sure that you install gcloud CLI and kubectl as listed in the prerequisites.
Steps
- With the cluster open, click CONNECT.
- In the modal window Connect to the cluster, copy the command to configure your cluster access.
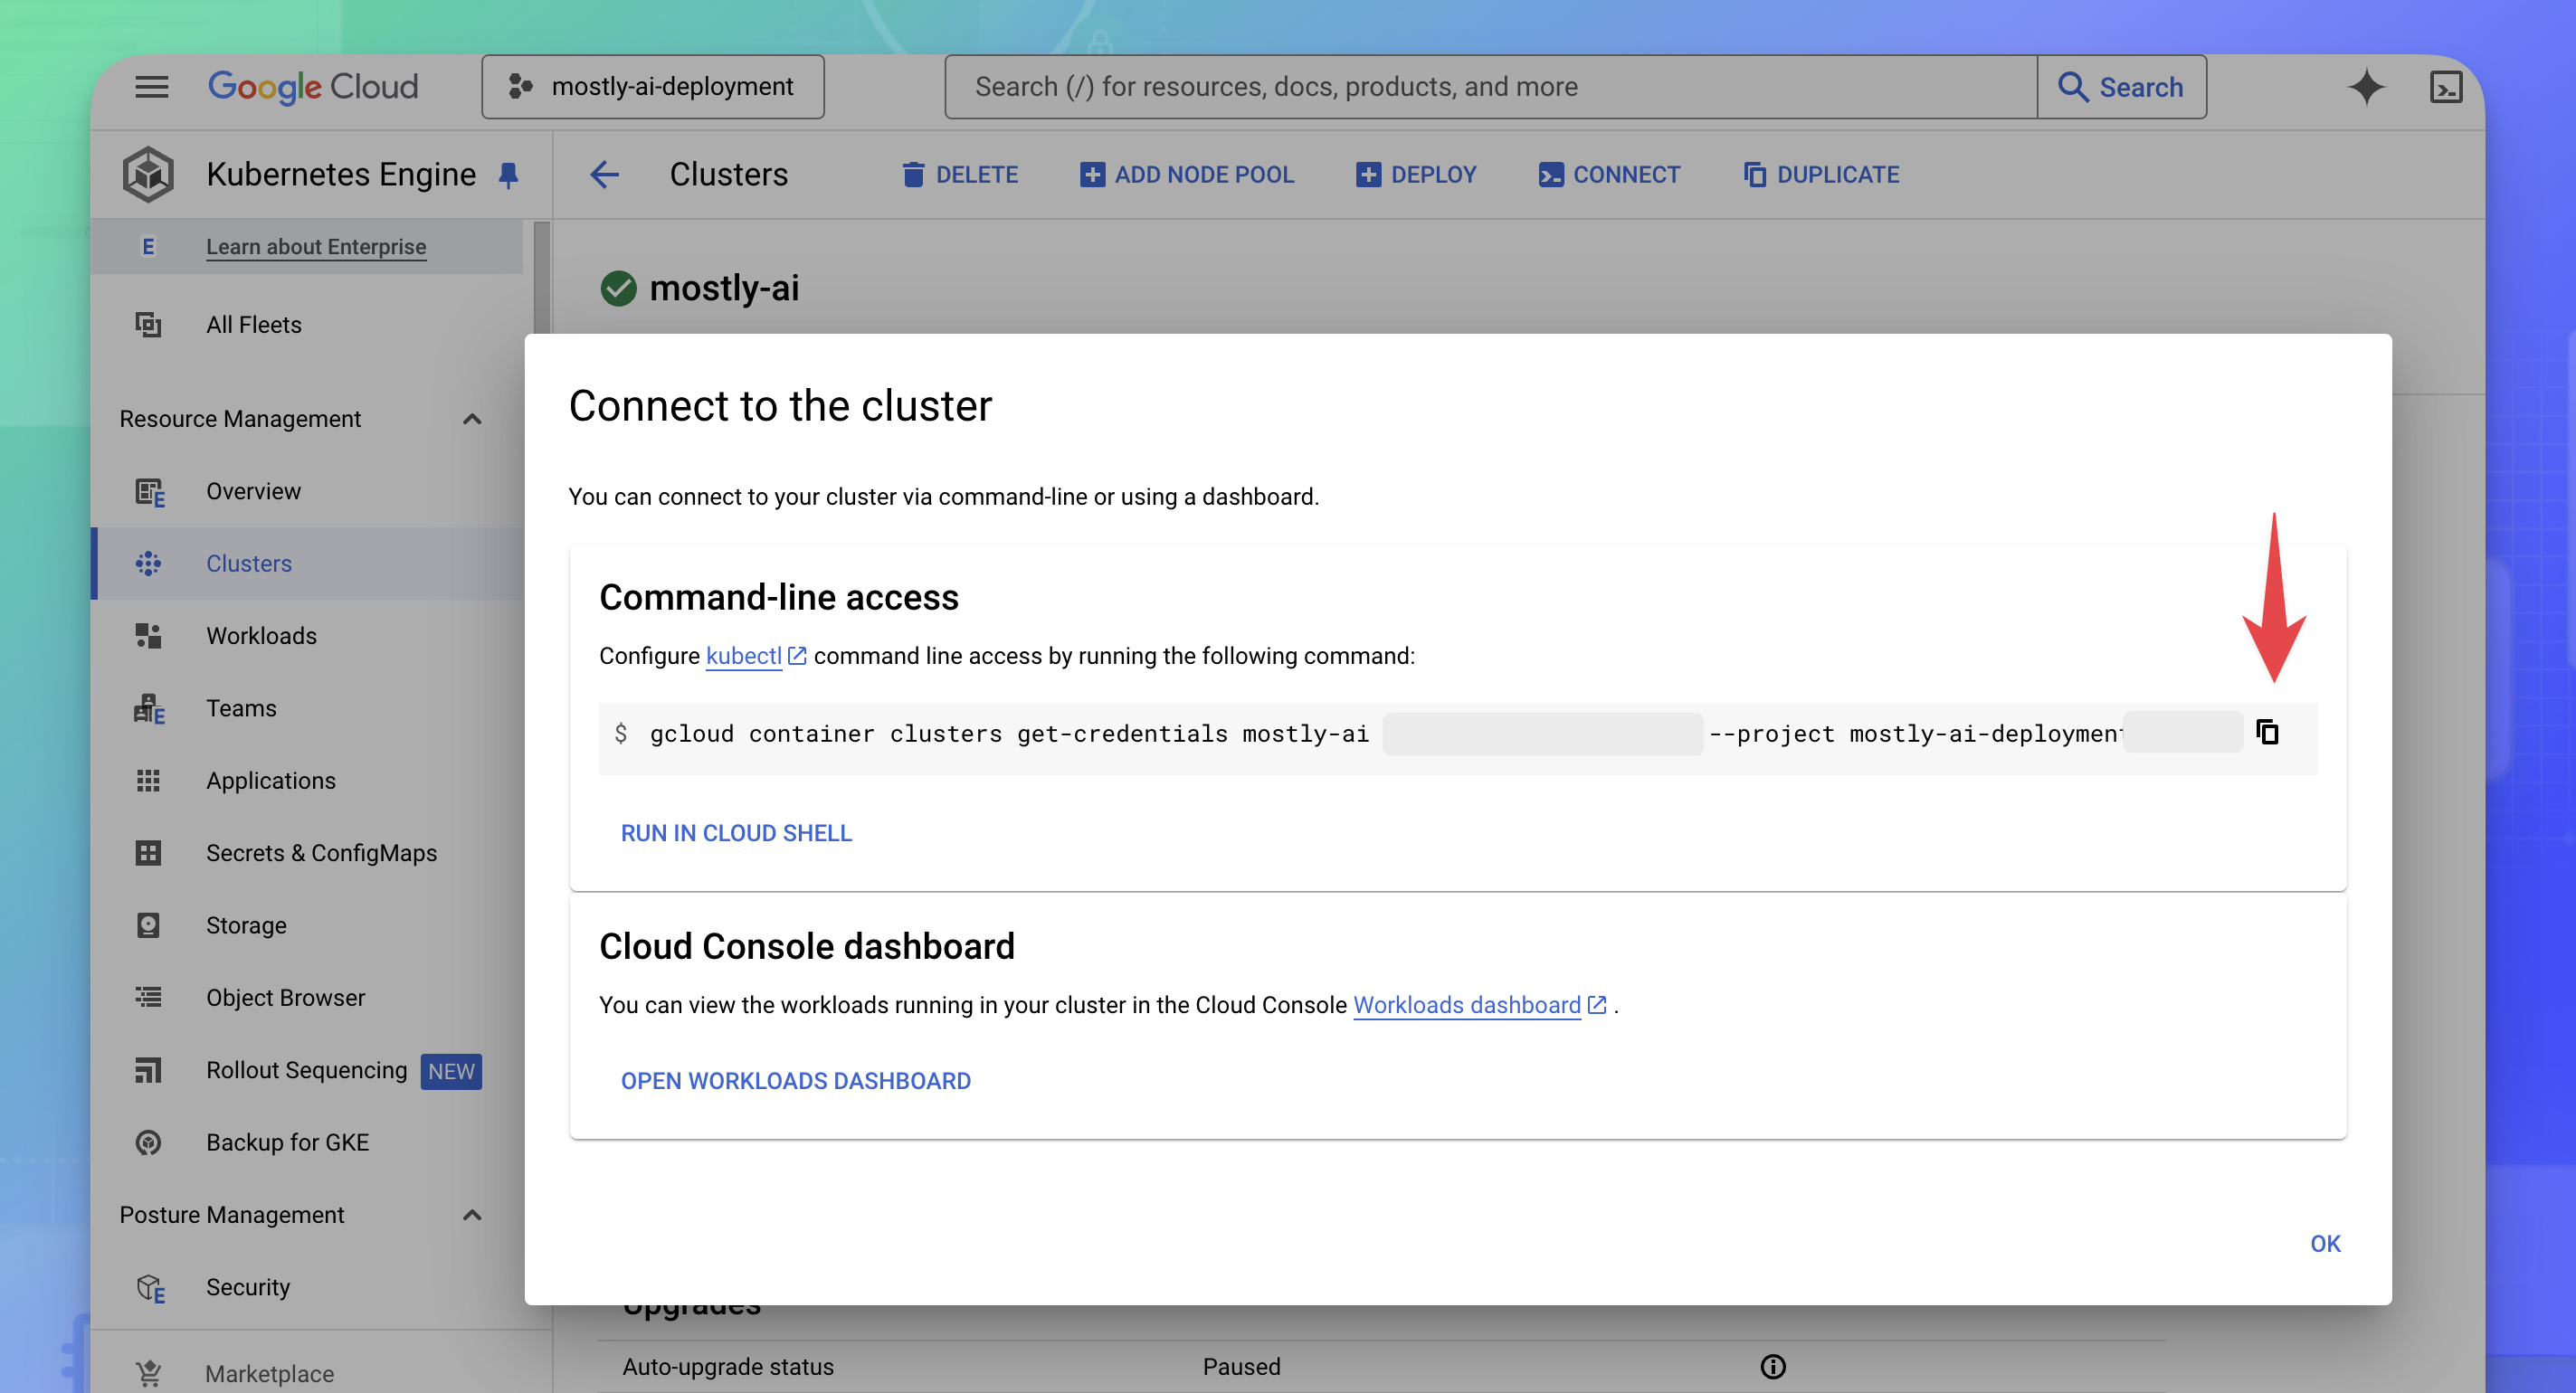
- Open a terminal or a command-line application, and paste and run the command.
For example, the following is a template command where you need to replace the values for the<cluster-name>,<zone-name>, and<project-identifier>arguments with your relevant values.
When you copy the command in step 4, the values will be pre-filled for you.If you connected successfully, you will see the following output:gcloud container clusters get-credentials <cluster-name> --zone <zone-name> --project <project-identifier>Fetching cluster endpoint and auth data. kubeconfig entry generated for <cluster-name>.
Result
The GKE cluster connection is now configured on your local system.
What’s next
You can now use kubectl to communicate with your GKE cluster and helm to install and manage packages.
Task 4: Configure an ingress controller
MOSTLY AI supports HAProxy by default as the ingress controller. NGINX and Istio virtual services are also supported.
For details on how to configure each, see Ingress controllers.
Deployment
You can deploy MOSTLY AI with from the Google Cloud Marketplace or manually with the MOSTLY AI Helm chart.
Deploy from the Google Cloud Marketplace
MOSTLY AI is available in the Google Cloud Marketplace and you can use the offering to deploy in your GKE cluster.
Steps
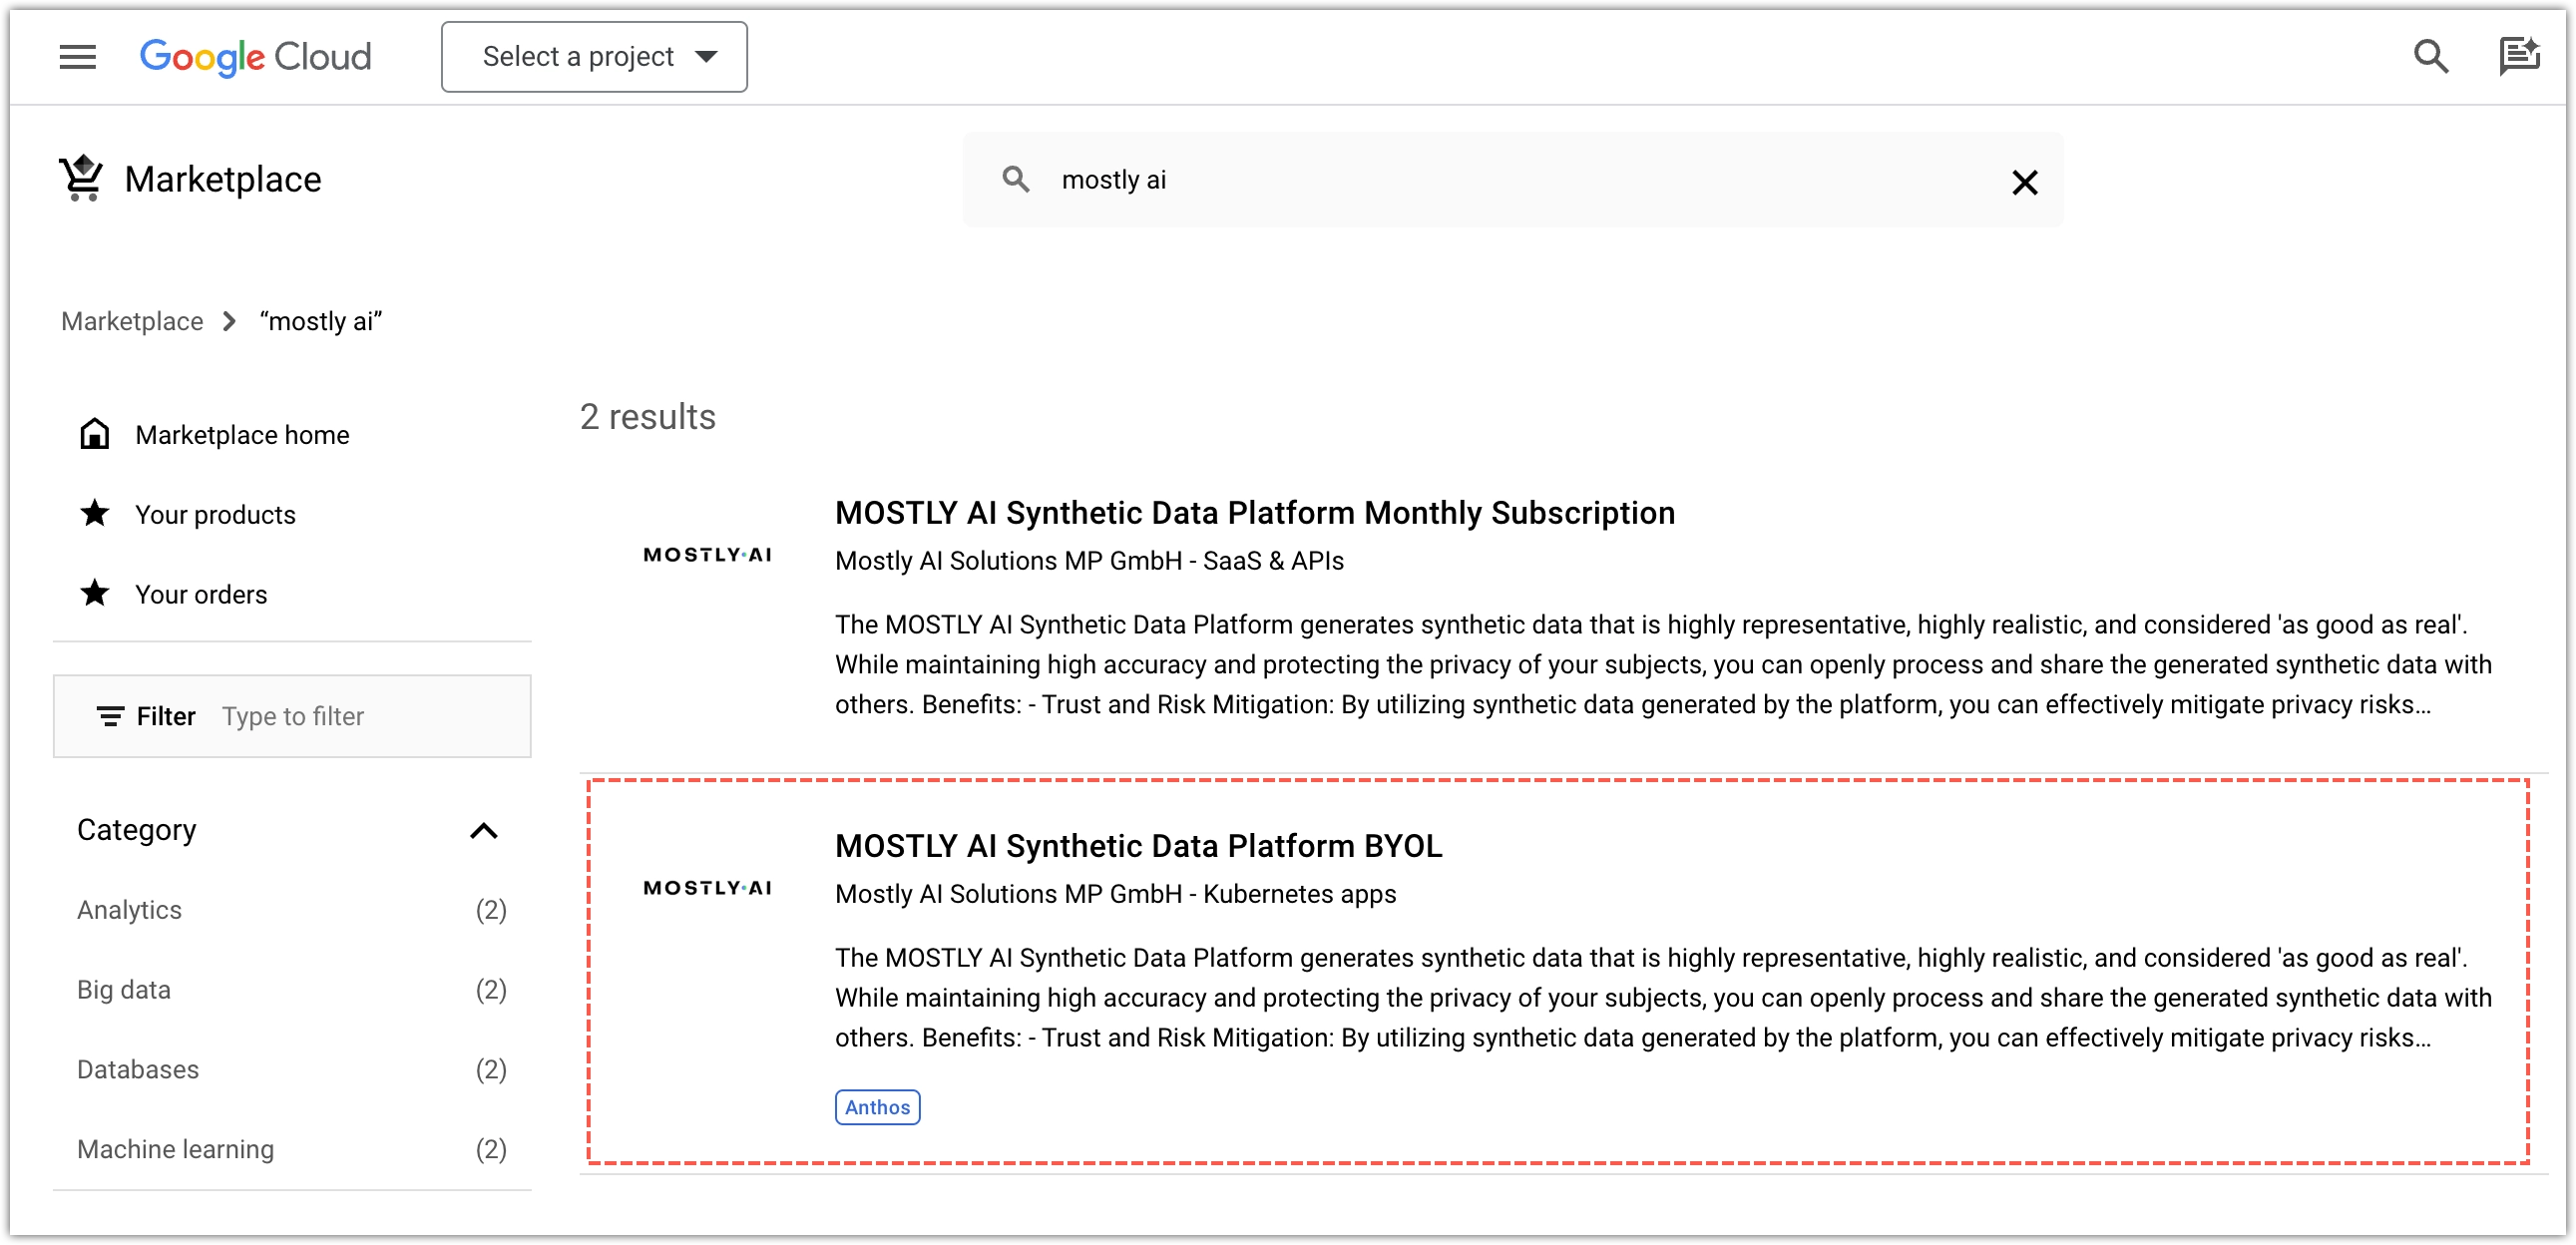
- Go to https://console.cloud.google.com/marketplace/browse?q=mostly%20ai.
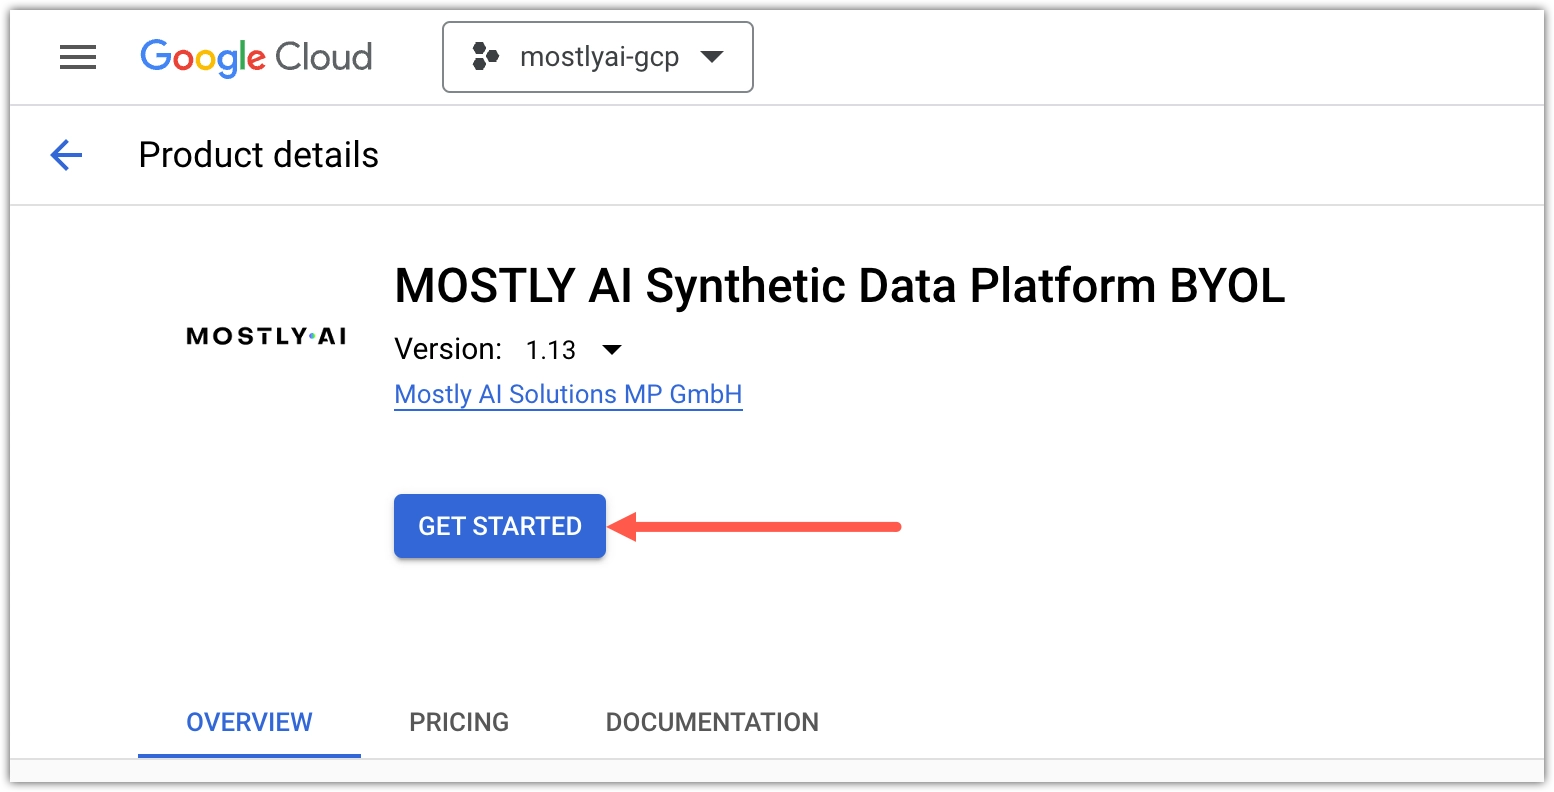
- Select MOSTLY AI Synthetic Data Platform BYOL.
- Click GET STARTED.
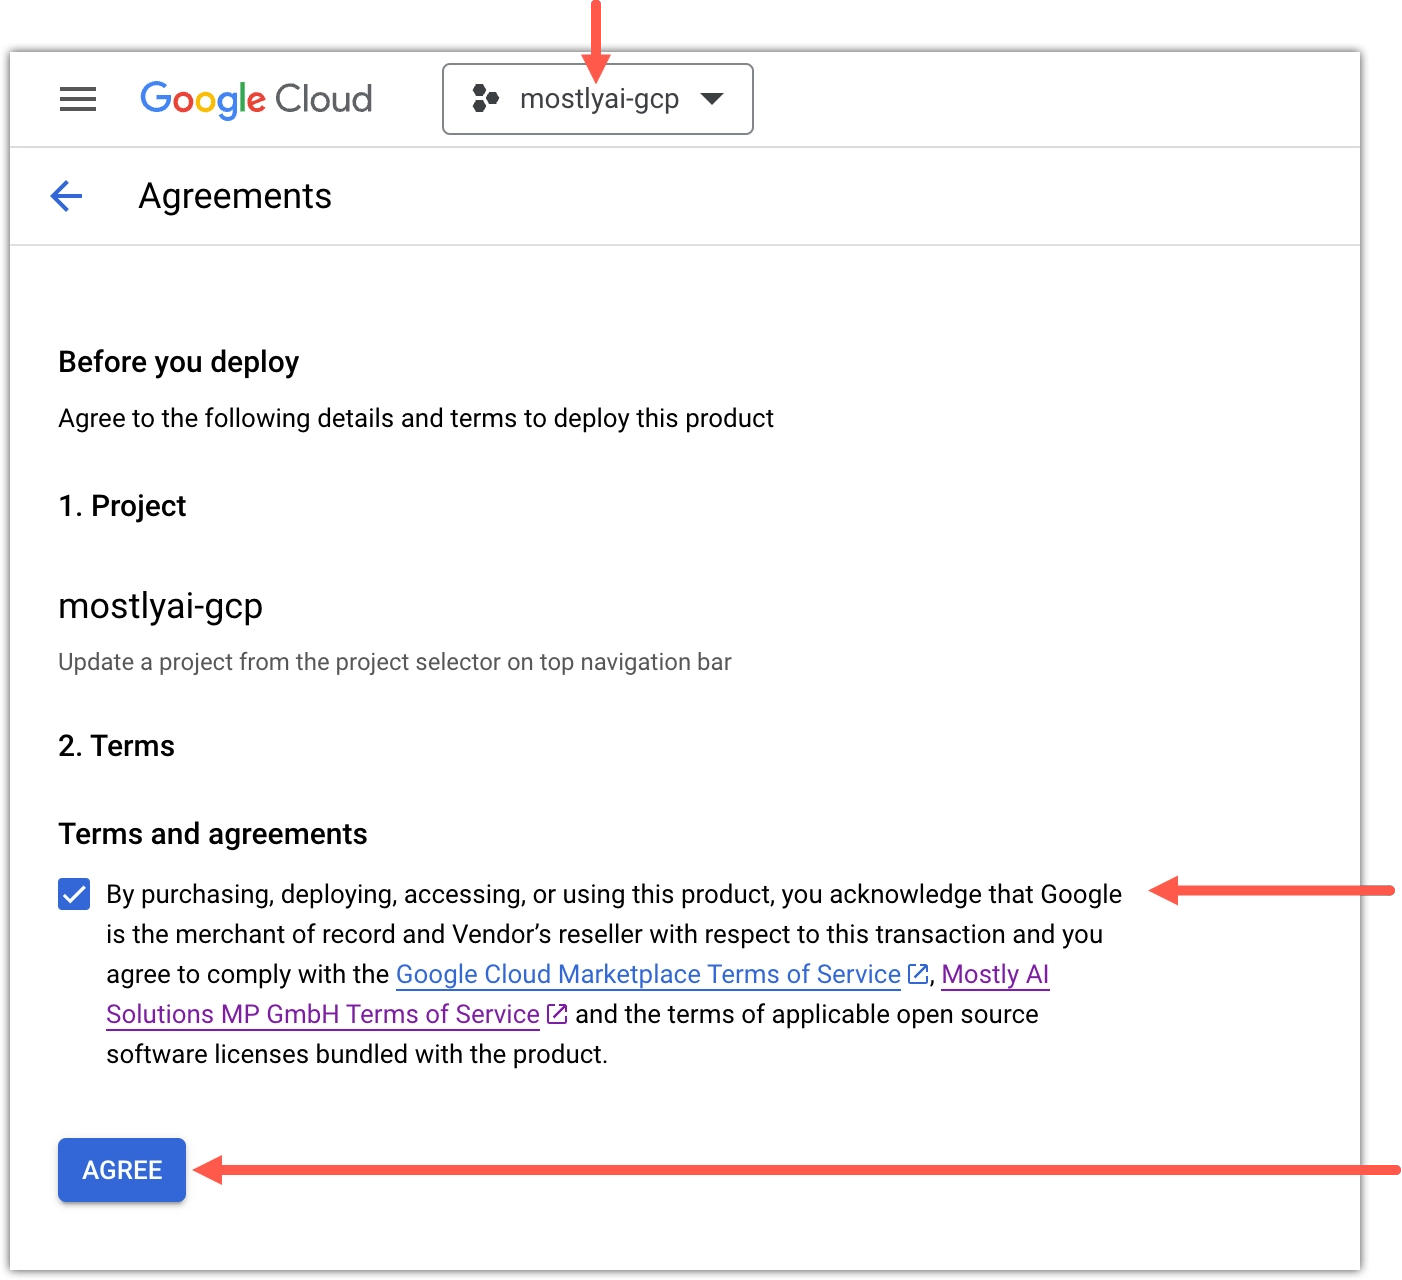
- Select a Google Cloud project for MOSTLY AI, select the Terms and agreements checkbox, and click AGREE.
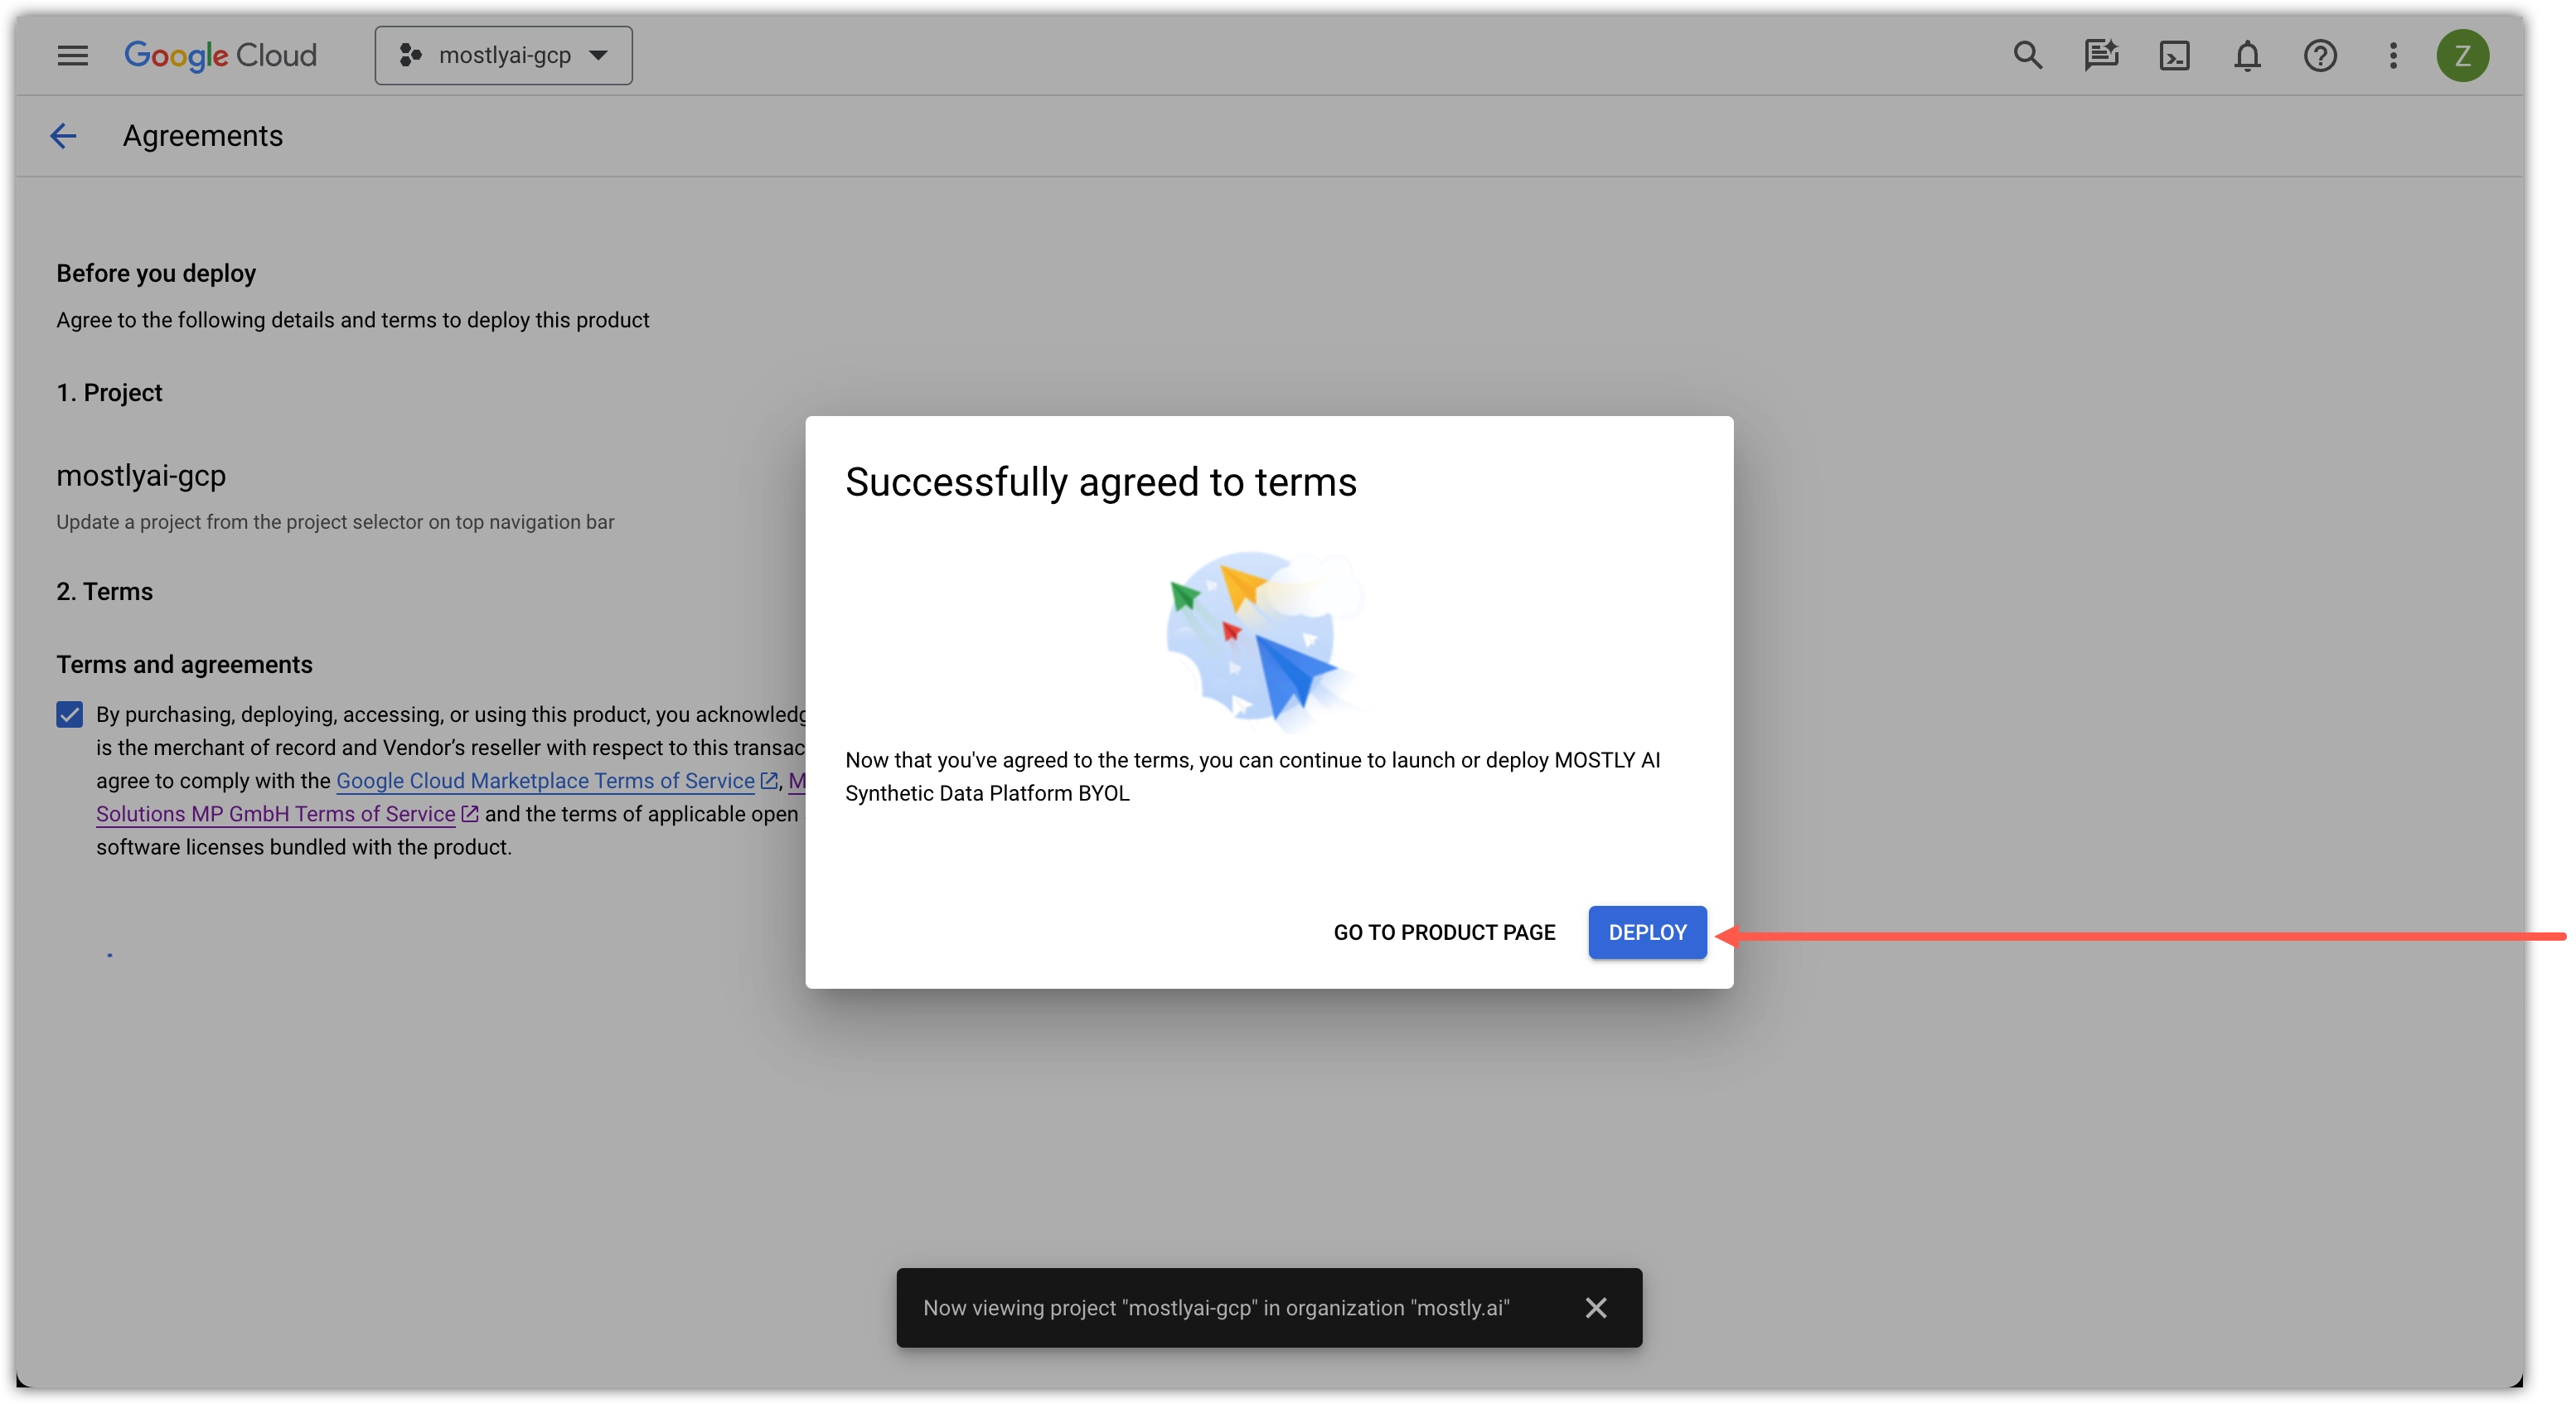
- Click DEPLOY in the prompt.
- On the Deploy MOSTLY AI page, click OR SELECT AN EXISTING CLUSTER.
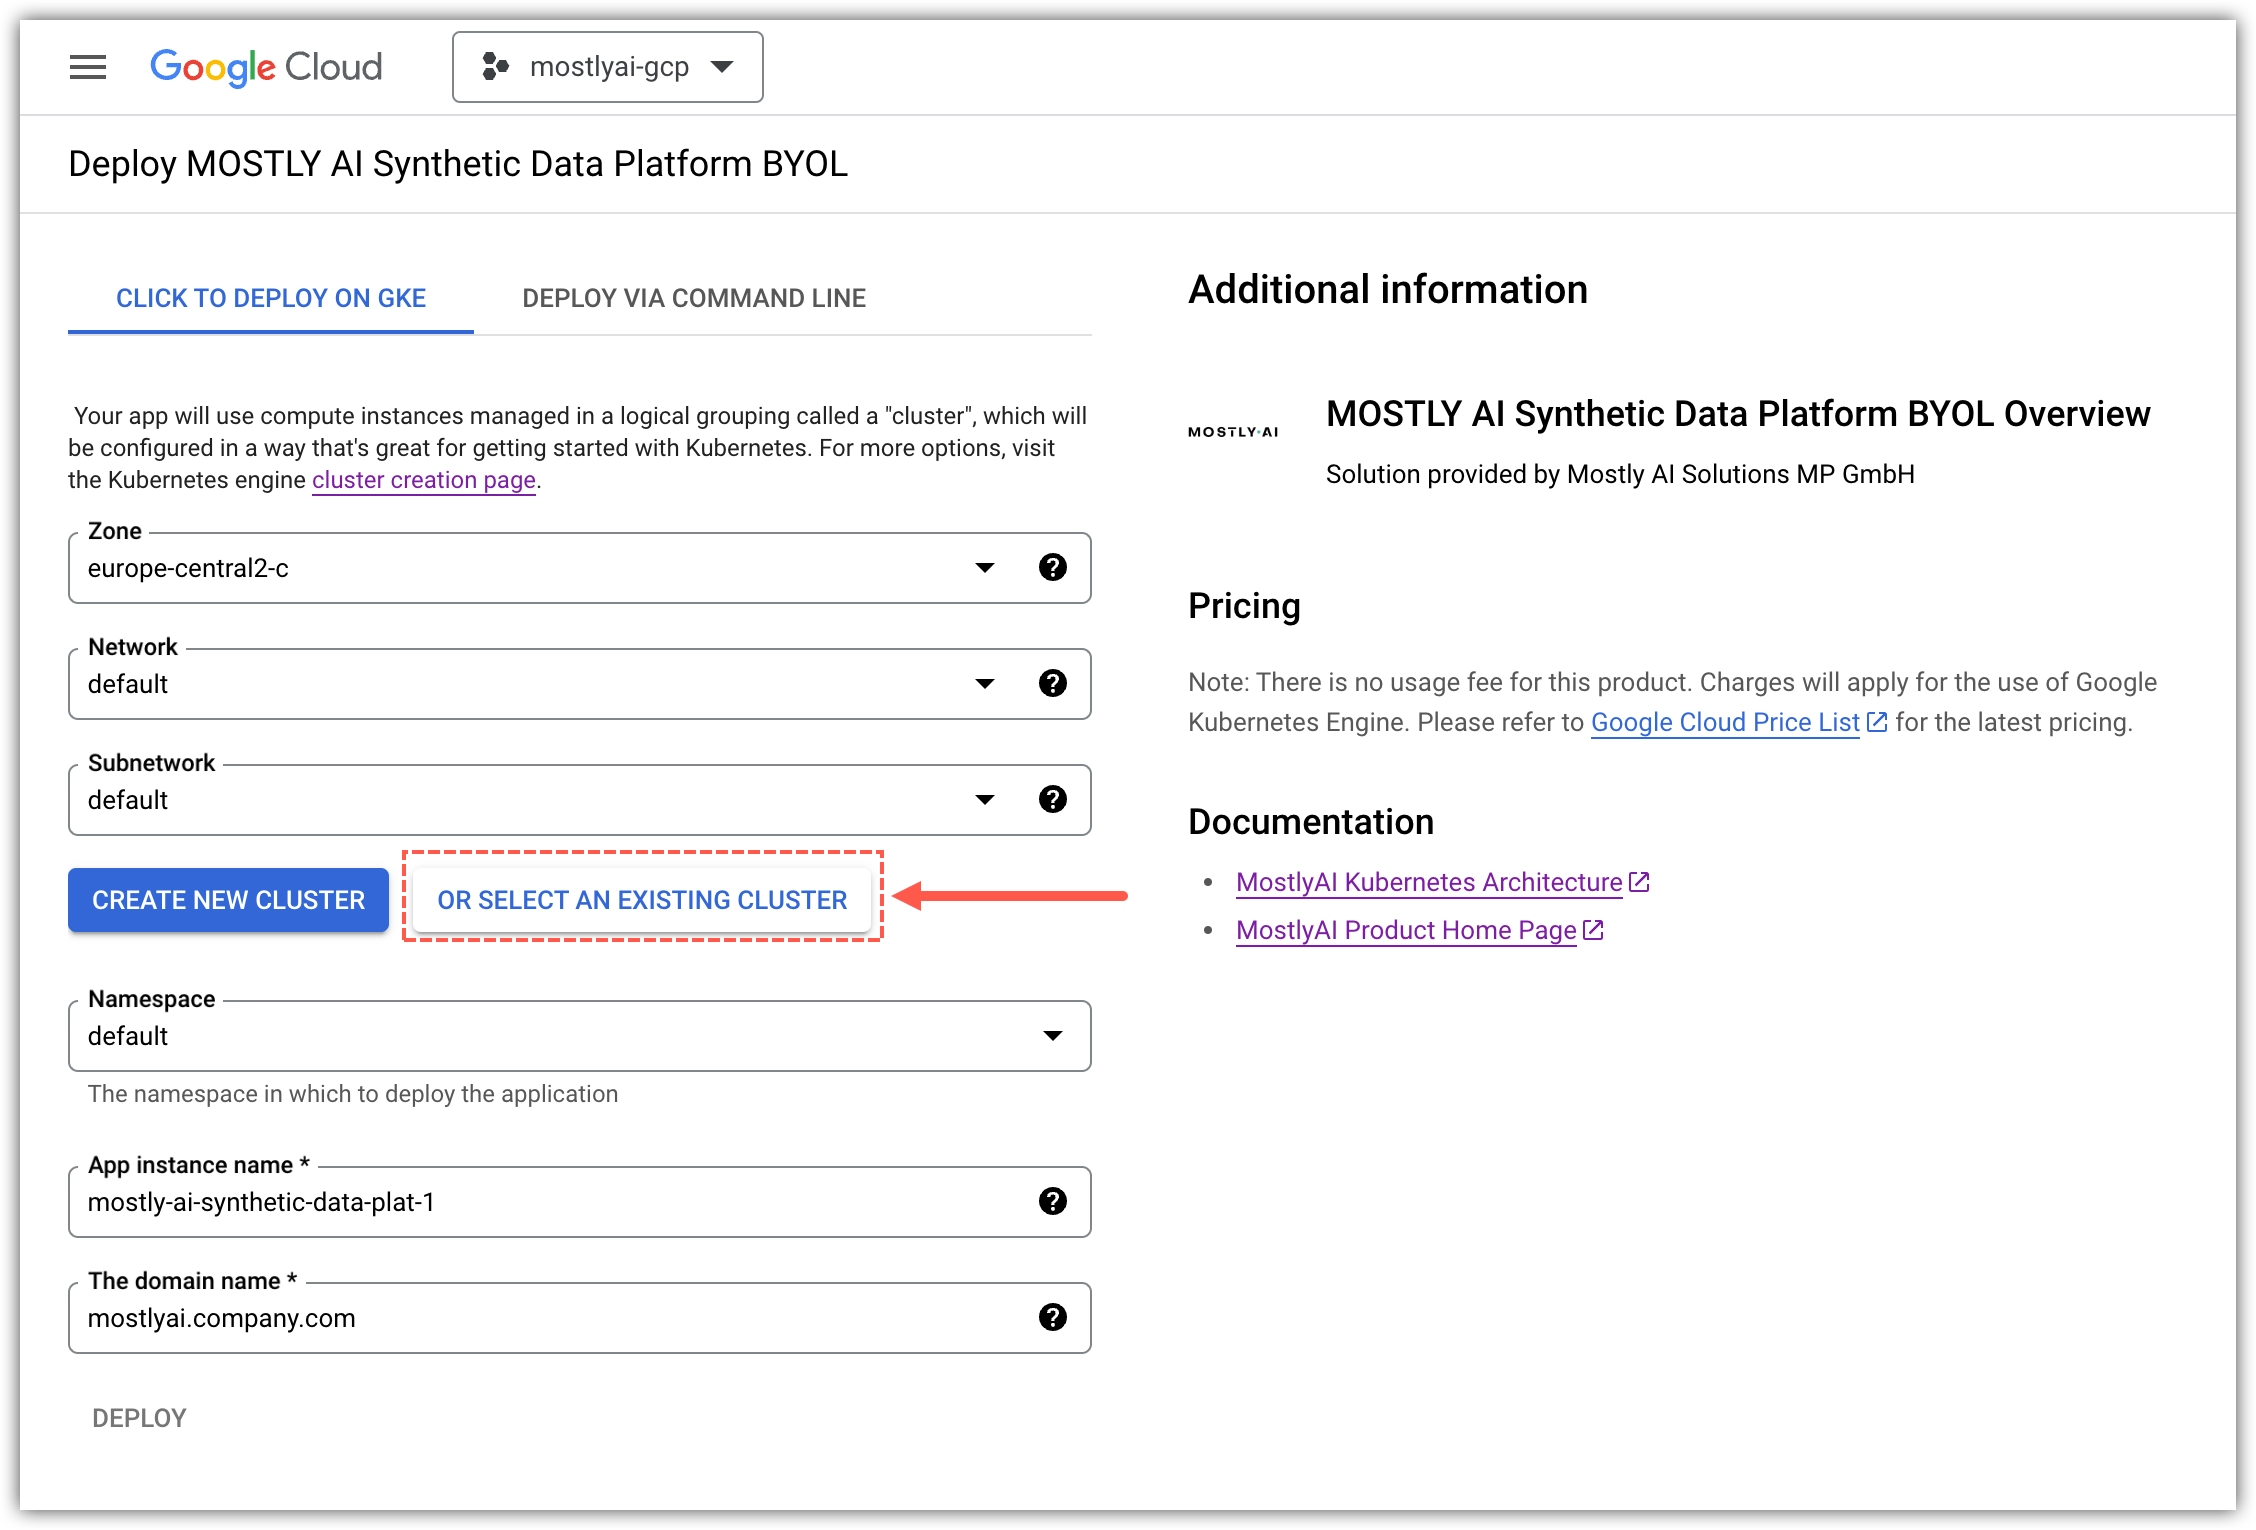
- For Existing Kubernetes Cluster, select your GKE cluster.
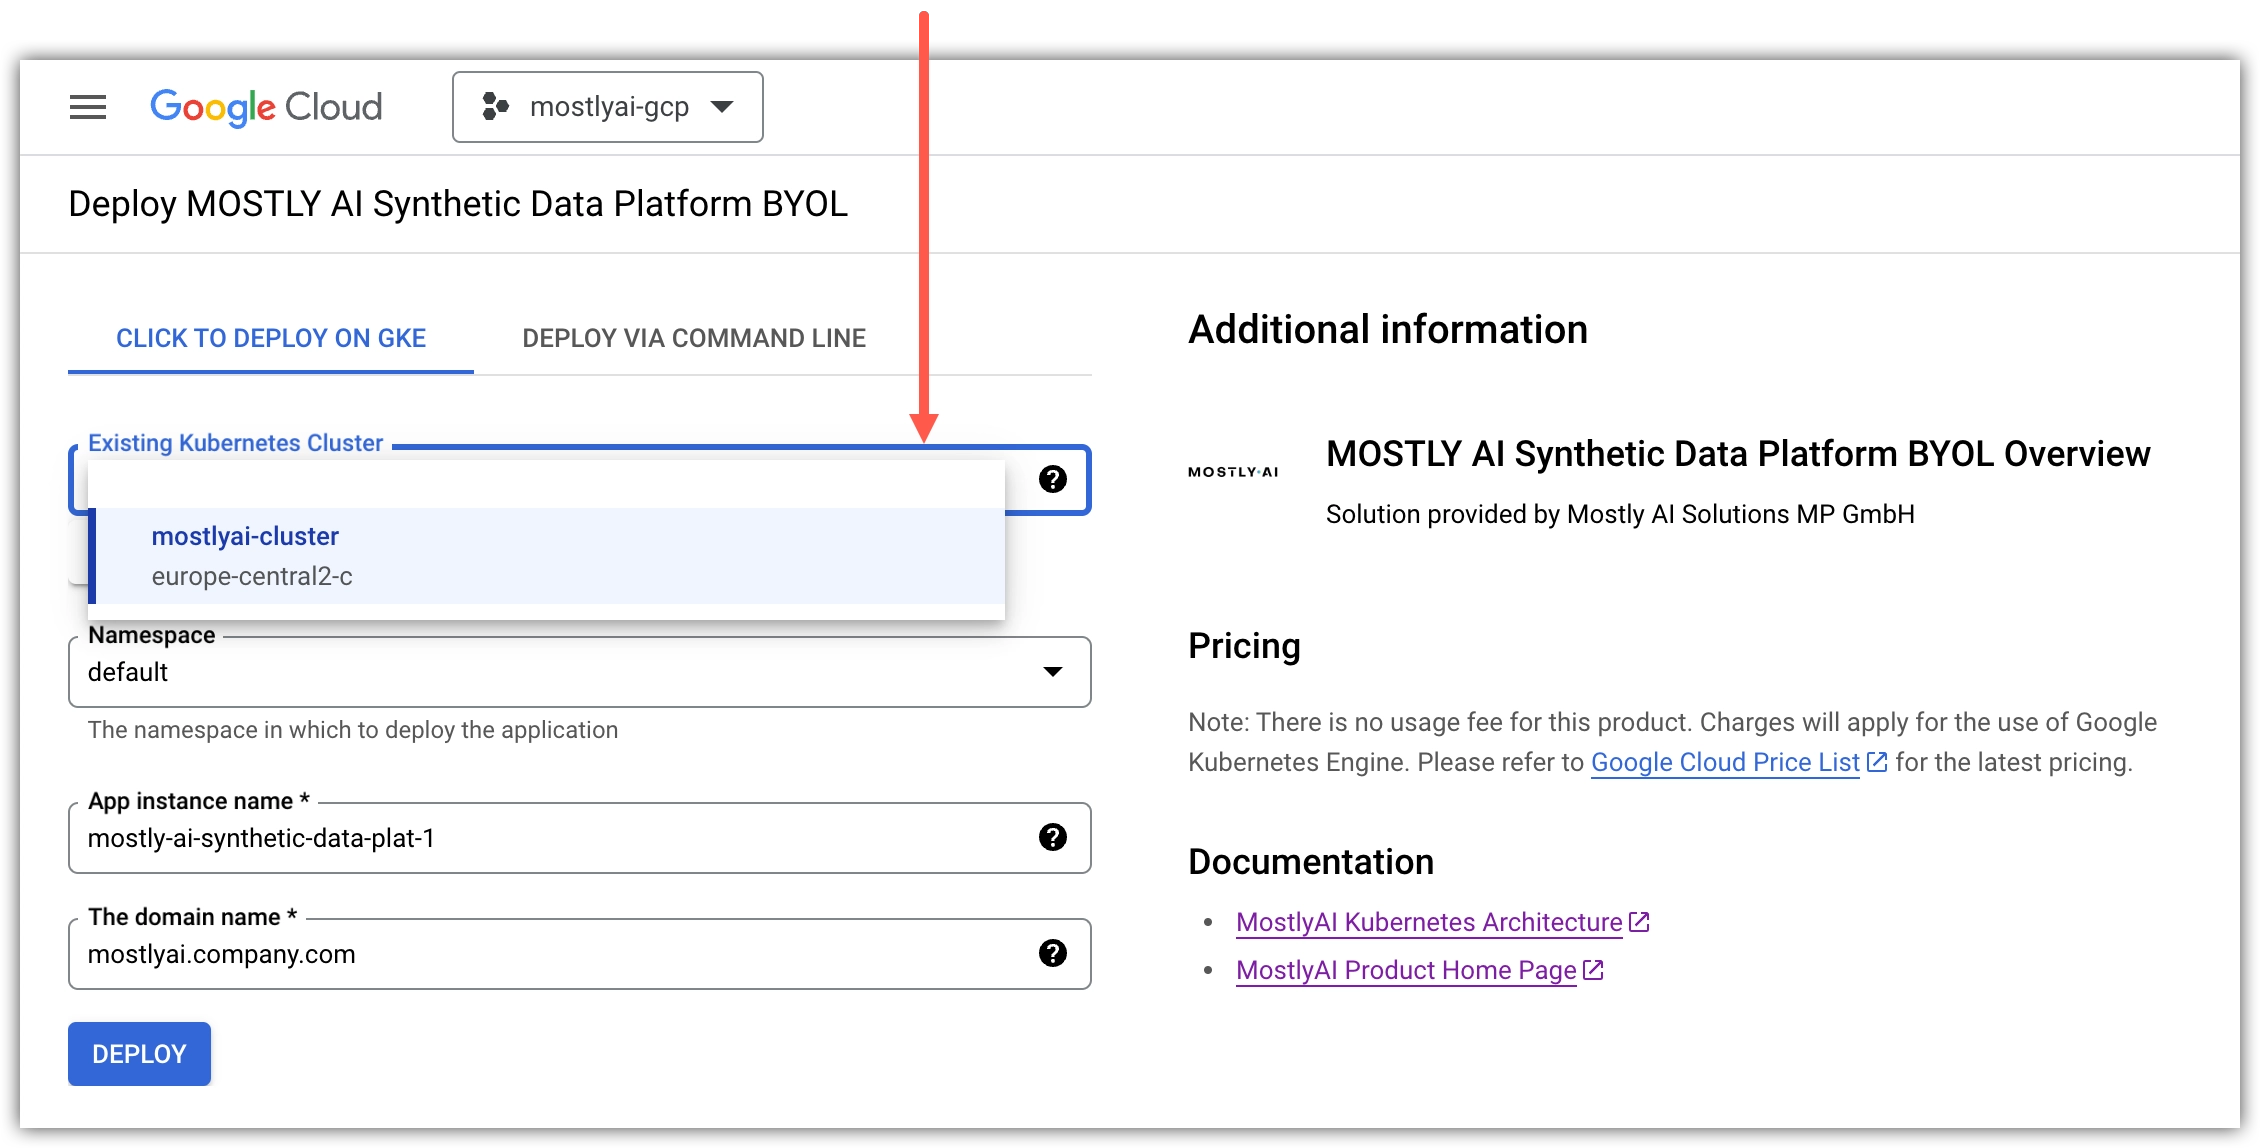
- For Namespace, select Create a namespace, and for New namespace name set
mostly-ai.💡We recommend that you use a separate namespace calledmostly-aito aid deployment and eventual cleanup.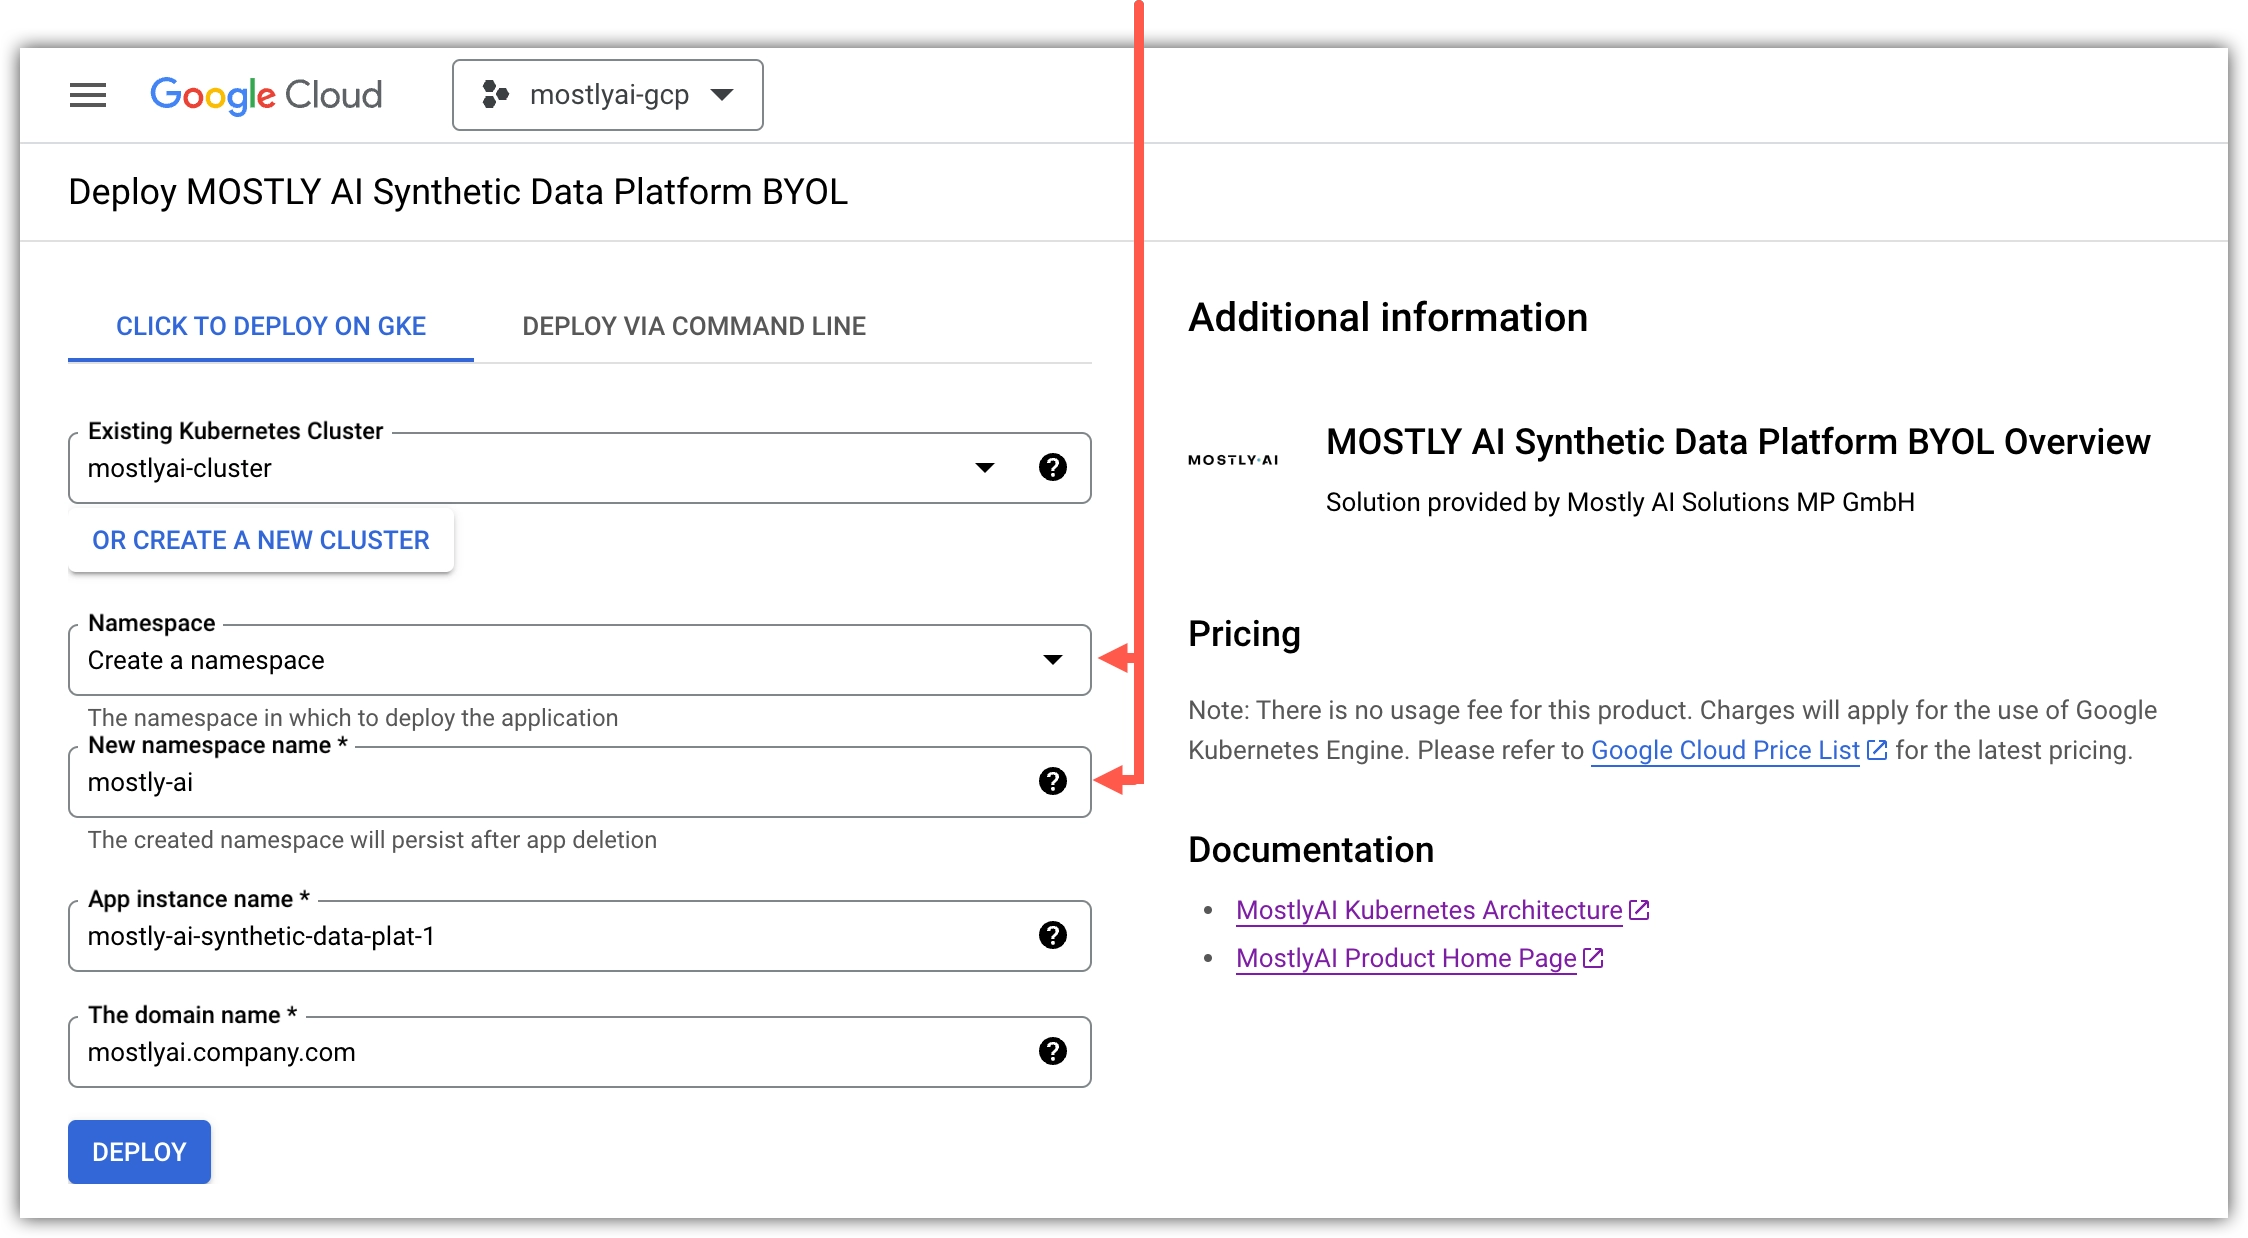
- For App instance name, set the GKE app name.
- For The domain name, set a fully-qualified domain (FQDN) name for the MOSTLY AI app.
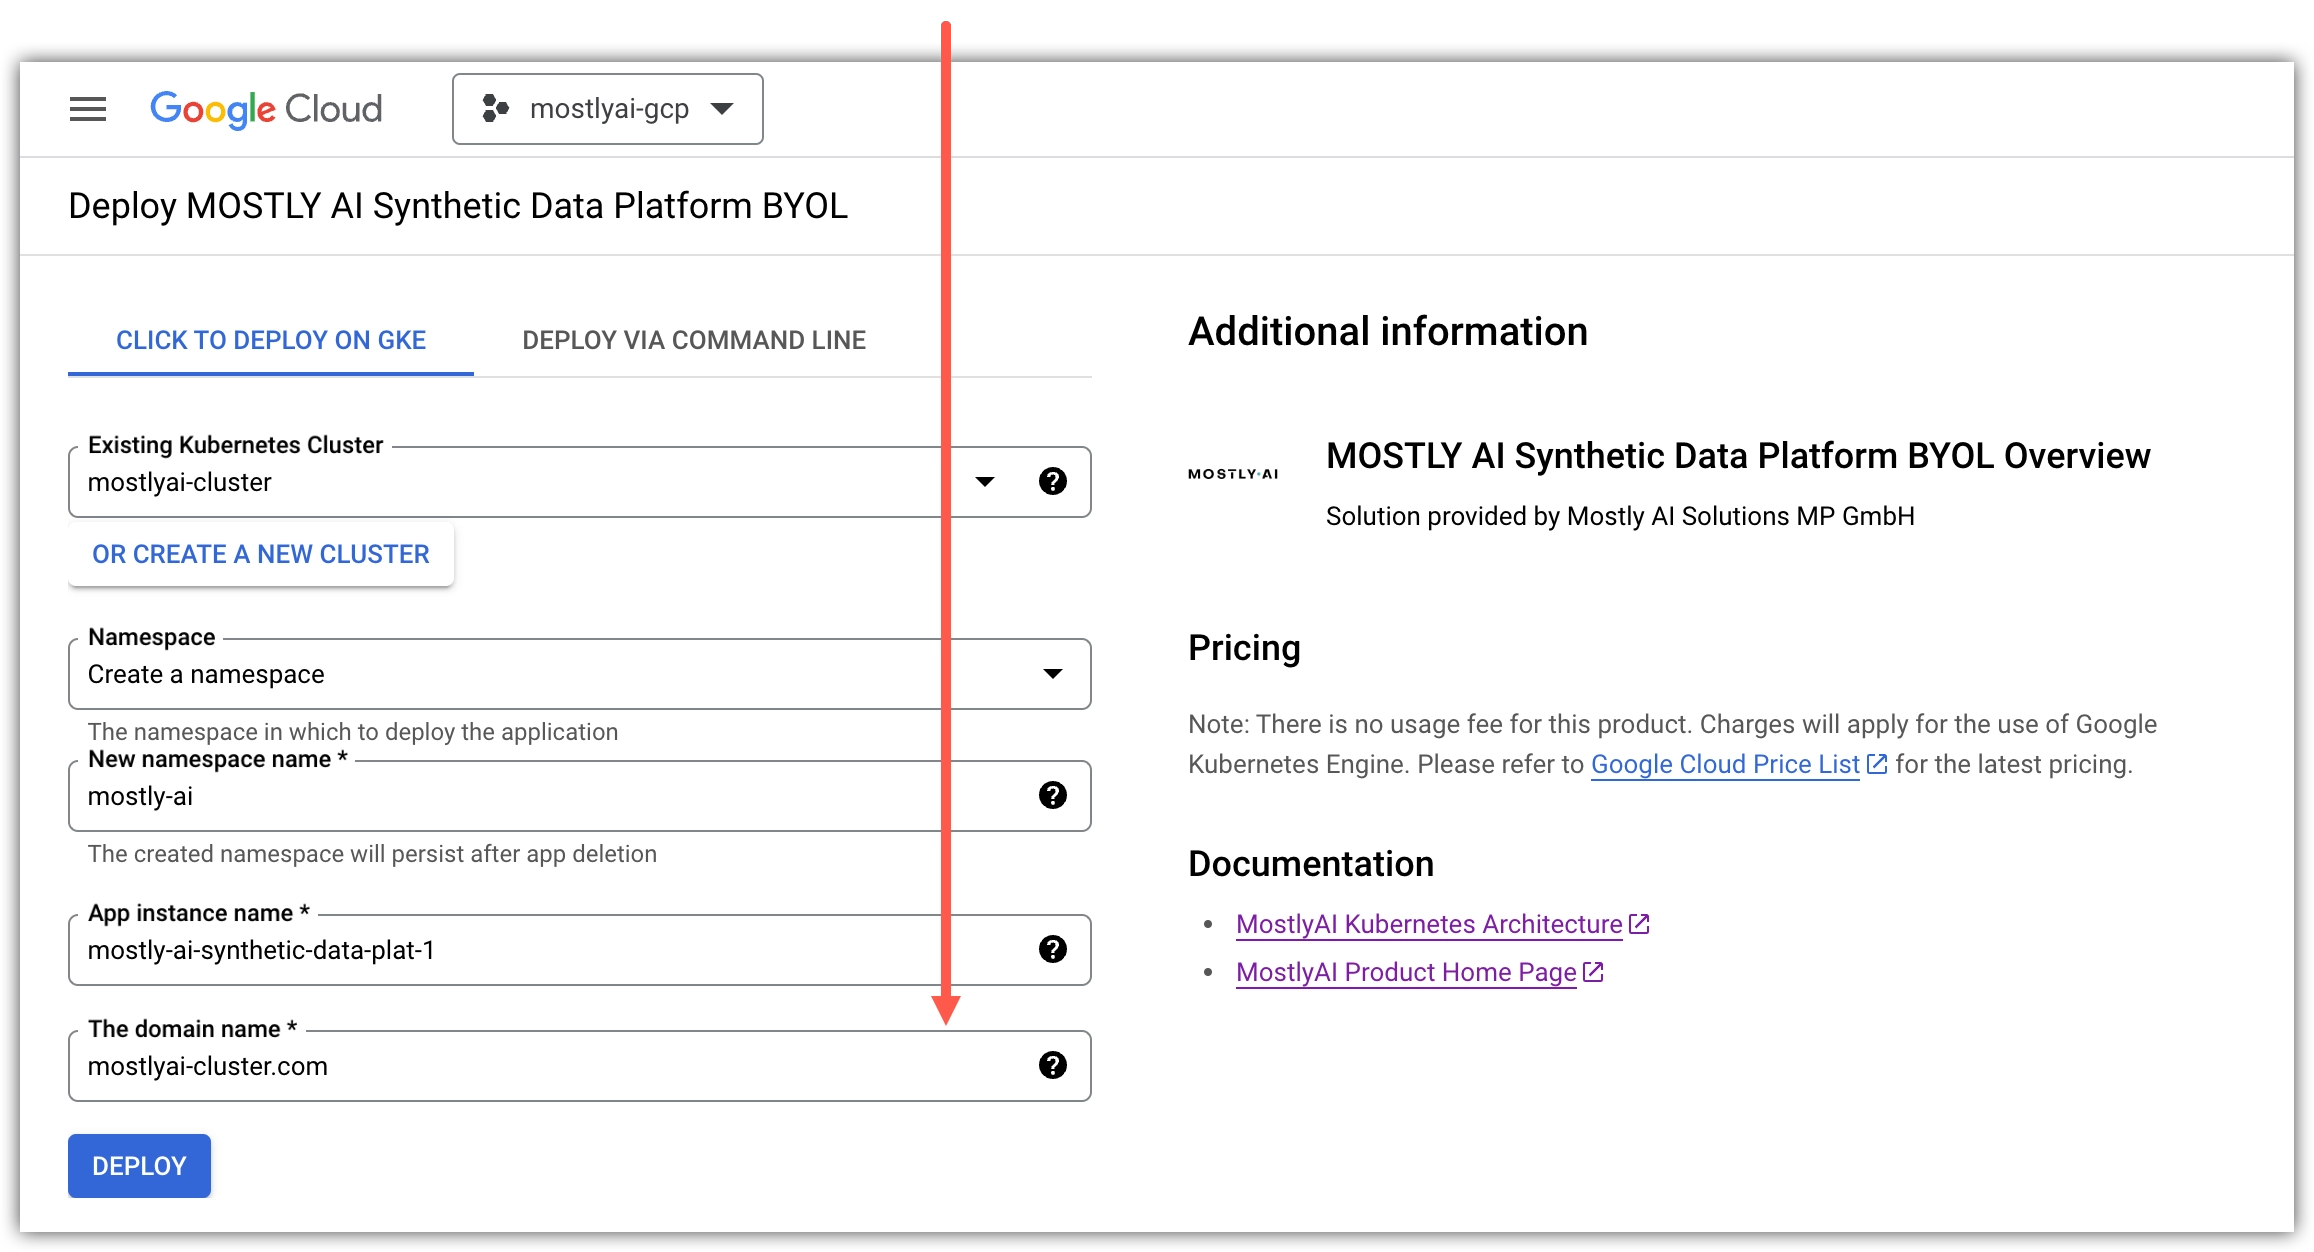
- Click DEPLOY.
Result
Google Cloud redirects your browser to the Applications tab of your GKE cluster and shows the deployment progress.

When the deployment completes, the Application details page lists all components and their status.

Deploy manually with MOSTLY AI Helm chart
If you wish to deploy MOSTLY AI manually with the Helm chart, you need to obtain the Helm chart from your MOSTLY AI Customer Experience Manager. You can then configure your deployment in the values.yaml file and use the helm command to start the deployment process.
The values.yaml file is part of the MOSTLY AI Helm chart. The Helm chart includes configuration files that define the resources and configurations needed to deploy MOSTLY AI.
Steps
- Open the
values.yamlfile in a text editor. - At the start, set the application domain name to an FQDN.
💡
miniois the shared storage service.values.yaml_customerInstallation: domainNames: mostly-ai: &fqdn yourfqdn.com ``` - (Optional) Apply one of the configurations below depending on whether you intend to use TLS-encrypted access to the MOSTLY AI application.
➡️ You use an TLS certificate. Replaceyour-tls-secretwith the TLS secret name as defined in your cluster configuration.💡Your IT department or Kubernetes administrator creates the FQDN and its TLS certificate and adds it to the configuration of your cluster. When added, it comes with a TLS secret name that you can define in thevalues.yamlfile. For details, see Configure your domain TLS certificate.values.yaml_customerInstallation: ... deploymentSettings: tlsSecretName: &tlsSecretName your-tls-secret ... ``` **➡️ You do not use an TLS certificate**. Replace the `your-tls-secret` with an empty string and, for `global.tls`, set `enabled` to `false`. ```yaml filename="values.yaml" copy {(4, 9)} _customerInstallation: ... deploymentSettings: tlsSecretName: &tlsSecretName [] # your-tls-secret ... global: ... tls: enabled: false ... ``` - (Optional) If you host third-party container images in an internal repository, replace
docker.ioinregistryFor3rdPartyComponents.values.yaml_customerInstallation: ... deploymentSettings: ... registryFor3rdPartyComponents: ®istryFor3rdPartyComponents docker.io ... - (Optional) If you need to host MOSTLY AI container images in an internal repository, replace
quay.io/mostlyaiinmostlyRegistry.values.yaml_customerInstallation: ... deploymentSettings: ... mostlyRegistry: &mostlyRegistry quay.io/mostlyai ... - (Optional) If you intend to use the MOSTLY AI image repository at
quay.io/mostlyai, set its secret inmostlyRegistryDockerConfigJson.💡To obtain the secret, contact your MOSTLY AI Customer Experience Engineer.
_customerInstallation:
...
  deploymentSettings:
  ...
    mostlyRegistryDockerConfigJson: &mostlyRegistryDockerConfigJson <HARBOR_SECRET>
...
Result
Your values.yaml file is now configured with the required settings for your MOSTLY AI deployment.
Result
The MOSTLY AI applications and services pods are queued for start up in your GKE cluster.
What’s next
You can track the startup progress in Kubernetes Engine on the Workloads tab. While the pods are starting, you might see the status column showing errors, such as Does not have minimum availability.
Give the pods some time (~5-10 minutes) to start and establish the necessary connections between services.
After you see that all pods have a successful startup, you can continue with the post-deployment tasks.
Post-deployment
With the MOSTLY AI pods running, you can now log in to your MOSTLY AI deployment for the first time.
Log in to your MOSTLY AI deployment
Log in for the first time to your MOSTLY AI deployment to set a new password for the superadmin user.
Prerequisites
Contact MOSTLY AI to obtain the supeadmin credentials as you need them to log in for the first time.
Steps
- Open your FQDN in your browser.
Step result: You Sign in page for your MOSTLY AI deployment opens.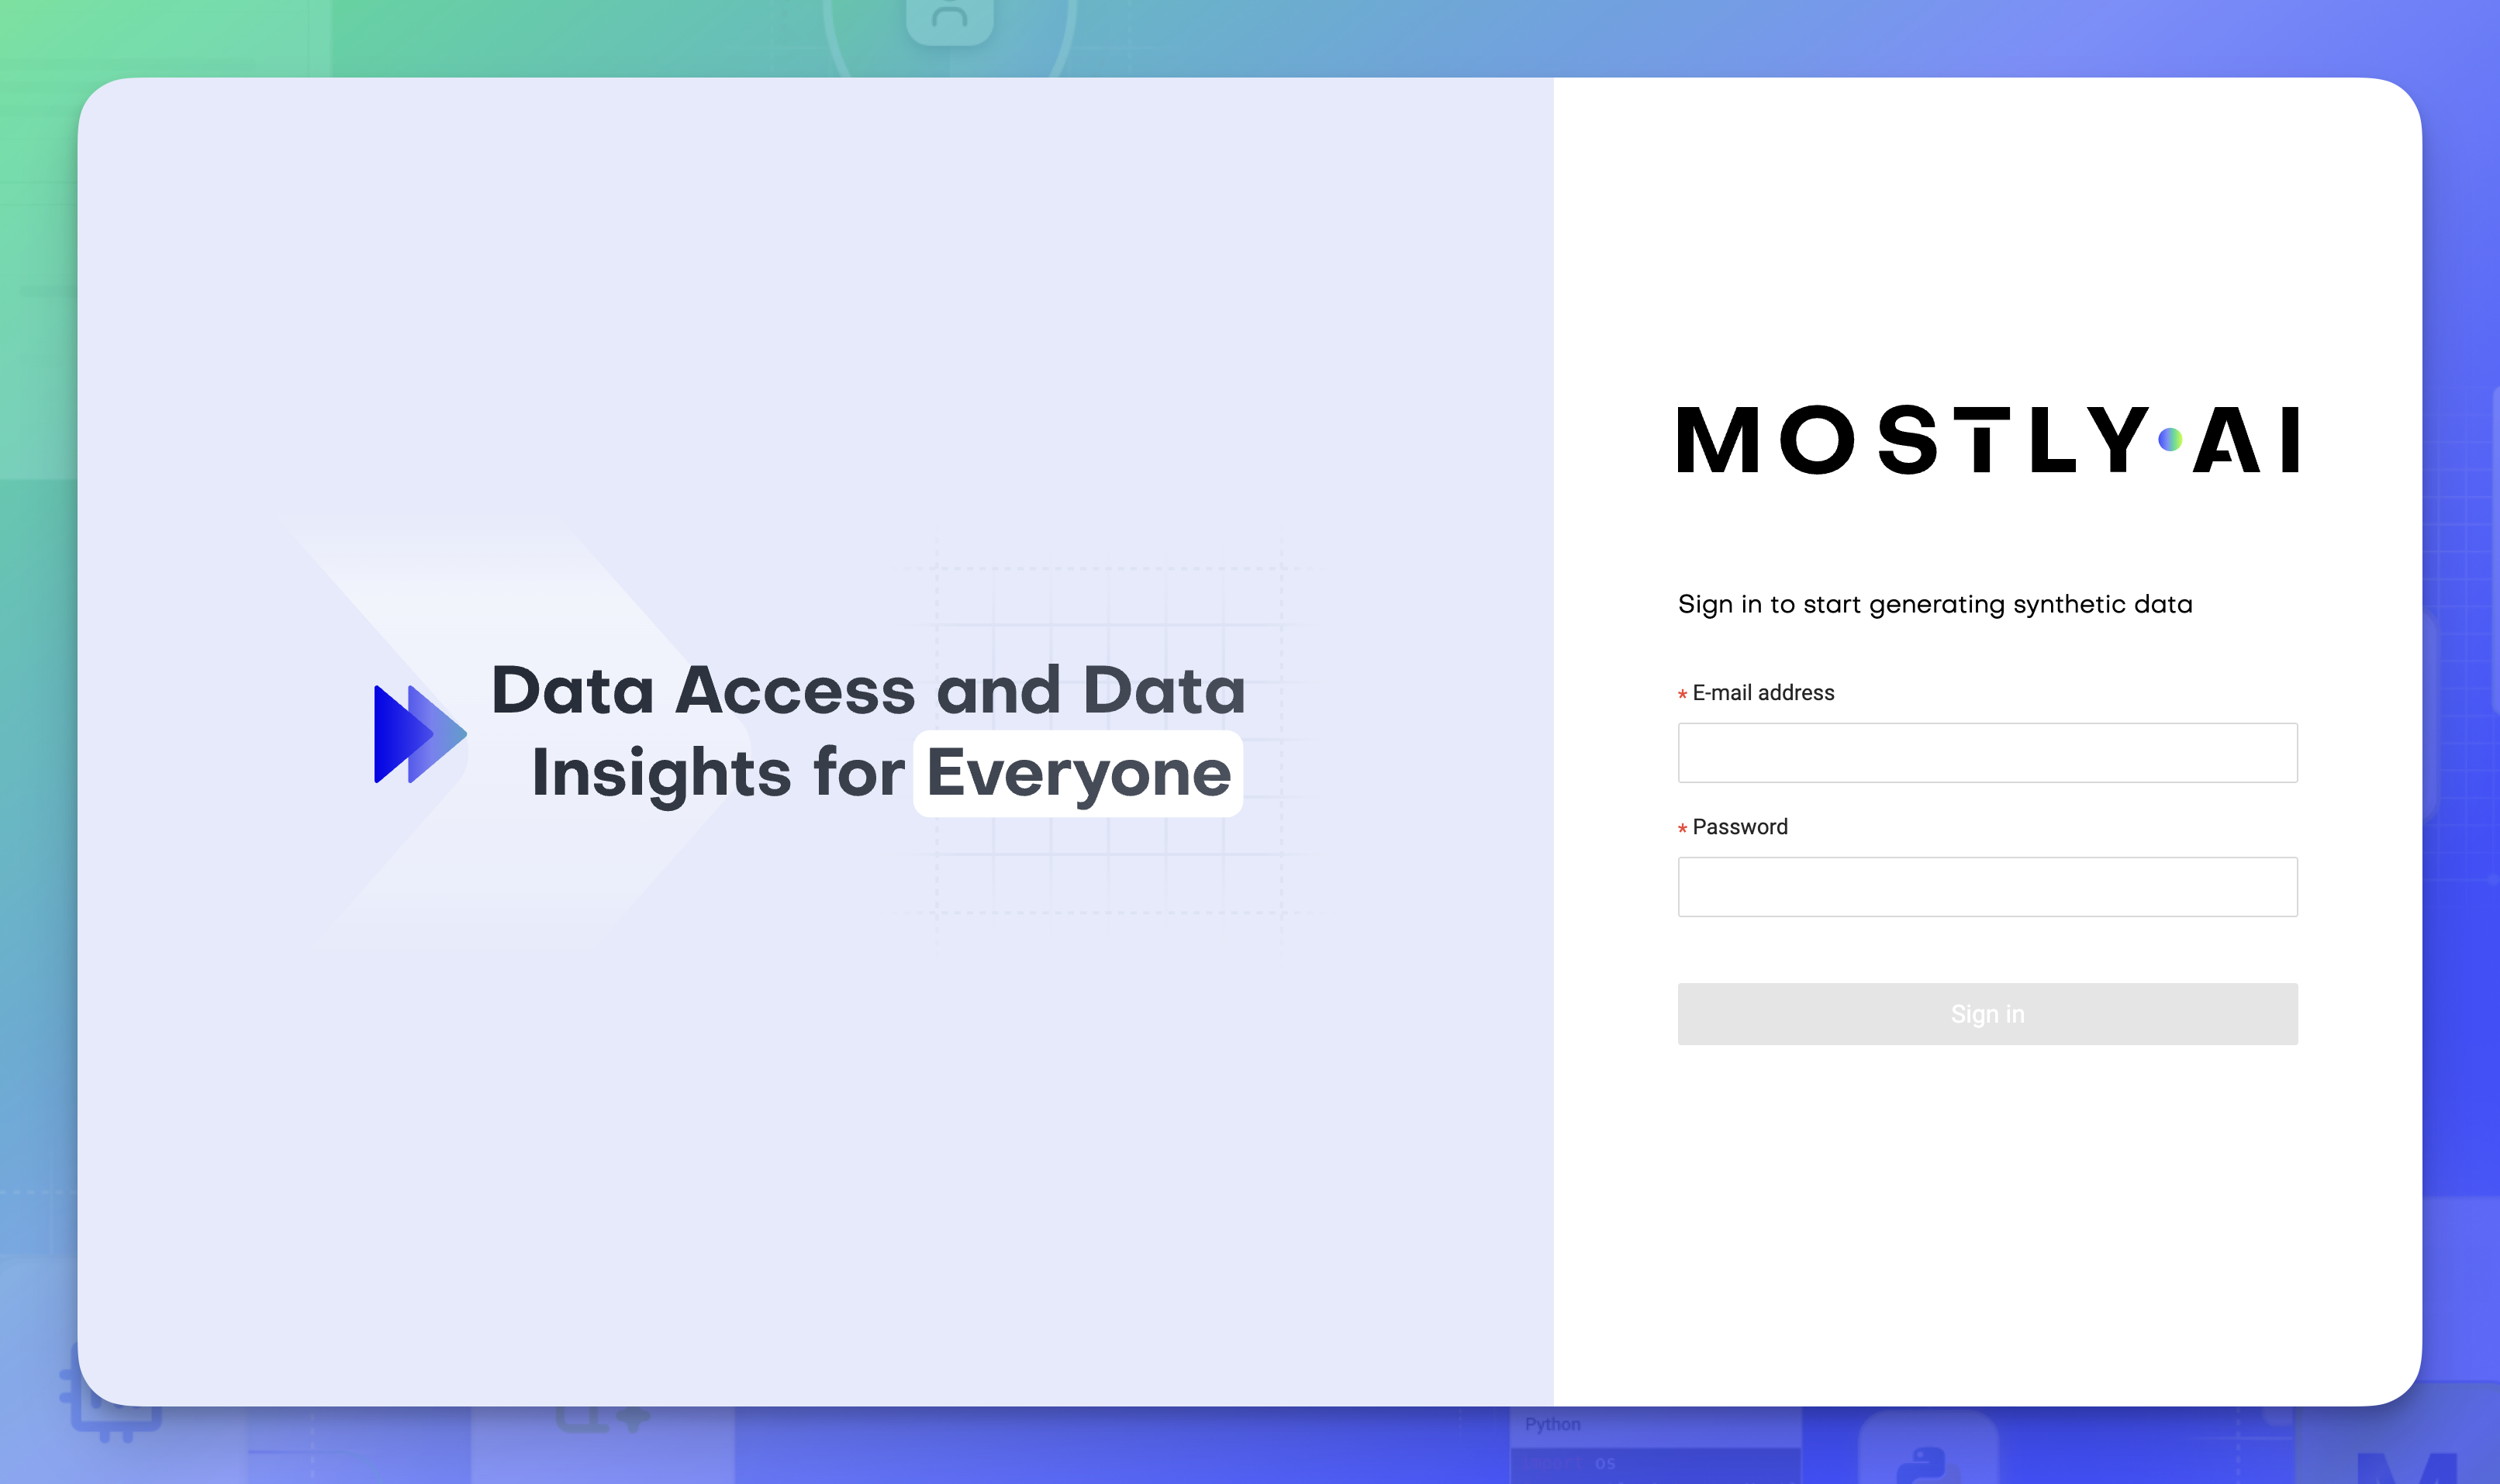
- Enter the superadmin credentials and click Sign in.
- Provide a new password and click Change password.
Result
Your superadmin password is now changed and you can use it to log in again to your MOSTLY AI deployment.