Deploy MOSTLY AI to a minikube cluster
One of the options to install MOSTLY AI without the need of a multi-node Kubernetes cluster is to do so on a local Kubernetes cluster with minikube. More specifically, this page covers the steps to install MOSTLY AI on a Ubuntu Server LTS.
Prerequisites
- A virtual machine or server that meets the minimum requirements.
- Ubuntu Server LTS. For example, in terms of an AWS EC2 instance, your virtual machine could be of the type
m5a.8xlarge - 24 vCPUs minimum
- 48GB RAM minimum
- 150-200GB disk spae
- Ubuntu Server LTS. For example, in terms of an AWS EC2 instance, your virtual machine could be of the type
- Microsoft Remote Desktop application
Pre-deploy
Task 1: Add the Docker repository to APT sources
- Install the packages needed to use a repository over HTTPS.
sudo apt-get install ca-certificates curl gnupg lsb-release - Add the official Docker GPG key.
sudo curl -fsSL https://download.docker.com/linux/ubuntu/gpg | sudo gpg --dearmor -o /usr/share/keyrings/docker-archive-keyring.gpg - Add the Docker repository to APT sources.
echo "deb [arch=$(dpkg --print-architecture) signed-by=/usr/share/keyrings/docker-archive-keyring.gpg] https://download.docker.com/linux/ubuntu $(lsb_release -cs) stable" | sudo tee /etc/apt/sources.list.d/docker.list > /dev/null - Update the
aptpackage index.sudo apt-get update
Task 2: Install Docker Engine
- Install Docker, containerd, and Docker Compose.
sudo apt-get install docker-ce docker-ce-cli containerd.io docker-compose-plugin -y - Start Docker.
sudo systemctl start docker
Task 3: Install minikube
- Download the minikube Linux binaries.
curl -LO https://storage.googleapis.com/minikube/releases/latest/minikube-linux-amd64 - Install the minikube binaries in
/usr/local/bin/minikube.sudo install minikube-linux-amd64 /usr/local/bin/minikube
Task 4: Install kubectl
- Download and install the
kubectlLinux binaries.sudo snap install kubectl --classic - Check the
kubectlversion.The output should be similar to the following:kubectl version --clientClient Version: v1.28.3 Kustomize Version: v5.0.4-0.20230601165947-6ce0bf390ce3
Task 5: Install Ubuntu Desktop
- Switch from the current user to the super user account
su.sudo su - - Change the password for the
ubuntuuser.passwd ubuntu - Update the APT package index.
sudo apt update - Install the Ubuntu Desktop package.
💡The dependency list for the Ubuntu Desktop is long. It might take several minutes to install all dependent packages.
bash copy sudo apt install ubuntu-desktop - Install the
xrdppackage to enable graphical login via RDP (Microsoft Remote Desktop Protocol).sudo apt install xrdp - Verify the installation of
xrdp.The output from the command should be similar to the following:sudo systemctl status xrdp● xrdp.service - xrdp daemon Loaded: loaded (/lib/systemd/system/xrdp.service; enabled; vendor preset: enabled) Active: active (running) since Tue 2023-11-07 20:05:16 UTC; 19s ago Docs: man:xrdp(8) man:xrdp.ini(5) Process: 32722 ExecStartPre=/bin/sh /usr/share/xrdp/socksetup (code=exited, status=0/SUCCESS) Process: 32730 ExecStart=/usr/sbin/xrdp $XRDP_OPTIONS (code=exited, status=0/SUCCESS) Main PID: 32731 (xrdp) Tasks: 1 (limit: 75773) Memory: 856.0K CPU: 16ms CGroup: /system.slice/xrdp.service └─32731 /usr/sbin/xrdp - Allow connections through the Remote Desktop port
3389.The output from the command should be similar to the following:sudo ufw allow 3389Rules updated Rules updated (v6)
Task 6: Allow RDP connection to the machine
This task describes the process to allow RDP connections to an AWS EC2 instance.
Steps
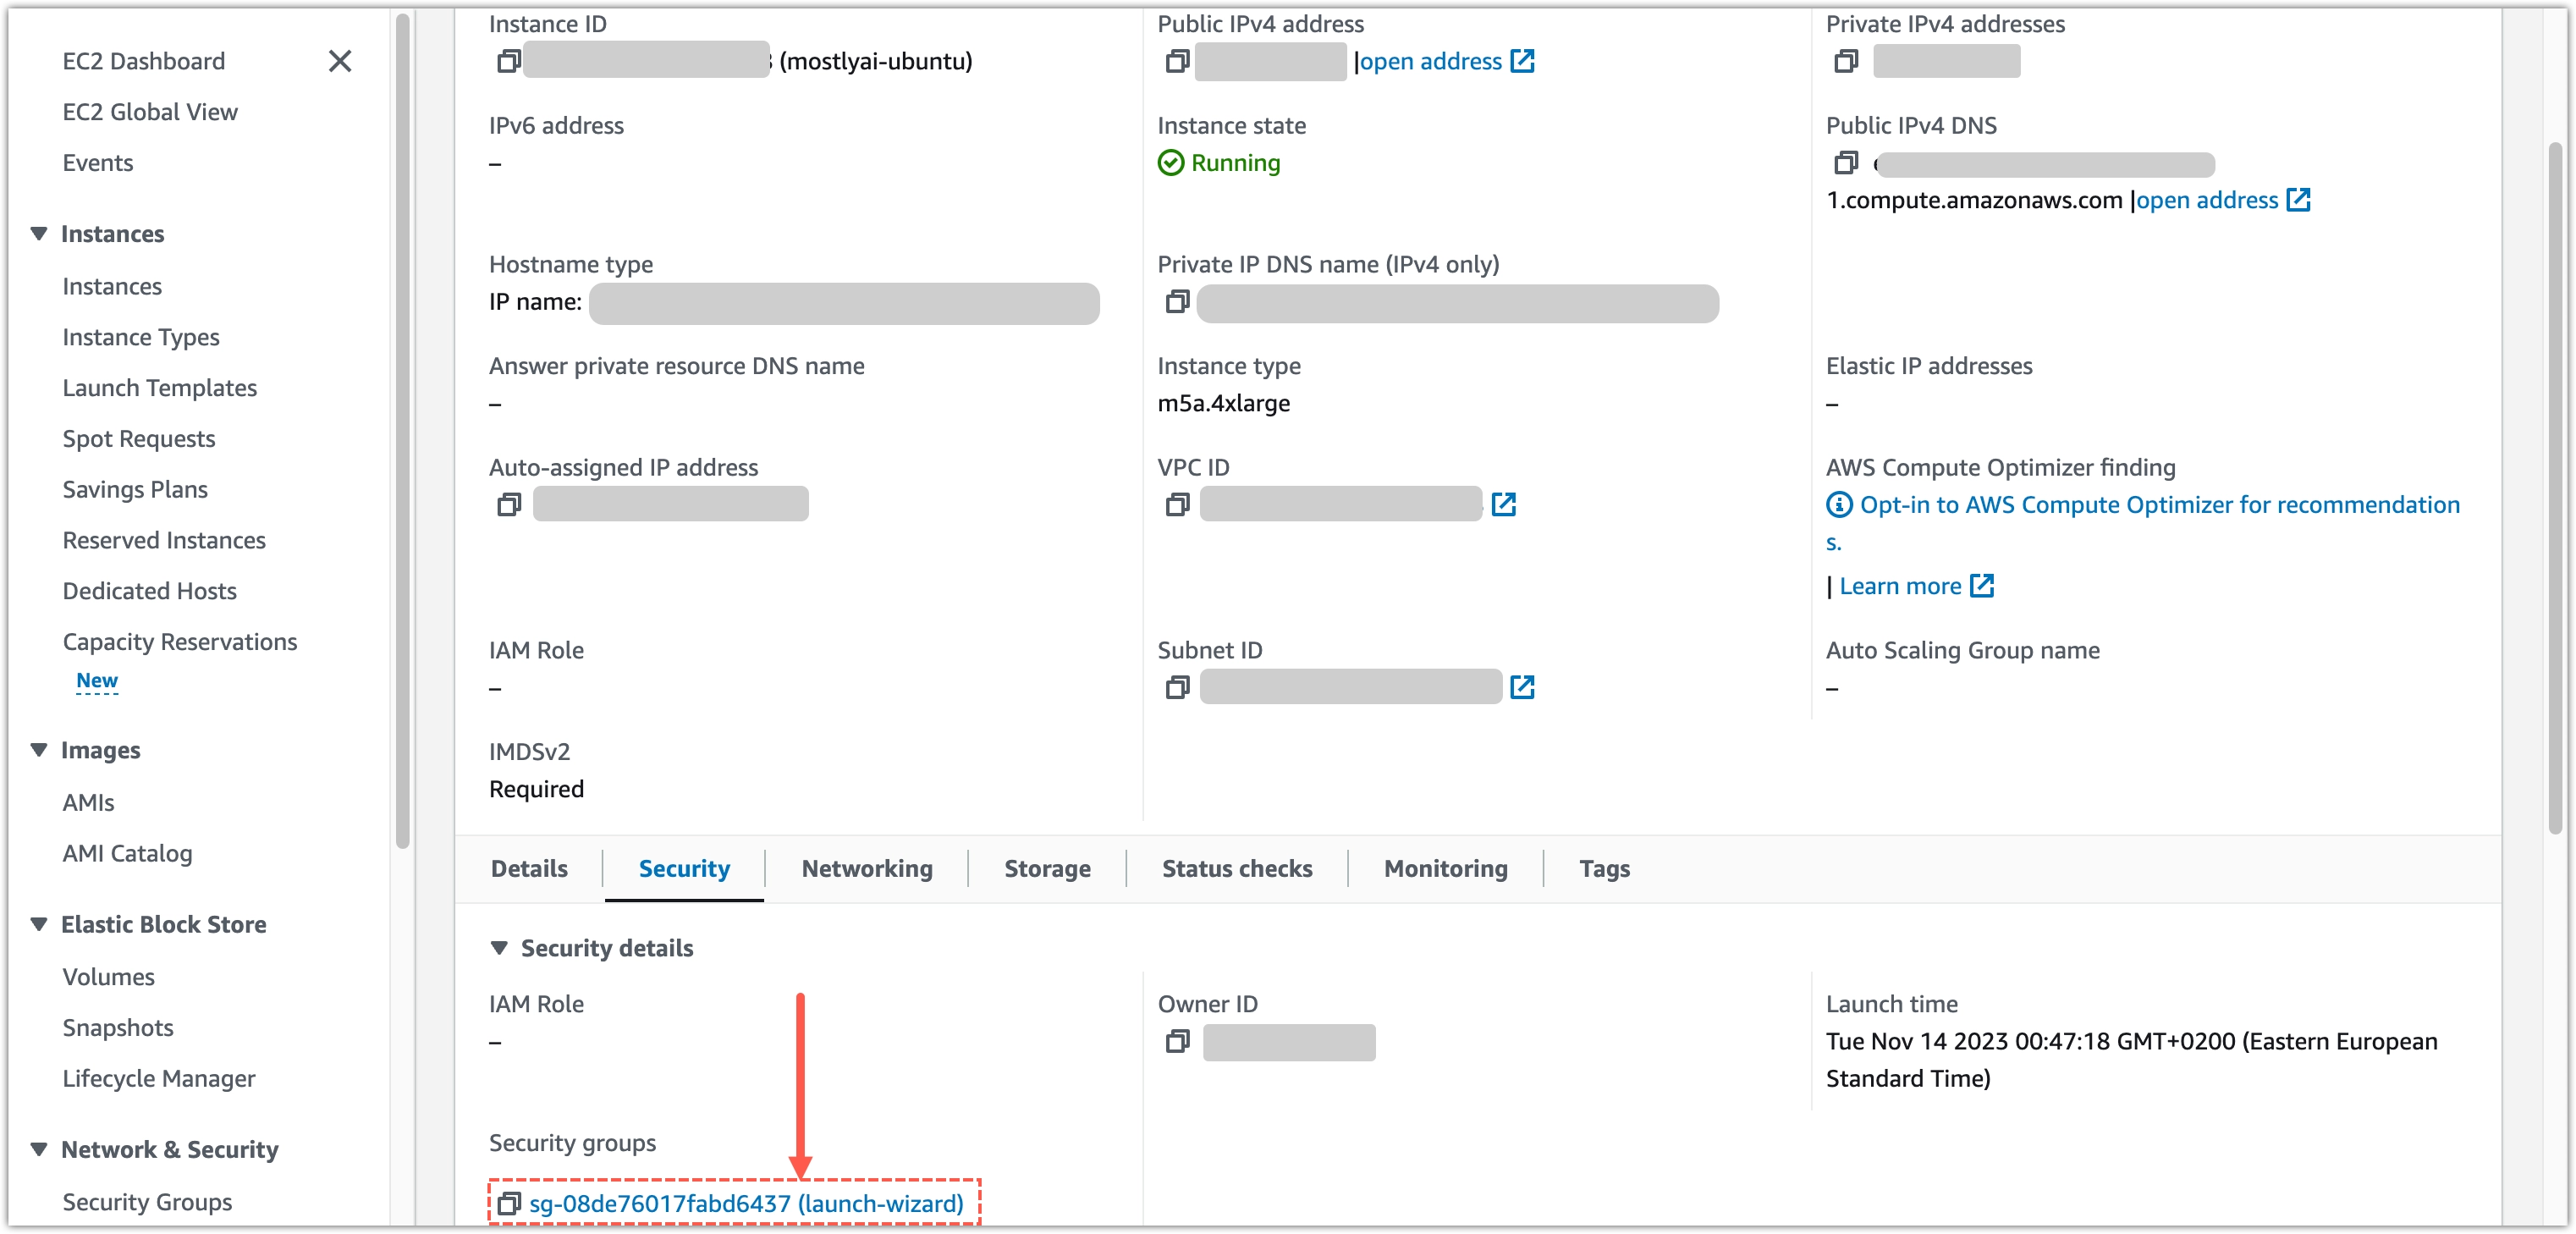
- In AWS, open EC2 and open your instance details.
- Select the Security tab from the bottom.
- Click the Security group for the instance.
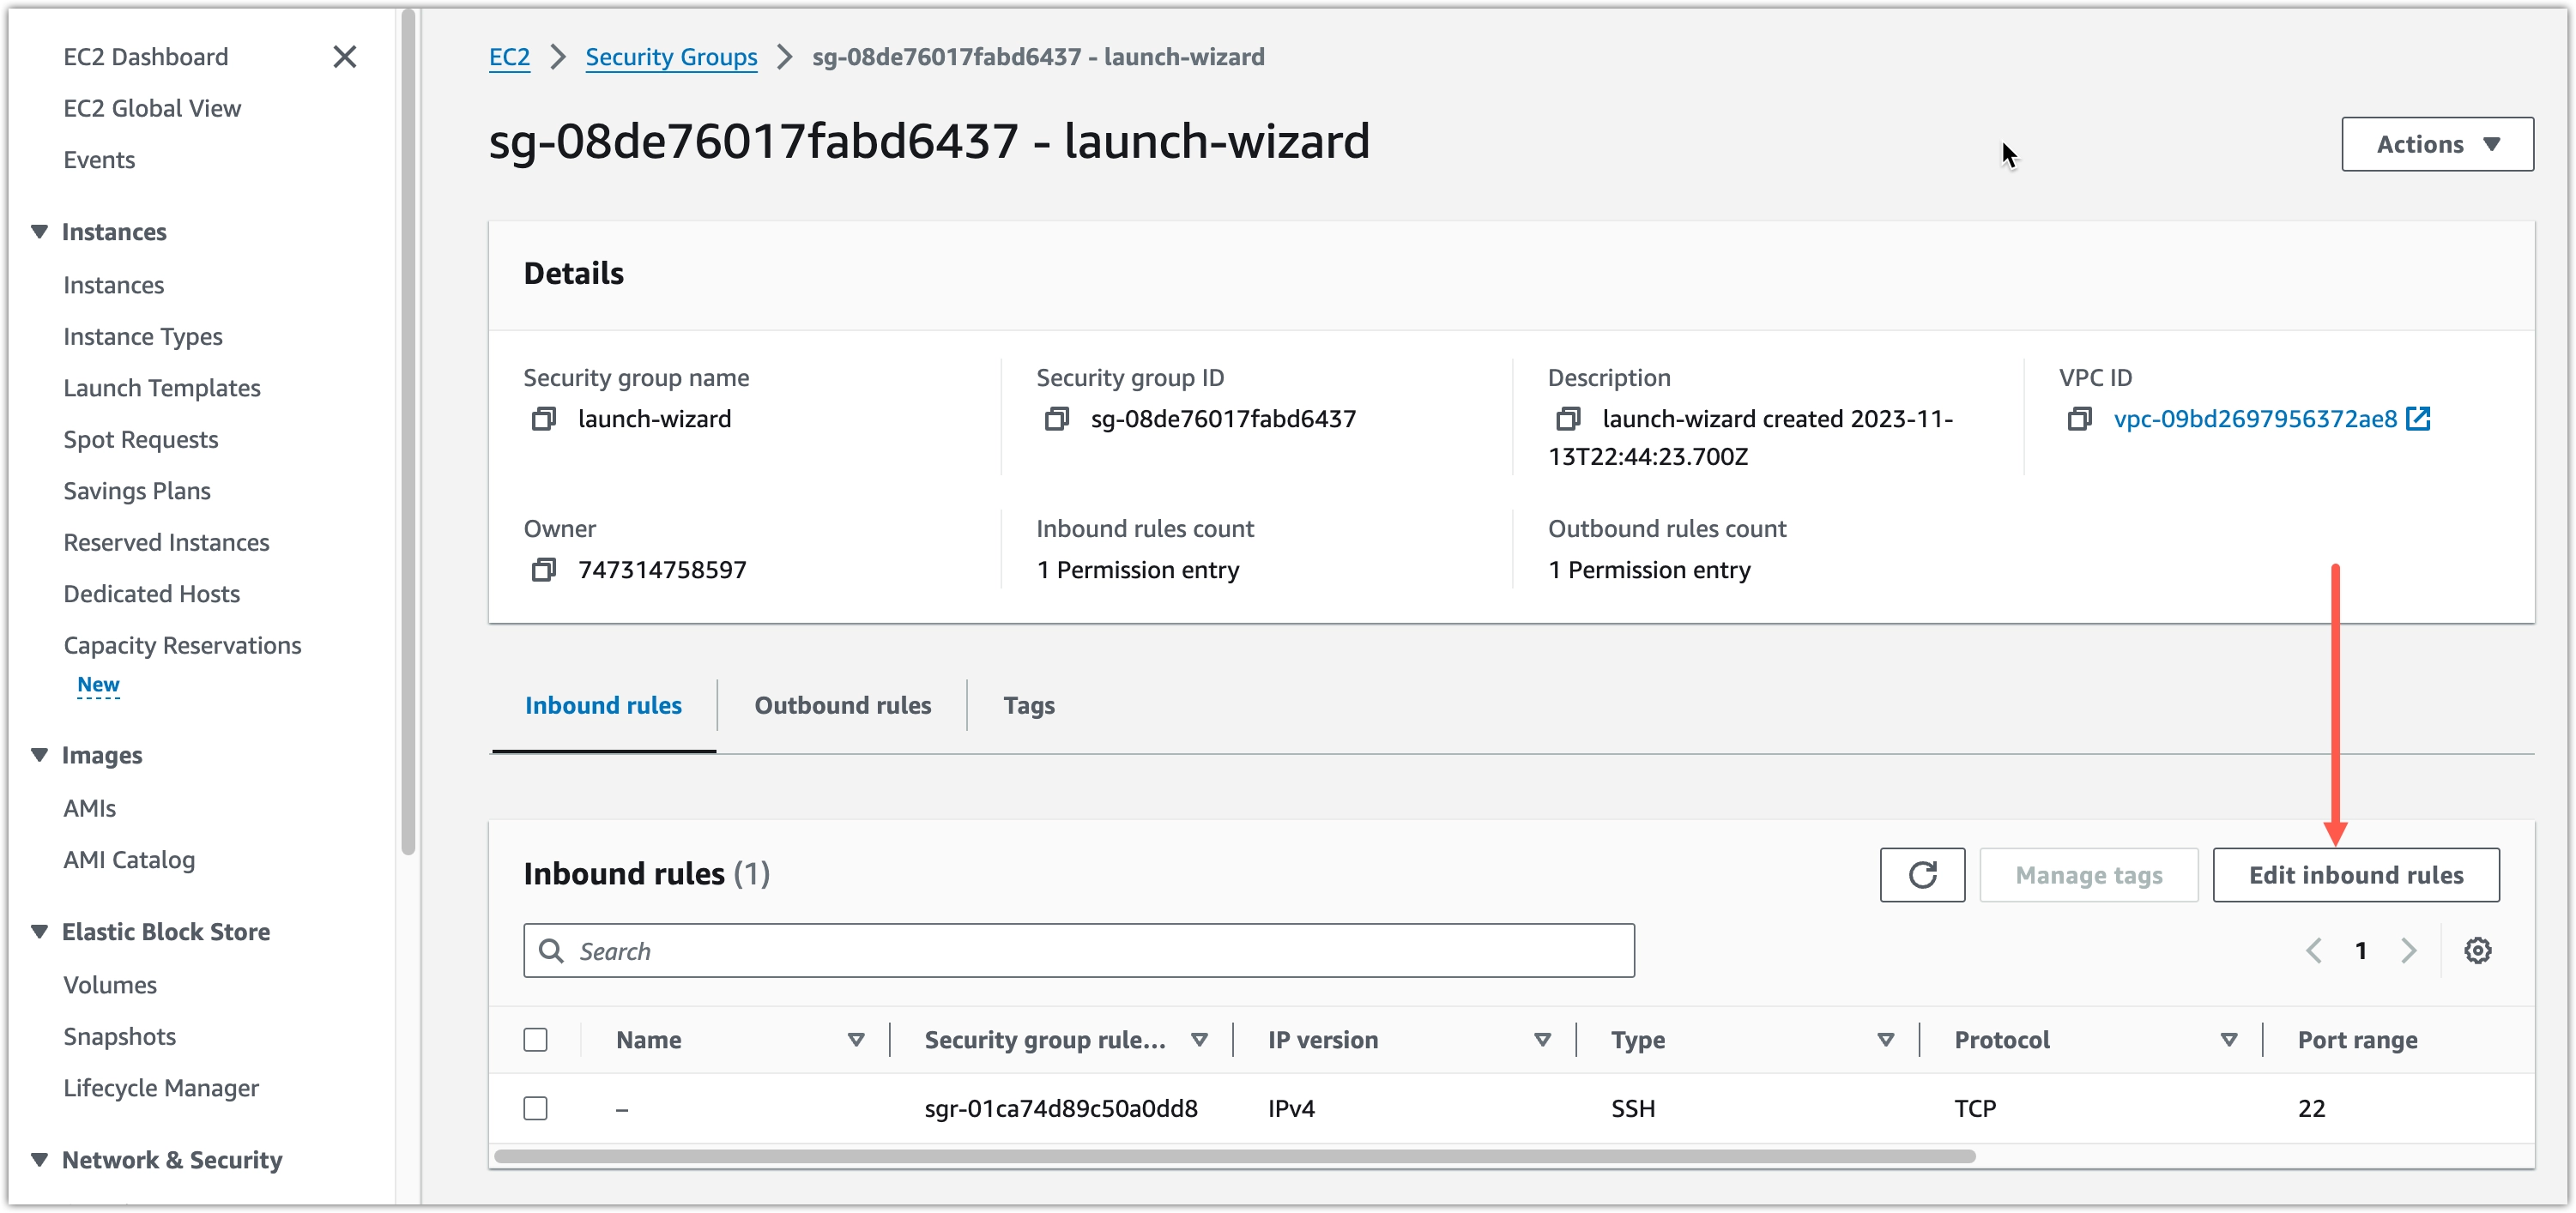
- For Inbound rules at the bottom, click Edit inbound rules.
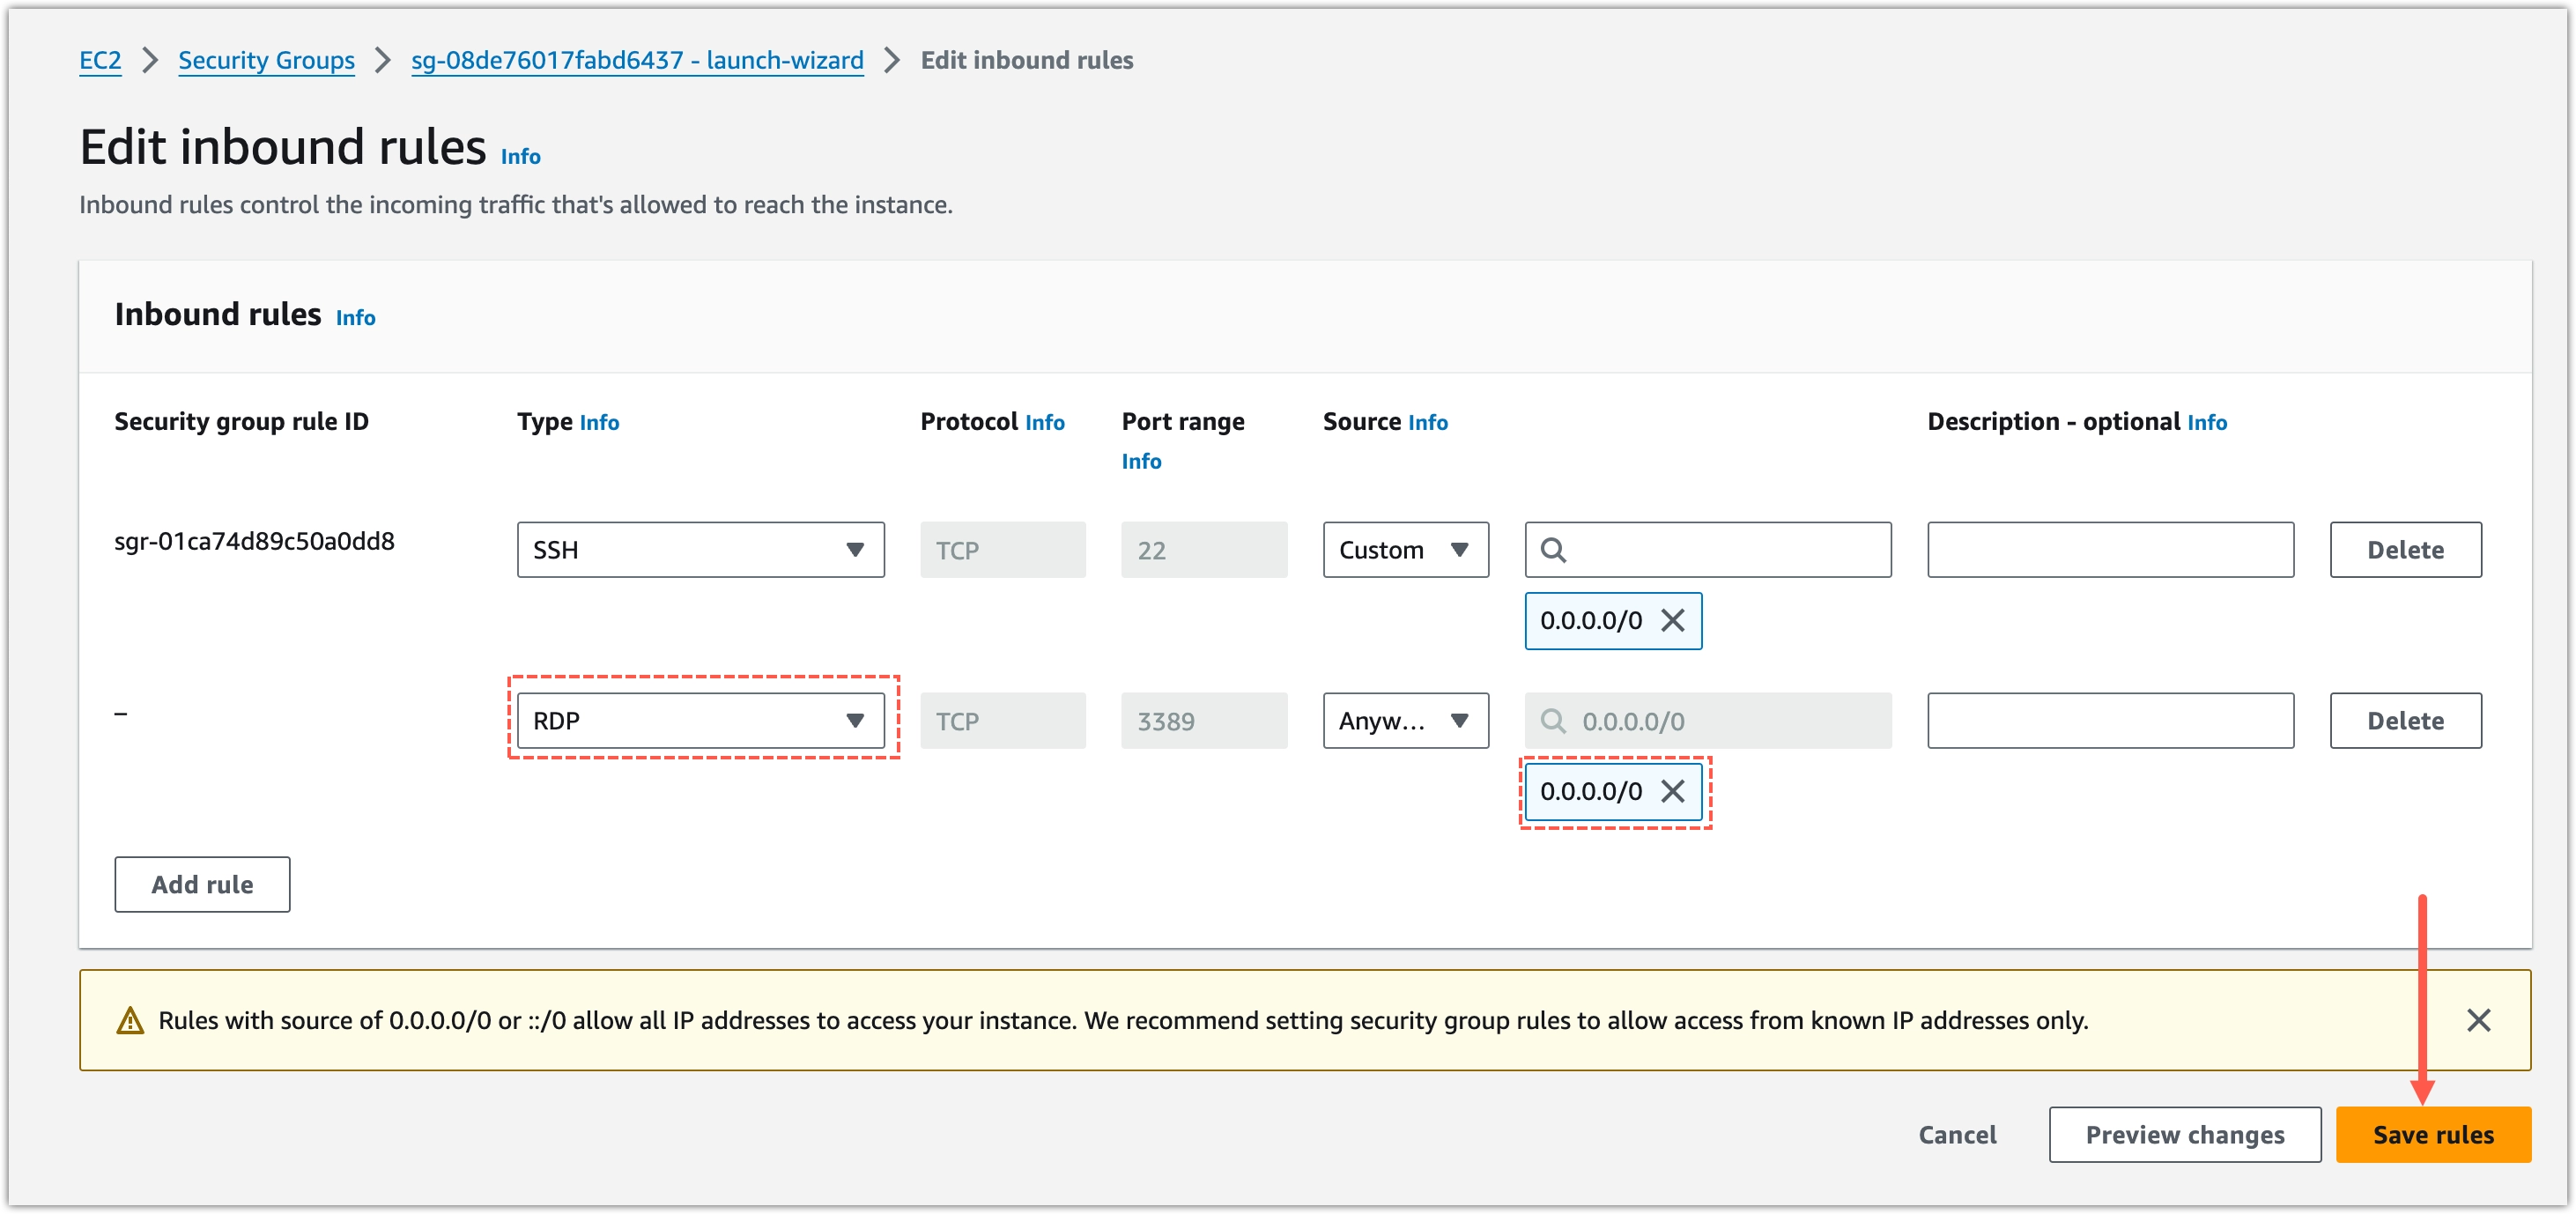
- For Type, select RDP and for Source, select 0.0.0.0/0.
- Click Save rules.
Result
You can now use Remote Desktop to connect to your machine.
Task 7: Connect to the machine using Remote Desktop
This task describes the process to use Microsoft Remote Desktop for macOS. The same process should be similar on any other operating system.
Prerequisites
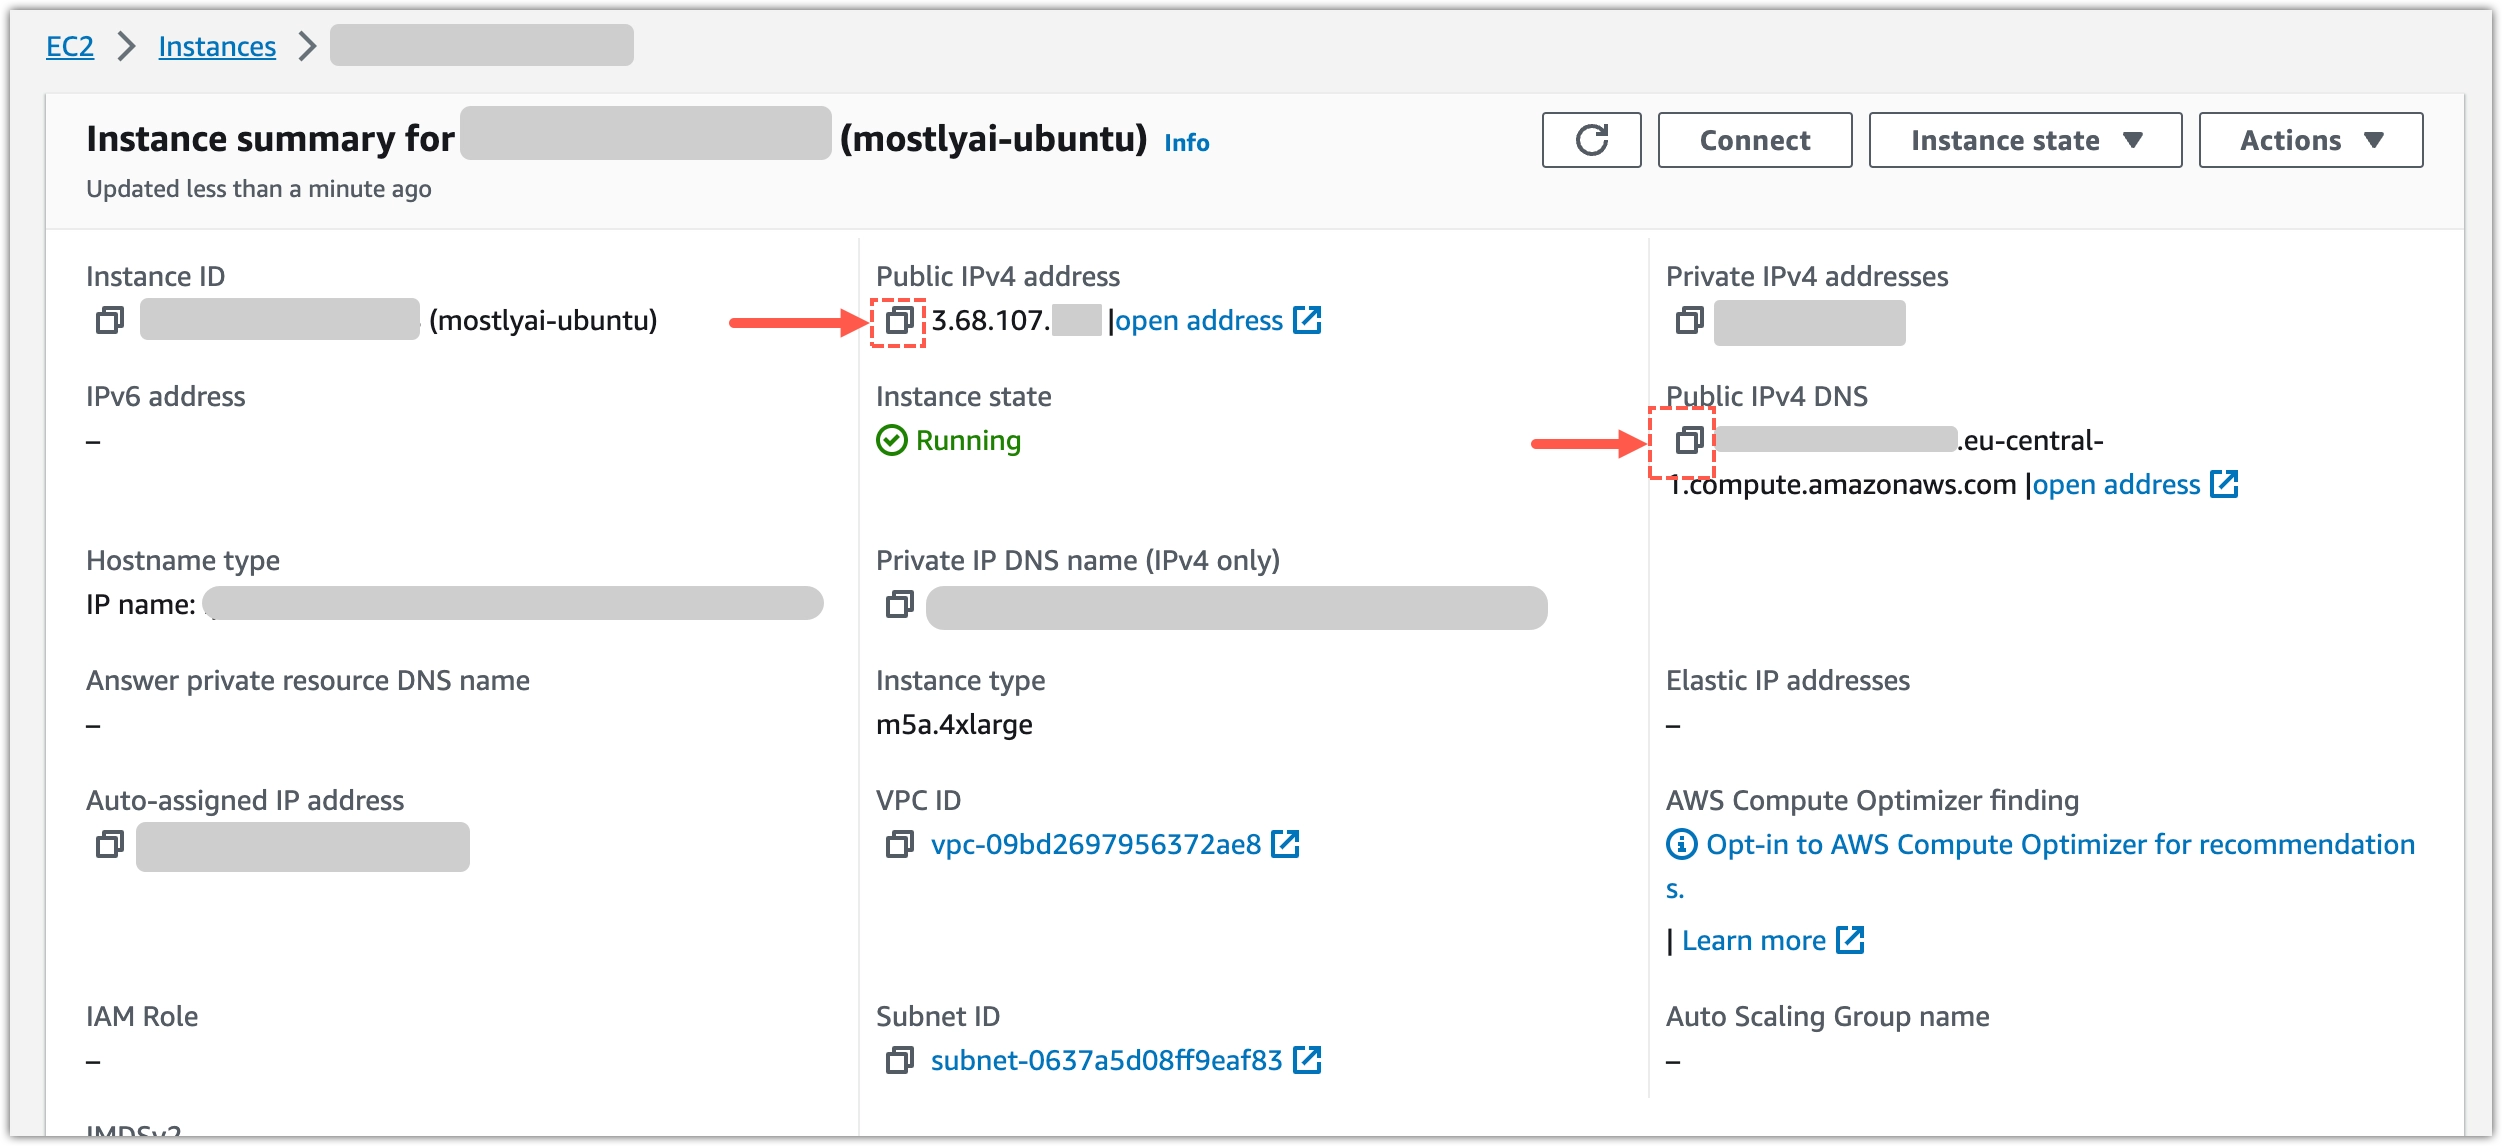
Obtain the public IPv4 address or DNS of your machine. For example, for an EC2 instance, you can copy the value from the Public IPv4 DNS or the Public IPv4 address fields.
Steps
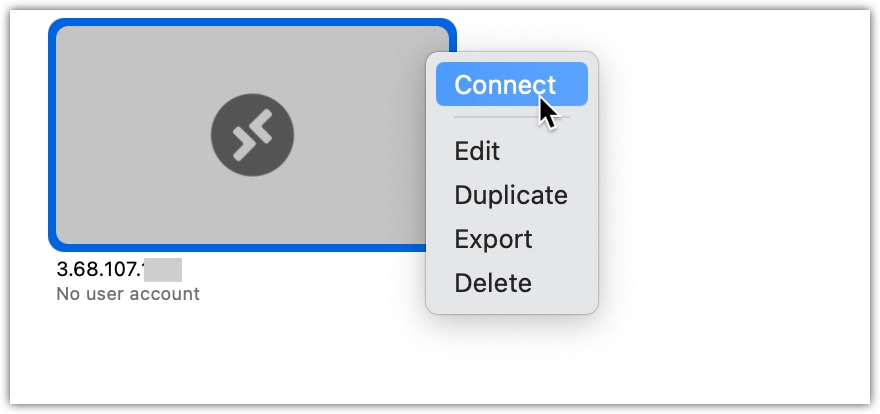
- Open the Remote Desktop application.
- Select Add PC.
- Paste the IP address or DNS of your machine and click Add.
- Double-click the new machine or right-click and select Connect.
- Enter the
ubuntuusername and password your defined in Task 5. - Enter the password again at the authentication prompt.
Result
You can now start a Terminal app and continue with Ubuntu Desktop.
Task 8: Start minikube
From the Ubuntu Terminal app, start minikub following the steps below.
Prerequisites
Add the docker user to the docker group.
bash copy sudo usermod -aG docker $USER && newgrp docker
Steps
- Start a minikube cluster.
minikube start --driver=docker --memory 24000 --cpus 14The output from the command should be similar to the following:💡Tip
Use the provided values of 24 GB memory and 14 CPU cores as the minimum requirements to set the default compute required by MOSTLY AI. For all other purposes, increase the values as necessary.
😀 minikube v1.31.2 on Ubuntu 22.04 ✨ Using the docker driver based on user configuration 📌 Using Docker driver with root privileges 👍 Starting control plane node minikube in cluster minikube 🚜 Pulling base image ... 💾 Downloading Kubernetes v1.27.4 preload ... > preloaded-images-k8s-v18-v1...: 393.21 MiB / 393.21 MiB 100.00% 39.28 M > gcr.io/k8s-minikube/kicbase...: 447.62 MiB / 447.62 MiB 100.00% 35.84 M 🔥 Creating docker container (CPUs=2, Memory=24000MB) ... 🐳 Preparing Kubernetes v1.27.4 on Docker 24.0.4 ... ▪ Generating certificates and keys ... ▪ Booting up control plane ... ▪ Configuring RBAC rules ... 📎 Configuring bridge CNI (Container Networking Interface) ... ▪ Using image gcr.io/k8s-minikube/storage-provisioner:v5 🔍 Verifying Kubernetes components... 🌟 Enabled addons: storage-provisioner, default-storageclass 🏄 Done! kubectl is now configured to use "minikube" cluster and "default" namespace by default - (Optional) Make
dockerthe default driver. The next time you start minikube, you do not need to specify a driver.minikube config set driver docker
Task 9: Create a namespace to install MOSTLY AI
- Verify the installation of
kubectlby listing your pods and namespaces.The output should be similar to the following listing.kubectl get po -ANAMESPACE NAME READY STATUS RESTARTS AGE kube-system coredns-787d4945fb-qw4r8 1/1 Running 0 1m19s kube-system etcd-minikube 1/1 Running 0 1m32s kube-system kube-apiserver-minikube 1/1 Running 0 1m33s kube-system kube-controller-manager-minikube 1/1 Running 0 1m33s kube-system kube-proxy-bx9kb 1/1 Running 0 1m19s kube-system kube-scheduler-minikub 1/1 Running 0 1m34s kube-system storage-provisioner 1/1 Running 0 1m31s - Create a namespace for MOSTLY AI.
kubectl create ns mostly-ai - Verify the newly created
mostly-ainamespace.The resulting listing should be similar to the following.kubectl get nsNAME STATUS AGE default Active 3m kube-node-lease Active 3m kube-public Active 3m kube-system Active 3m mostly-ai Active 37s - Set the
mostly-ainamespace as the default.If successful, the result from the command is the following:kubectl config set-context --current --namespace=mostly-aiContext "minikube" modified.
Task 10: Install required minikube addons
- Install the NGINX add-on.
minikube addons enable ingress - Install the volume snapshots add-on.
minikube addons enable volumesnapshots - Install the CSI hostpath driver add-on.
minikube addons enable csi-hostpath-driver - Verify the installed add-ons.
The output from the command is a table that should contain the highlight lines below:
minikube addons list|-----------------------------|----------|--------------|--------------------------------| | ADDON NAME | PROFILE | STATUS | MAINTAINER | |-----------------------------|----------|--------------|--------------------------------| | csi-hostpath-driver | minikube | enabled ✅ | Kubernetes | | ingress | minikube | enabled ✅ | Kubernetes | | volumesnapshots | minikube | enabled ✅ | Kubernetes | |-----------------------------|----------|--------------|--------------------------------|
Task 11: Install Helm
- Add the Helm GPG key.
curl https://baltocdn.com/helm/signing.asc | gpg --dearmor | sudo tee /usr/share/keyrings/helm.gpg > /dev/null - Install the APT HTTPS transport to use repositories over HTTPS.
sudo apt-get install apt-transport-https --yes - Add the Helm repository to APT sources.
echo "deb [arch=$(dpkg --print-architecture) signed-by=/usr/share/keyrings/helm.gpg] https://baltocdn.com/helm/stable/debian/ all main" | sudo tee /etc/apt/sources.list.d/helm-stable-debian.list - Update the
aptpackage index.sudo apt-get update - Install Helm.
sudo apt-get install helm
Deploy
Task 12: Start minikube dashboard
With minikube running, you can open the minikube dashboard in a web browser and observer changes to the minikube cluster.
Steps
- In the machine, open a Terminal app.
- Start the minikube dashboard.
minikube dashboard
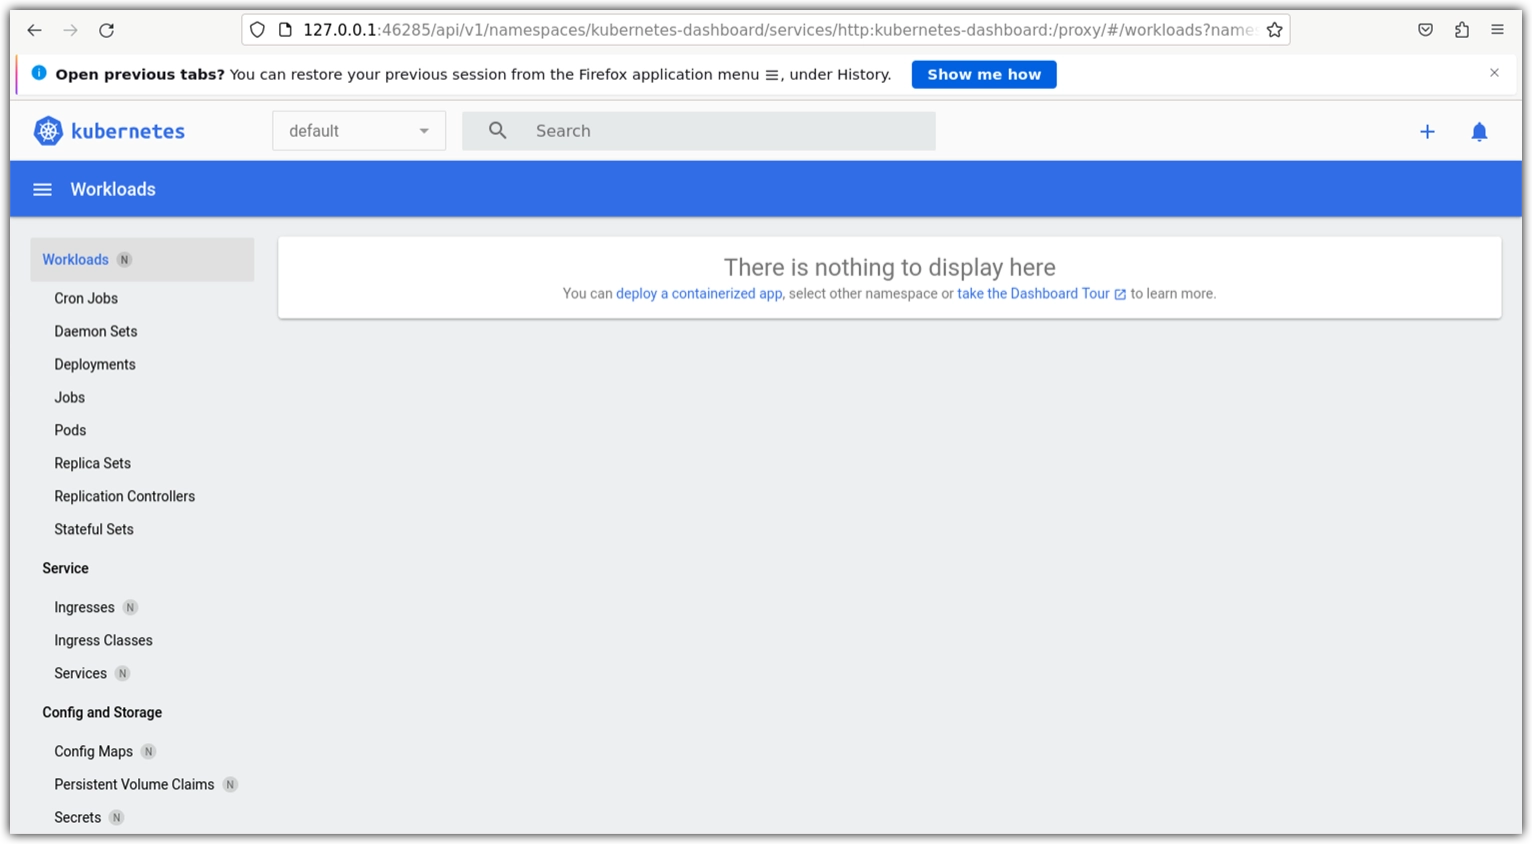
Result
In the default web browser, the minikube dashboard opens.
Task 13: Define a local DNS name
MOSTLY AI requires a fully-qualified domain (FQDN) name where the application accepts HTTPS connections from a web browser. In a minikube environment, you cannot use a FQDN. Because you this, you can set up a local DNS hostname in the /etc/hosts file.
By default, minikube exposes applications with an IP address 192.168.49.2. You can map that for your local DNS hostname in /etc/hosts.
Steps
- Edit
/etc/hosts.sudo vi /etc/hosts - Add the following line.
/etc/hosts
127.0.0.1 localhost
192.168.49.2 mostly.local
Result
When you now open mostly.local in a web browser, it will direct traffic to the MOSTLY AI app after you deploy it in the next section.
Task 14: Upload Helm chart
From your local computer, use scp to upload the MOSTLY AI Helm chart to the home folder of the machine that runs minikube.
Change KEYPAIR_FILENAME.pem to the actual key pair filename and IP_ADDRESS to the IPv4 address or DNS name of your machine.
scp -i KEYPAIR_FILENAME.pem MOSTLY_AI_Helm_chart.zip ubuntu@IP_ADDRESS:~Task 15: Edit values.yaml
- On the machine, unzip the Helm chart.
- Edit the
values.yamlfile as highlighted below.- At the start, set the application domain name to
mostly.local.💡miniois the shared storage service.values.yaml_customerInstallation: domainNames: mostly-ai: &fqdn mostly.local ``` - (Optional) Apply one of the configurations below depending on whether you intend to use SSL-encrypted access to the MOSTLY AI application.
➡️ You use an SSL certificate. Replaceyour-tls-secretwith the TLS secret name as defined in your cluster configuration.💡Your IT department or Kubernetes administrator creates the FQDN and its SSL certificate and adds it to the configuration of your cluster. When added, it comes with a TLS secret name that you can define in thevalues.yamlfile. For details, see Configure your domain SSL certificate.values.yaml_customerInstallation: ... deploymentSettings: tlsSecretName: &tlsSecretName your-tls-secret ... ``` **➡️ You do not use an SSL certificate**. Replace the `your-tls-secret` with an empty string and, for `global.tls`, set `enabled` to `false`. ```yaml filename="values.yaml" copy {(4, 9)} _customerInstallation: ... deploymentSettings: tlsSecretName: &tlsSecretName [] # your-tls-secret ... global: ... tls: enabled: false ... ``` - (Optional) If you host third-party container images in an internal repository, replace
docker.ioinregistryFor3rdPartyComponents.values.yaml_customerInstallation: ... deploymentSettings: ... registryFor3rdPartyComponents: ®istryFor3rdPartyComponents docker.io ... - (Optional) If you need to host MOSTLY AI container images in an internal repository, replace
quay.io/mostlyaiinmostlyRegistry.values.yaml_customerInstallation: ... deploymentSettings: ... mostlyRegistry: &mostlyRegistry quay.io/mostlyai ... - (Optional) If you intend to use the MOSTLY AI image repository at
quay.io/mostlyai, set its secret inmostlyRegistryDockerConfigJson.💡To obtain the secret, contact your MOSTLY AI Customer Experience Engineer.
- At the start, set the application domain name to
_customerInstallation:
...
  deploymentSettings:
  ...
    mostlyRegistryDockerConfigJson: &mostlyRegistryDockerConfigJson <HARBOR_SECRET>
...- Enable the
ingressannotations. a. Enable the ingress annotations undermostly-app. `yaml filename=“values.yaml” copy -6 mostly-app: ingress: annotations: nginx.ingress.kubernetes.io/proxy-body-size: 10240m nginx.ingress.kubernetes.io/proxy-buffer-size: 128k nginx.org/proxy-connect-timeout: 3000s nginx.org/proxy-read-timeout: 3000s nginx.org/client-max-body-size: 3000mannotations:
b. Enable the ingress annotations undermostly-keycloak. yaml filename=“values.yaml” copy -3
mostly-keycloak:
deployment:
resources:
tolerations: []
affinity:
ingress:
annotations:
nginx.ingress.kubernetes.io/proxy-body-size: 10240m
nginx.ingress.kubernetes.io/proxy-buffer-size: 128k
annotations:
7. Save thevalues.yaml` file.
Task 16: Add a taint to your compute nodes
The MOSTLY AI application requires that new compute jobs (generator training and synthetic data generations) run on Kubernetes compute nodes that have a specific taint.
Prerequisites
Contact your IT department or system administrator to check who can set taints on the Kubernetes nodes.
Steps
- Set the taint on the only
minikubenode on which MOSTLY AI compute jobs will run.kubectl taint nodes minikube scheduling.mostly.ai/node=engine-jobs:NoSchedule
Result
You should see the following:
node/minikube taintedTask 17: Deploy MOSTLY AI
Steps
- Make sure you are in the root folder of the Helm chart, where
mostly-combinedis located and is a subfolder. - Use
helmto deploy MOSTLY AI with the editedvalues.yamlfile.helm upgrade --install mostly-ai ./mostly-combined --values values.yaml --namespace mostly-ai --create-namespace - Open the web browser running the minikube dashboard.
- In the dashboard, select the mostly-ai namespace and then Workloads > Pods.
Result
Immediately after running the Helm command, you will see all pods (in the dashboard, go to Workloads > Pods) with different status.
Wait for a while for all pods status to turn green.
Post-deployment
With the MOSTLY AI pods successfully started, you can now log in to your MOSTLY AI deployment for the first time.
Task 18: Log in to your MOSTLY AI deployment
Log in for the first time to your MOSTLY AI deployment to set a new password for the superadmin user.
Prerequisites
Contact MOSTLY AI to obtain the superadmin credentials. You need them to log in for the first time.
Steps
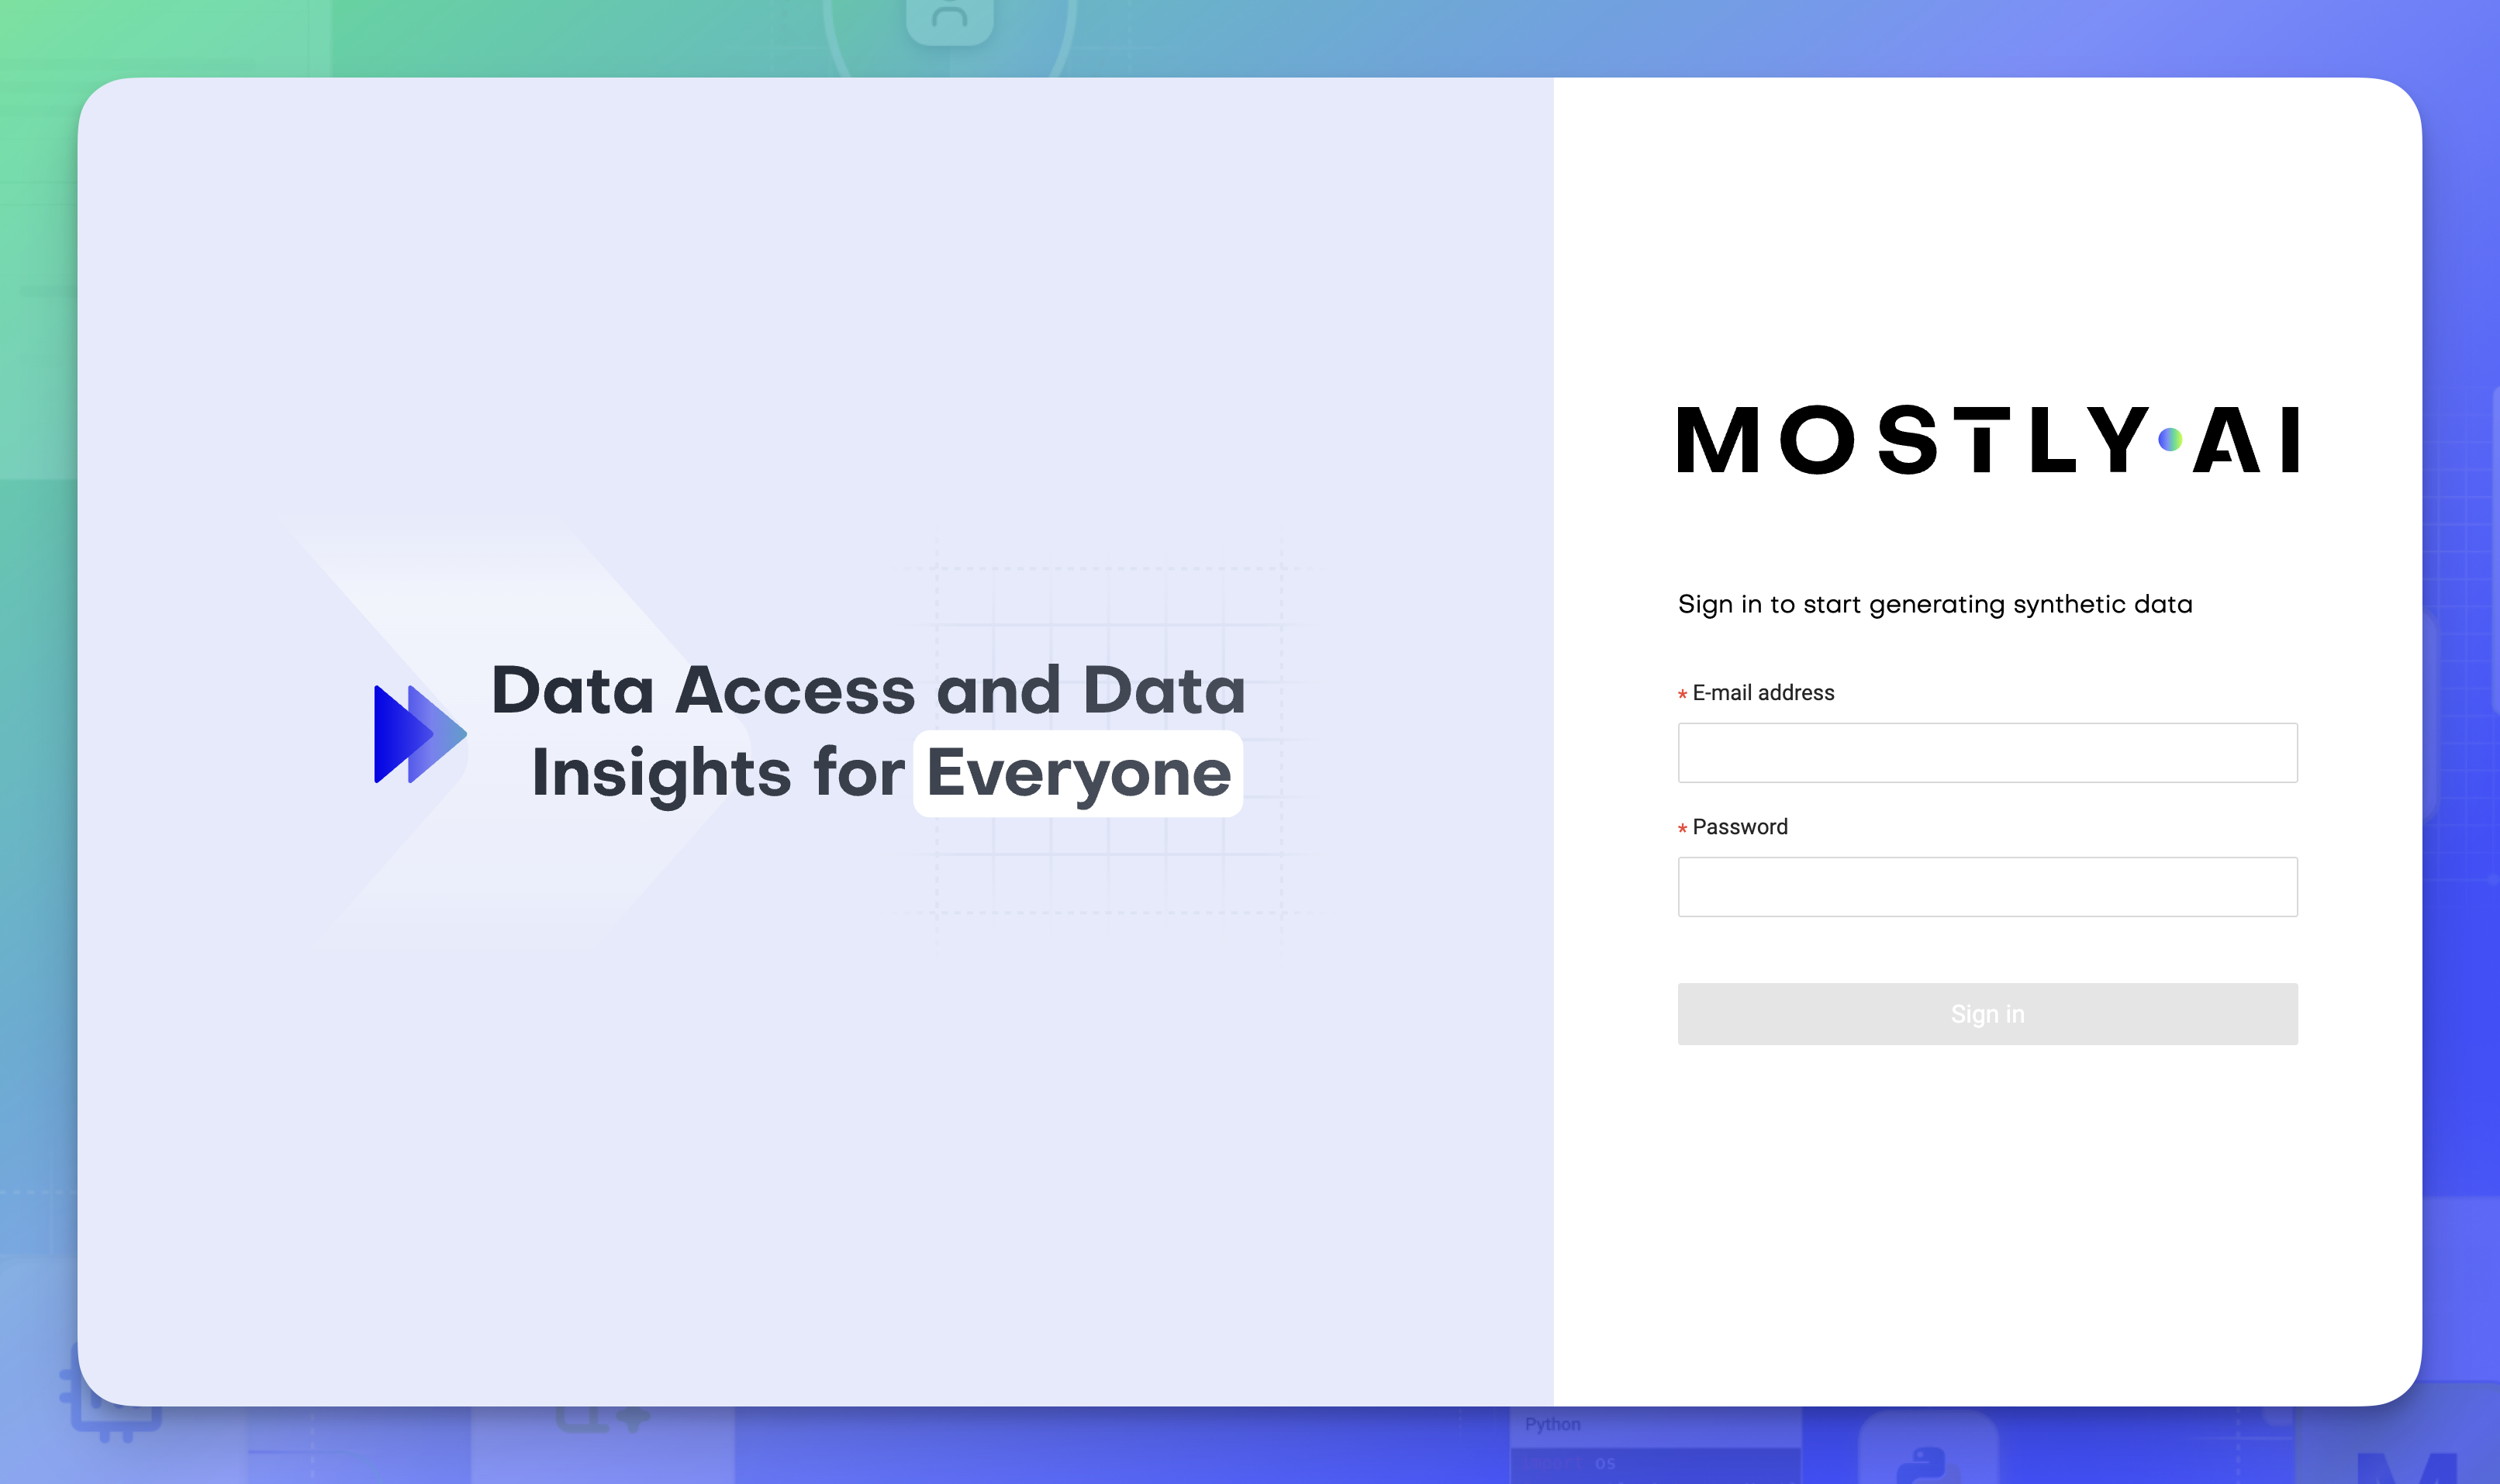
- Open the locally defined hostname
mostly.localin a web browser.
Step result: Your Sign in page for your MOSTLY AI deployment opens.
- Enter the superadmin credentials and click Sign in.
- Provide a new password and click Change password.
Result
Your superadmin password is now changed and you can use it to log in again to your MOSTLY AI deployment.
What’s next
You can run a quick test by following the Quick start for Model creators and Quick start for Data consumers.