Add data to a generator
While a generator has the New status (created but training has not started), you can add tabular data to it. And you can add data from multiple sources:
- file upload (CSV, Parquet)
- databases
- cloud storage buckets
Note You cannot add data to already trained generators.
Add via file upload
From the web application, open an untrained generator to add tables to it.
-
On the Generators page, click + New generator.
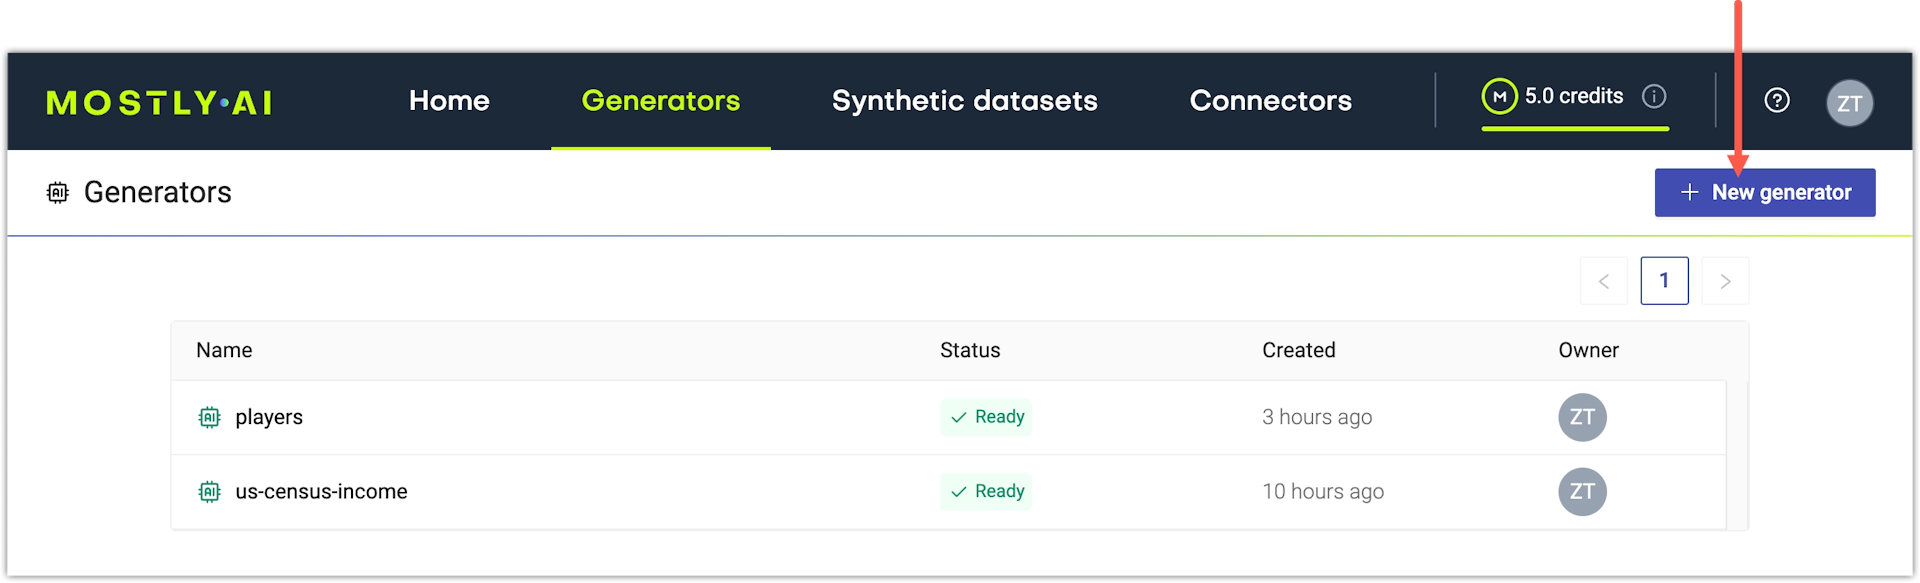
Step result: You now have a generator object created in the MOSTLY AI database and the generator is listed on the Generators page.
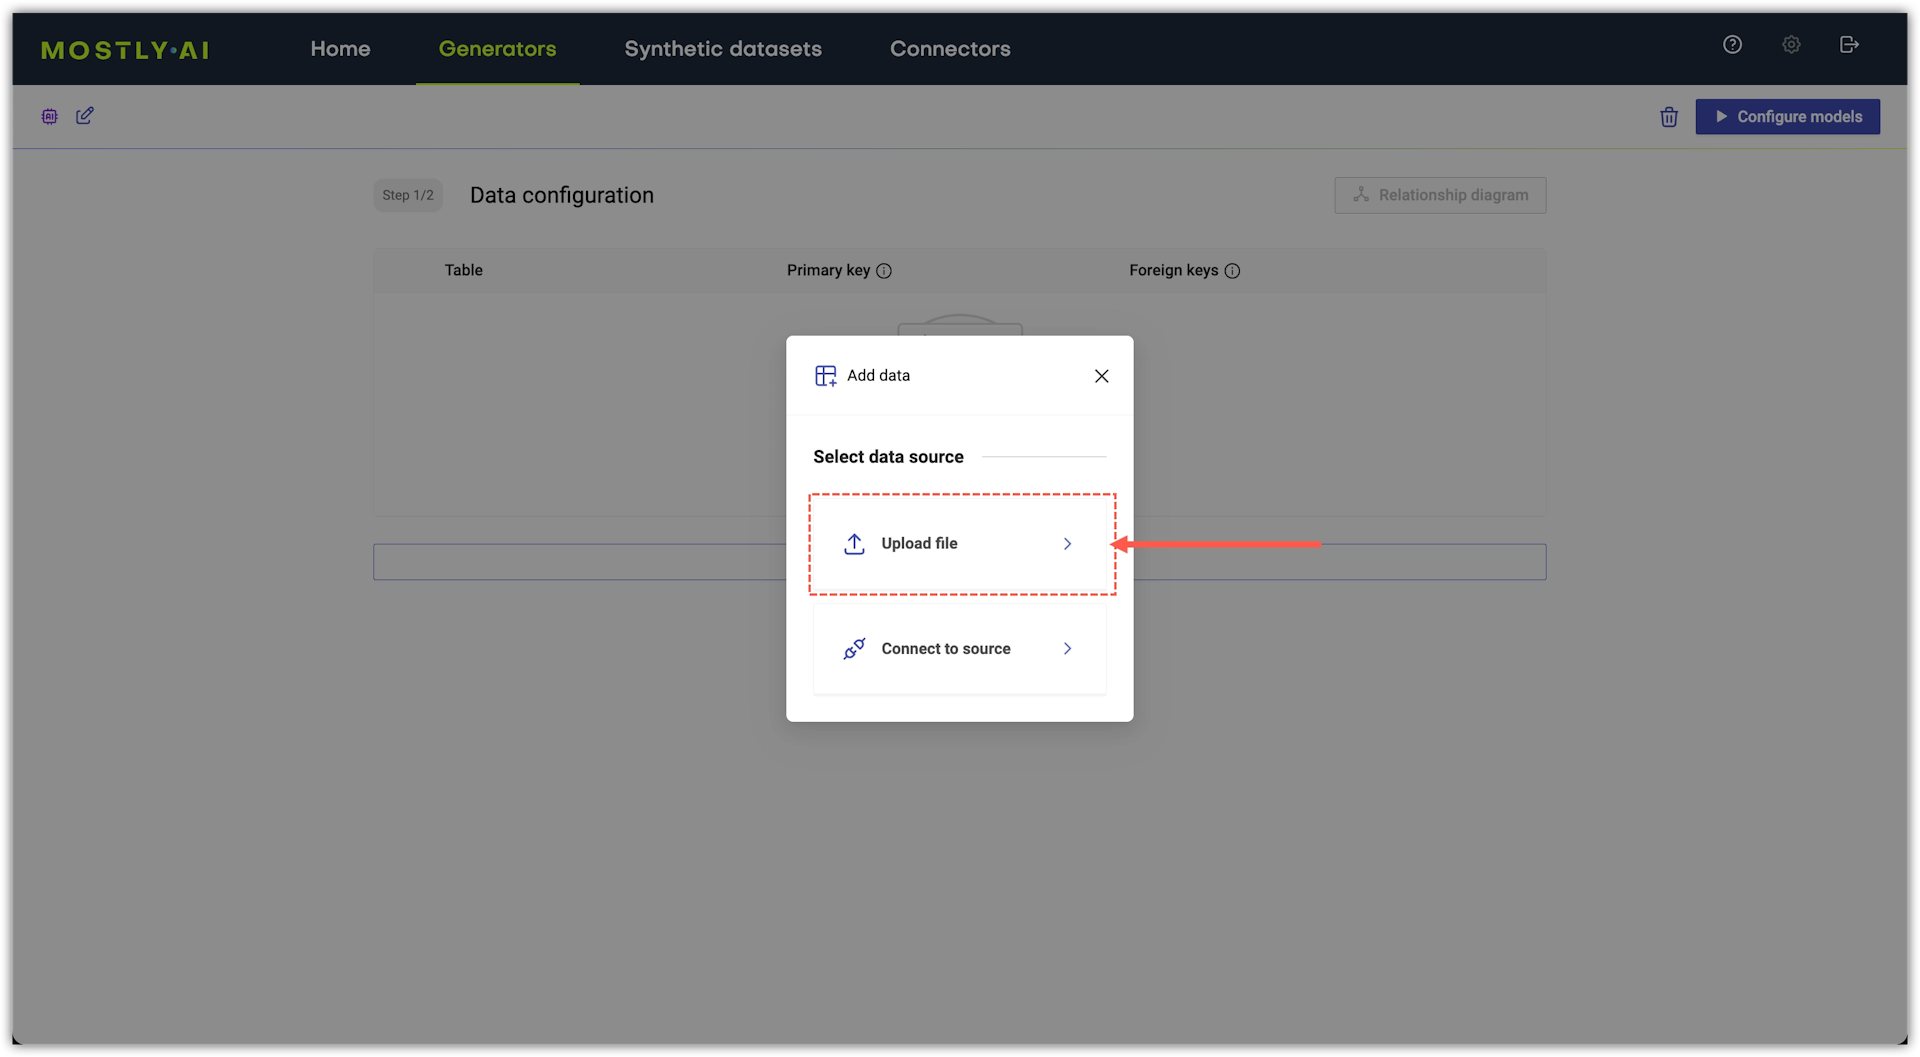
The Add data window appears prompting you to add tabular data for your generator to train on.
-
Click Upload file.
-
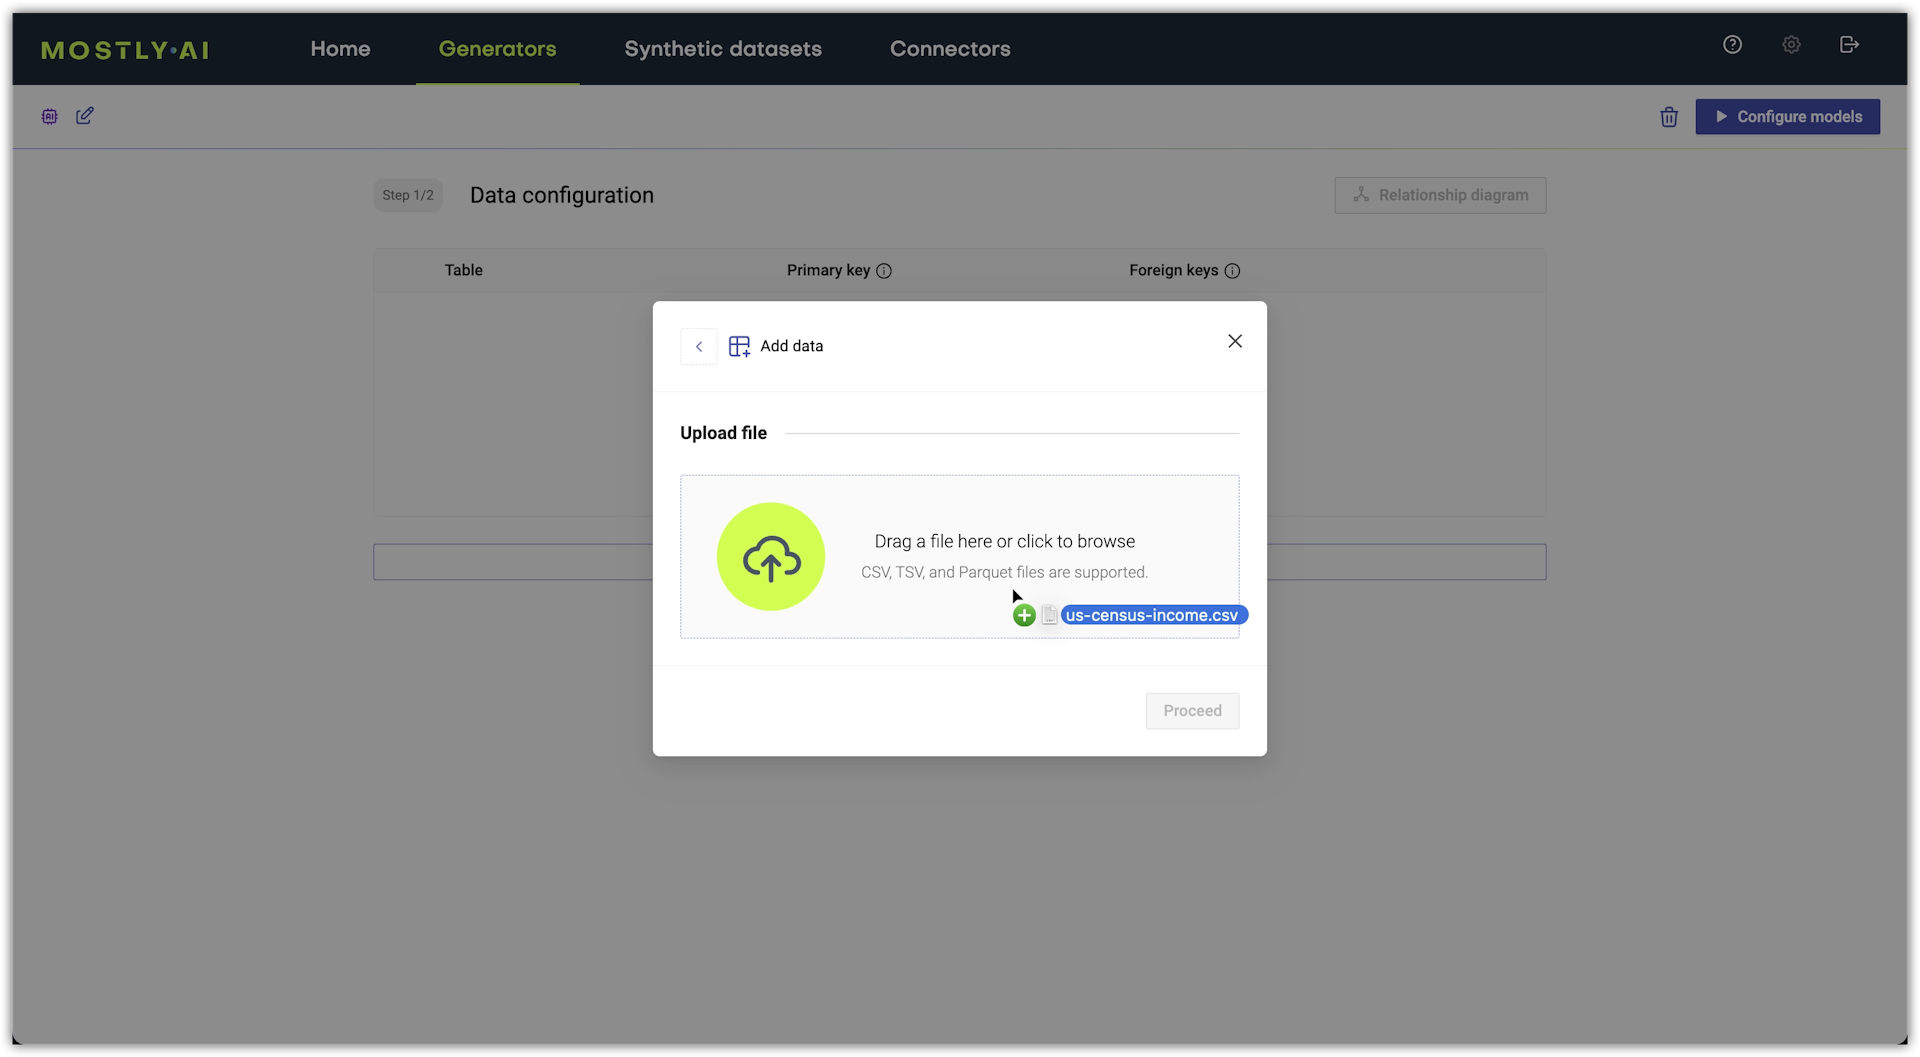
Under Upload file, drag a local file onto the box or click the box to browse your local file system.
💡If you need a dataset, download one from the Datasets page.
-
(Optional) Enter a name for the table.
The table name appears in the list of tables added to the generator. Also, the table name that you provide is what appears in each generated synthetic dataset.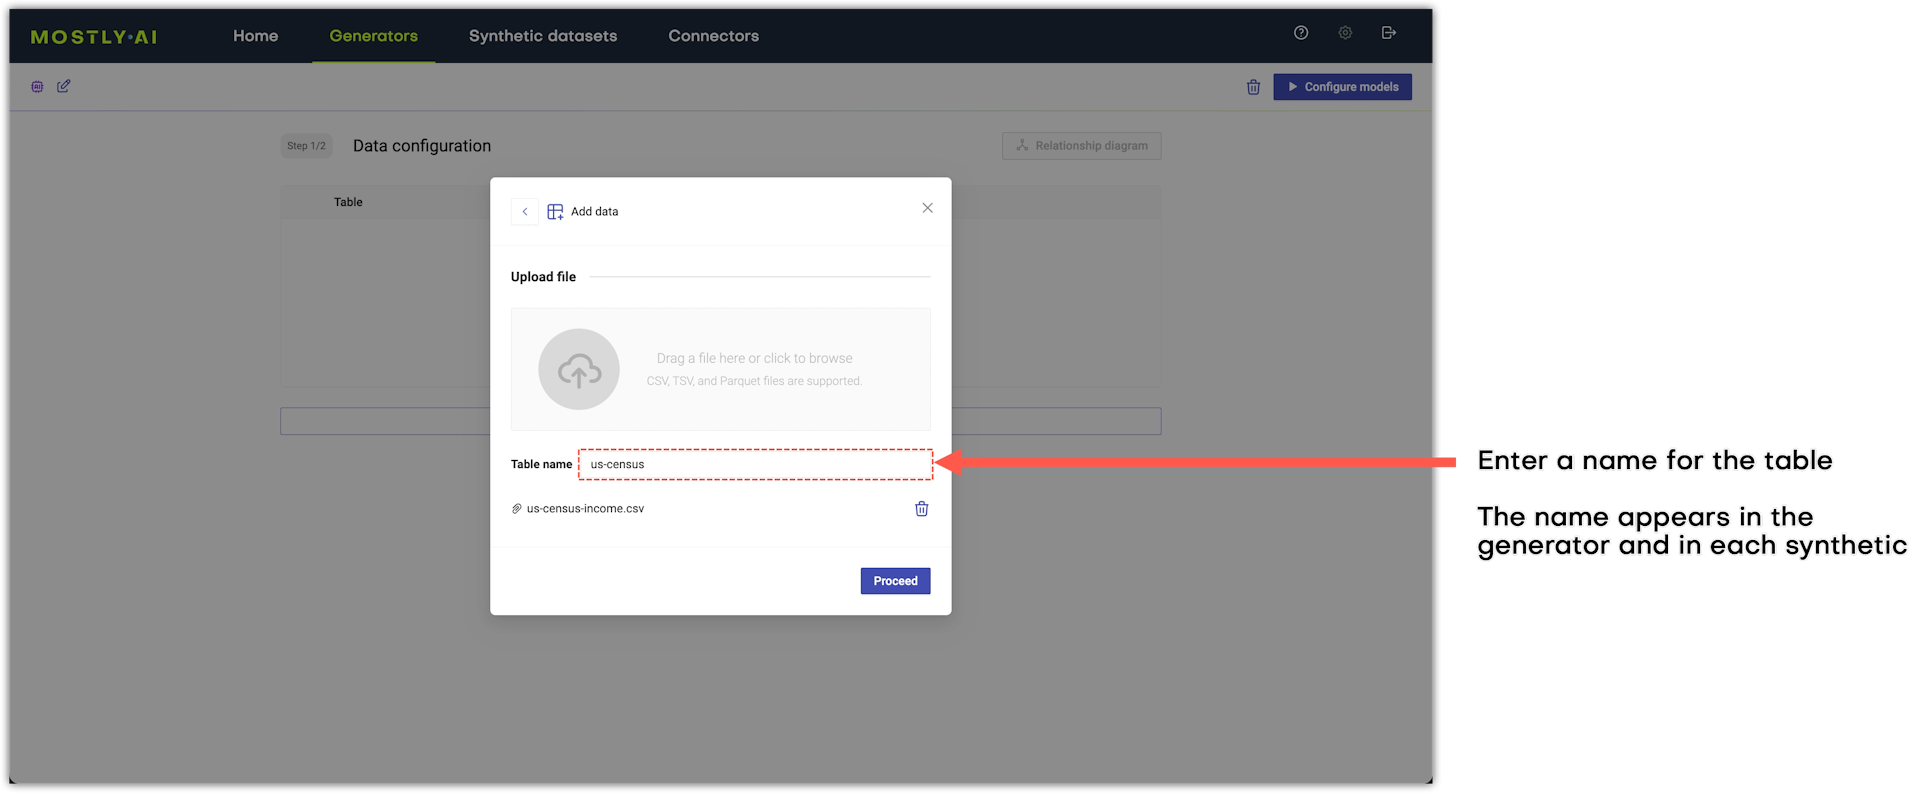
-
Click Proceed.
Add data from a database
Use a source database connector to add tables to generators.
From the web application, open an untrained generator to add tables to it.
Steps
- In the generator, click Add data on the Data configuration page.
- Select Connect to source.
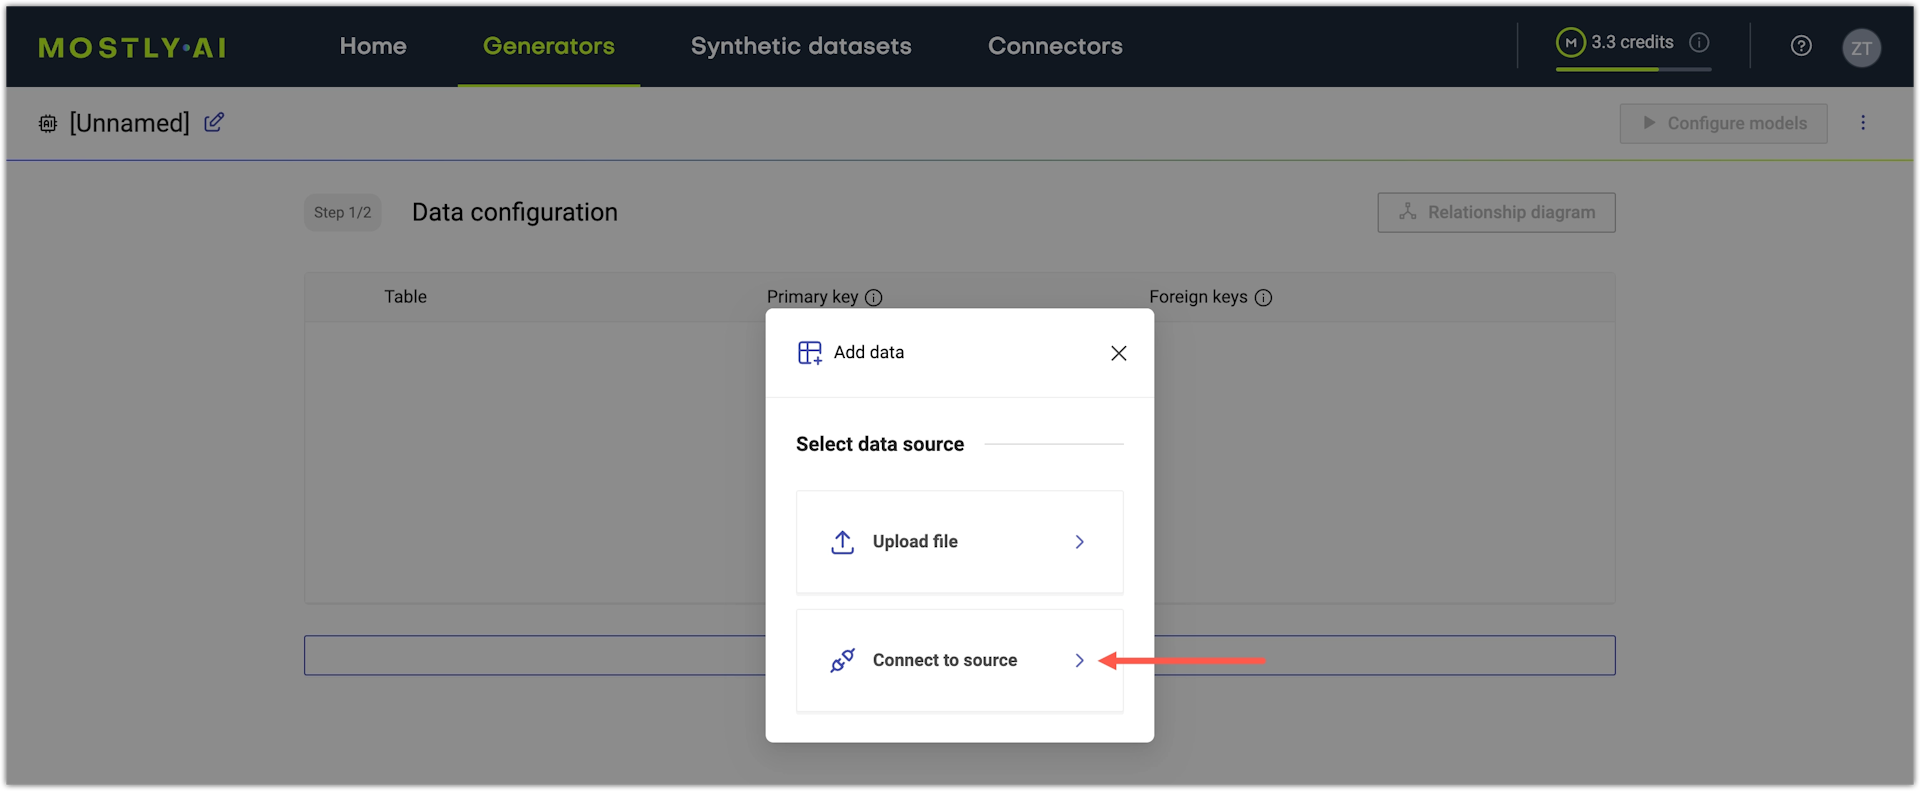
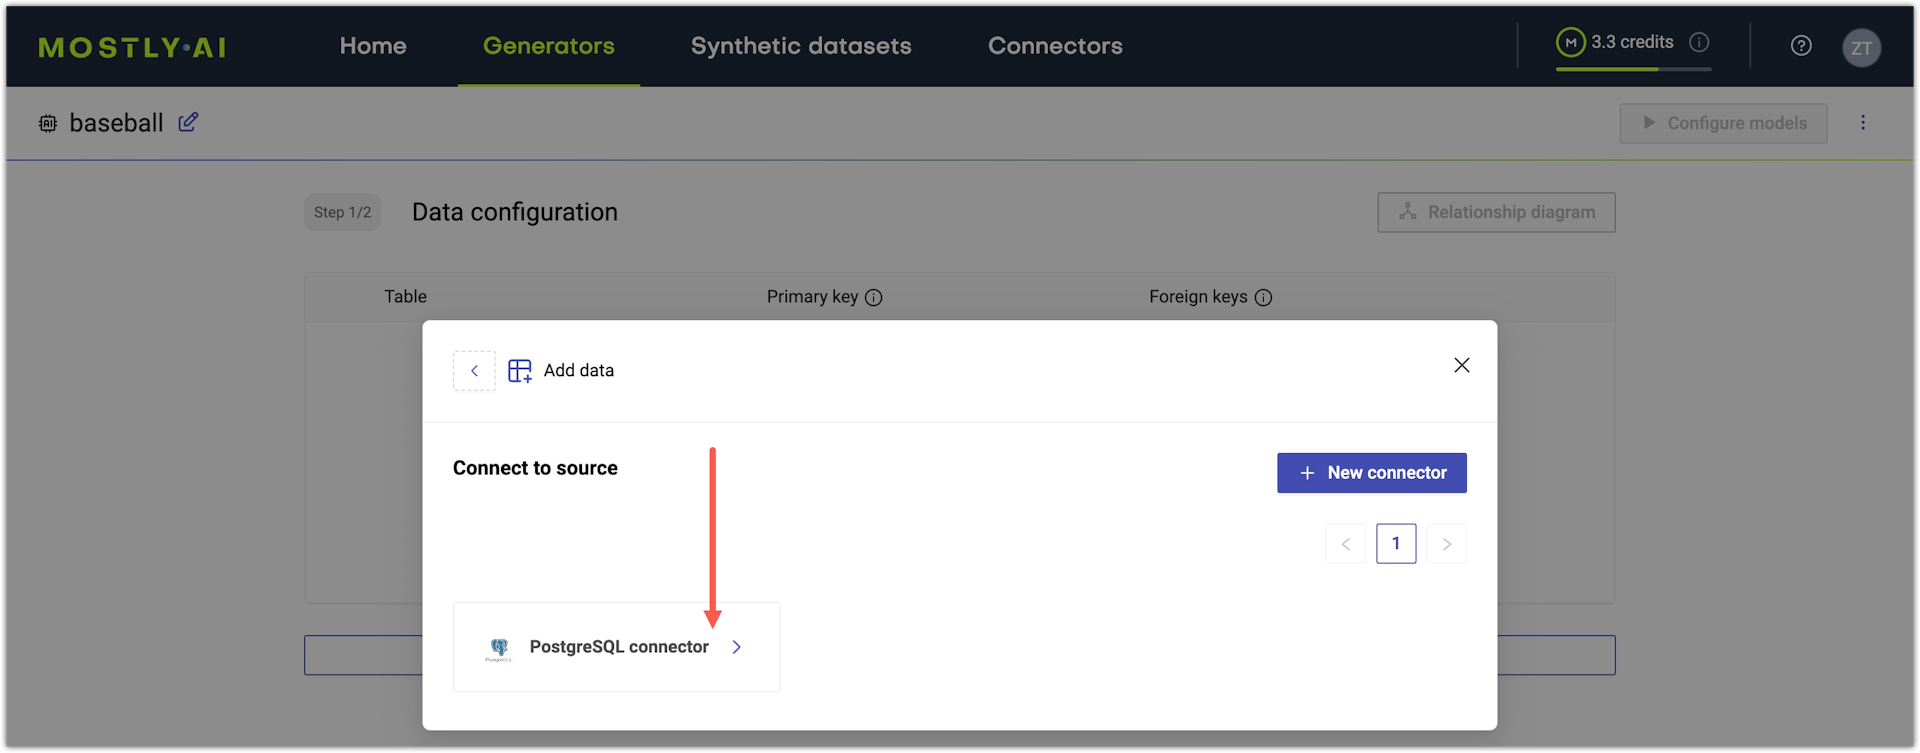
- Select a database connector.
📑
If you do not have one, click + New connector to create a database connector. When done, the app brings you back to select a connector.
- Select a schema (optional) and table.
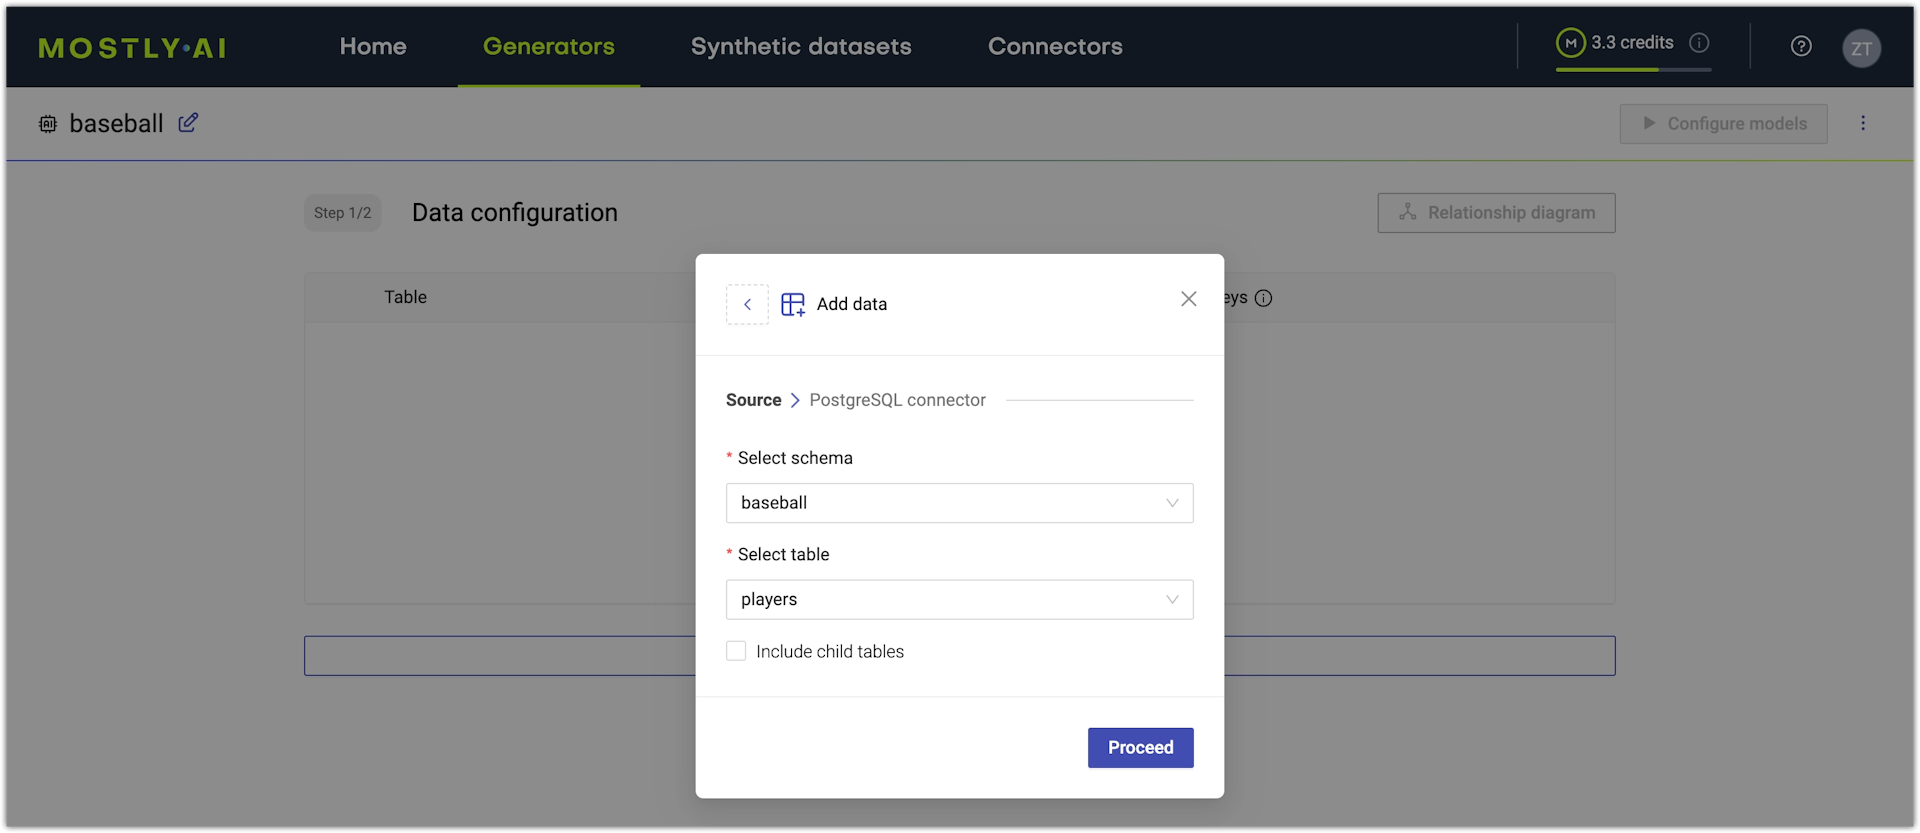
- Click Proceed.
Result
The database table is now added to your generator.
Add data from a cloud bucket
Use a source cloud storage connector to add tables to generators.
Steps
- In an untrained generator, click Add data.
- Click Connect to source.
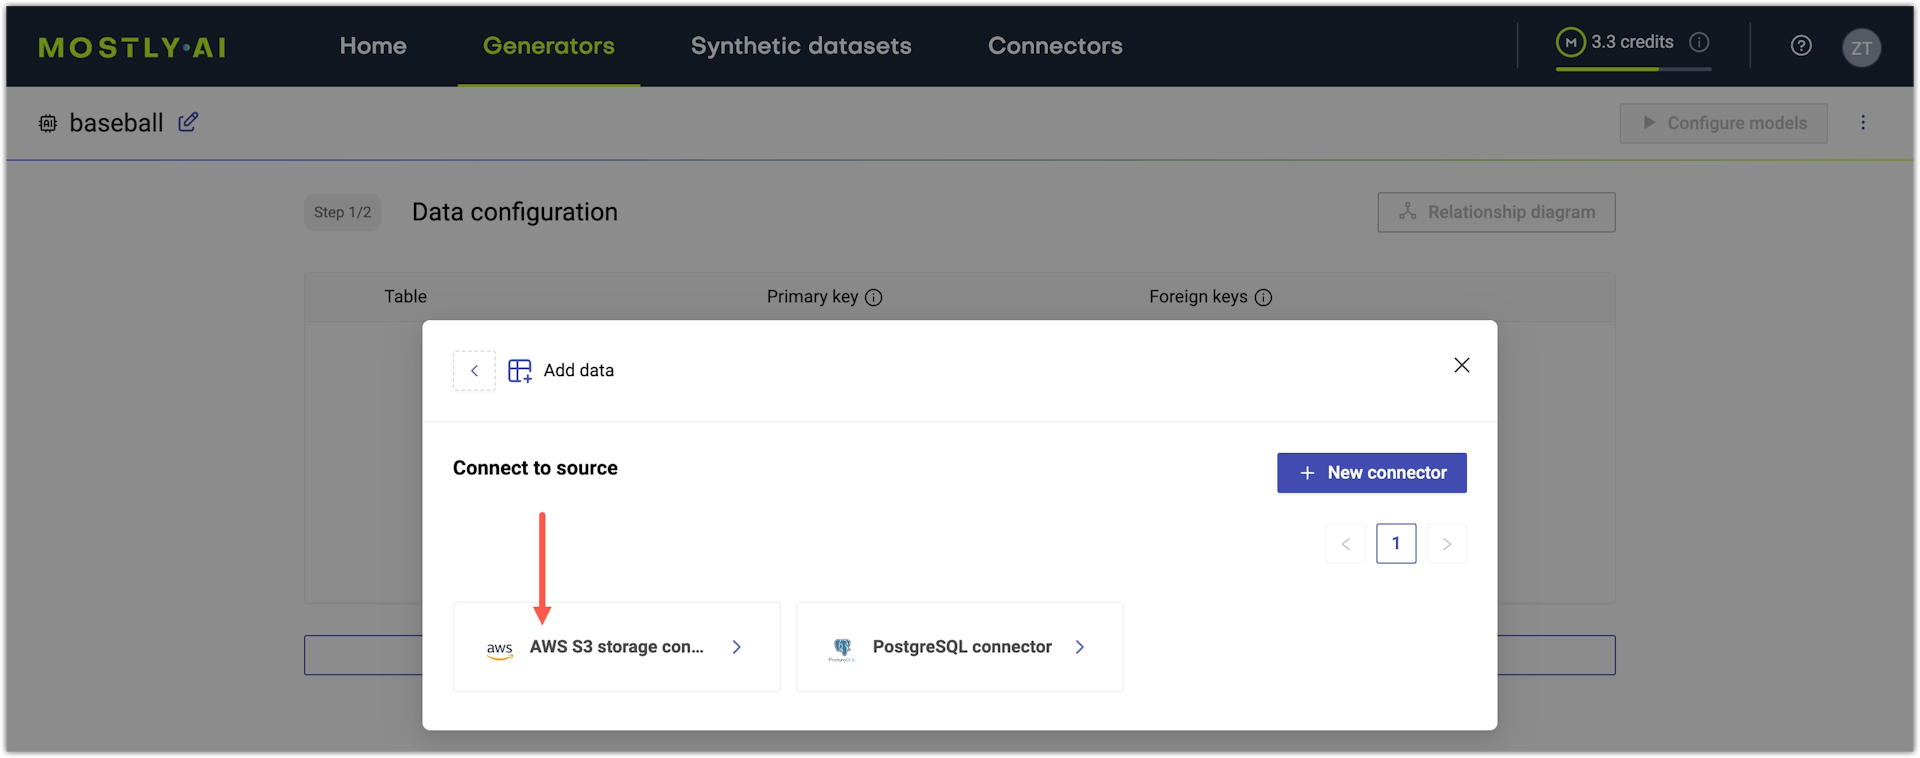
- Select a cloud storage connector.
📑
If you do not have one, click + New connector to create a cloud storage connector. When done, the app brings you back to select a connector.
- Define the bucket path to your table, where Table path is the folder path, and Table name is the filename.
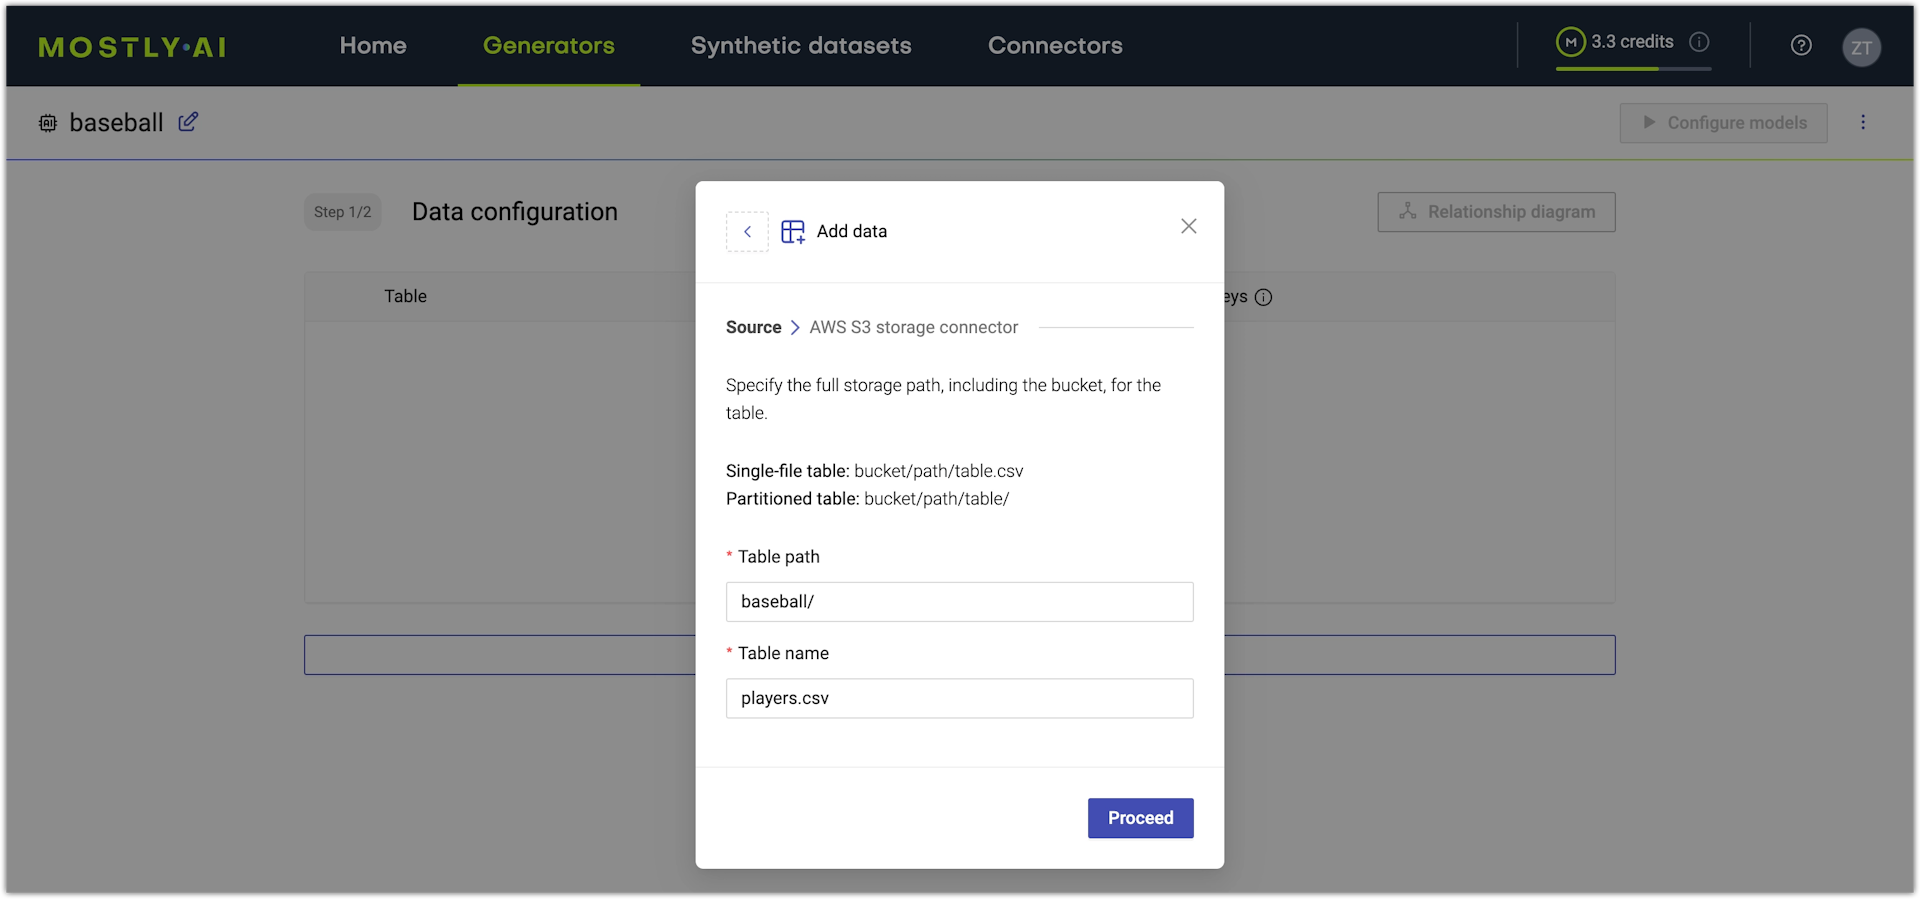
- Click Proceed.