Use Databricks for synthetic data
With MOSTLY AI, you can connect to a Databricks SQL Warehouse and use it as a data source or destination for your synthetic data.
Prerequisites
To create a Databricks connector, you need to obtain your SQL Warehouse connection details, a Databricks catalog name, and a personal access token for Databricks. The linked sections below provide step-by-step guidance on how to complete the prerequisites.
- Database connection details in Databricks
- Catalog name in Databricks
- Personal access token in Databricks
📑
Note: As MOSTLY AI leverages Unity Catalog Volumes in Databricks for data ingestion, make sure that the user associated with the access token in your destination connector is granted the
CREATE TABLEandCREATE VOLUMEprivileges.
Get connection details for your Databricks SQL Warehouse
-
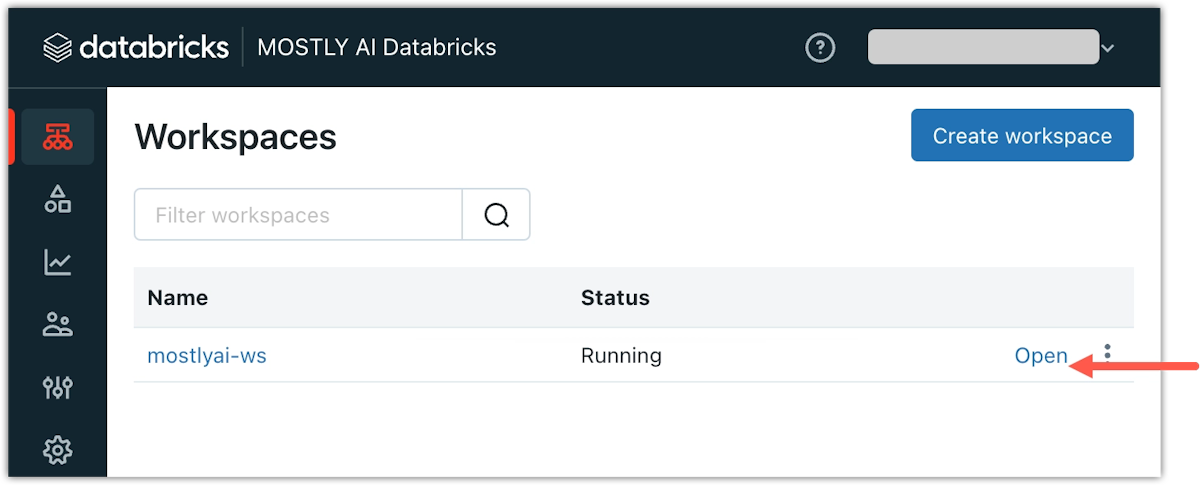
In Databricks, open the workspace that contains the SQL Warehouse you want to use.
-
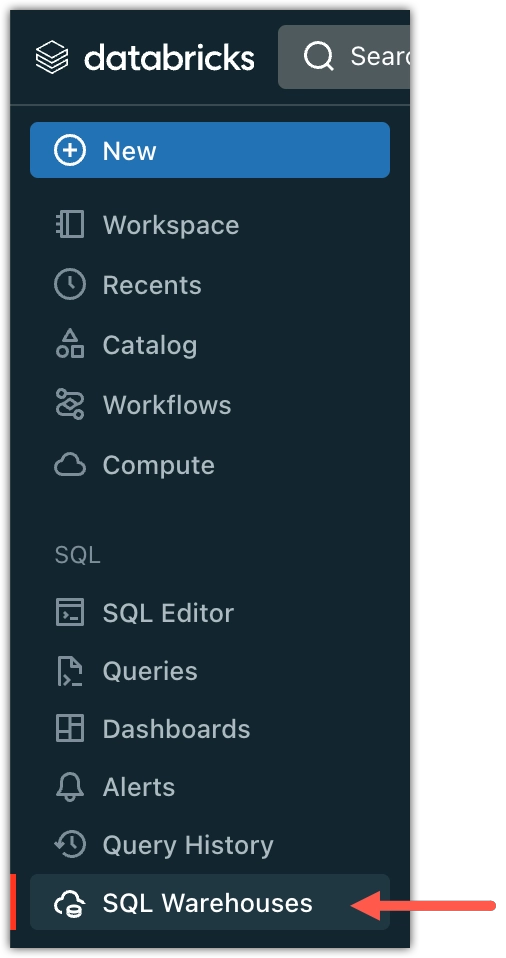
Open the sidebar menu again and select SQL Warehouses.
-
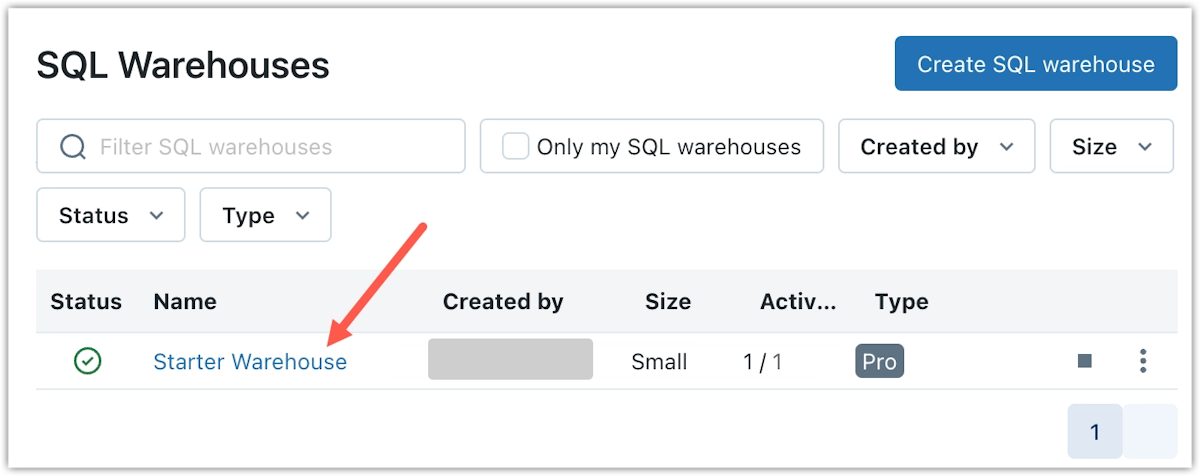
From the list, open the SQL warehouse you want to use for synthetic data.
-
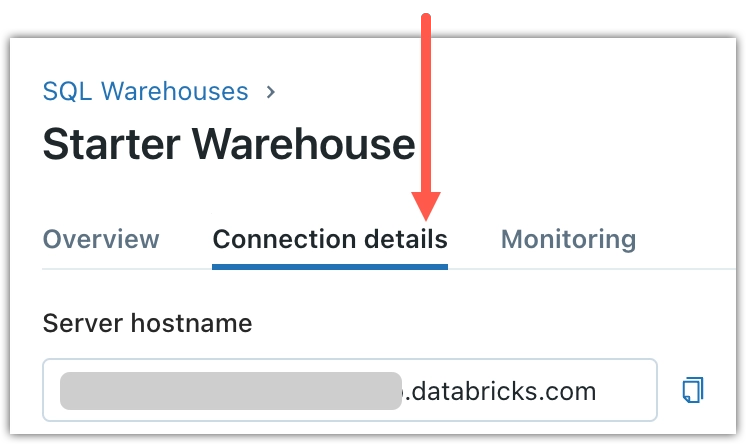
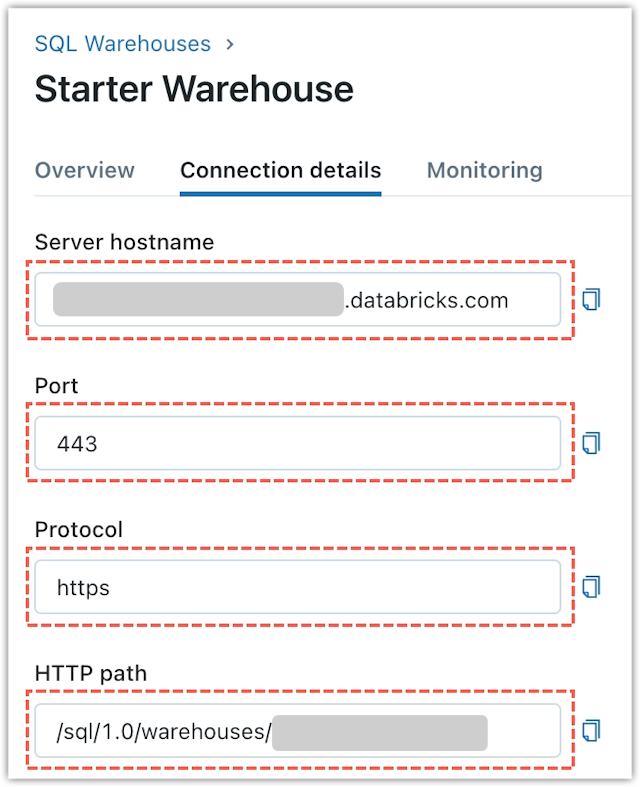
Select the Connection details tab.
-
Copy the necessary connection details (hostname, port, protocol, and HTTP path) for the MOSTLY AI Databricks connector.
Get Databricks catalog name
-
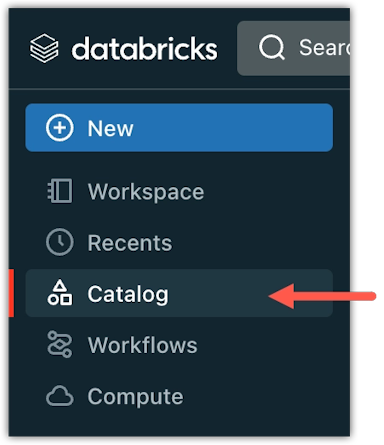
From the Databricks sidebar menu, select Data.
-
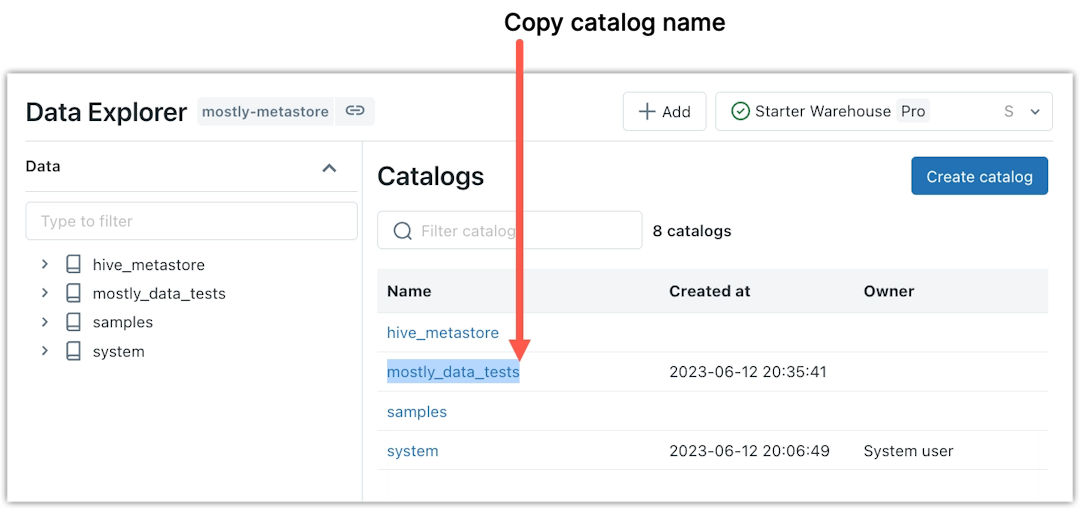
Copy the name of the catalog you want to use in MOSTLY AI.
Create a Databricks personal access token
-
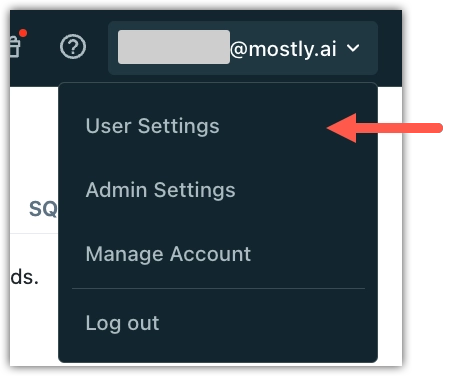
In Databricks, open your account menu and select User Settings.
-
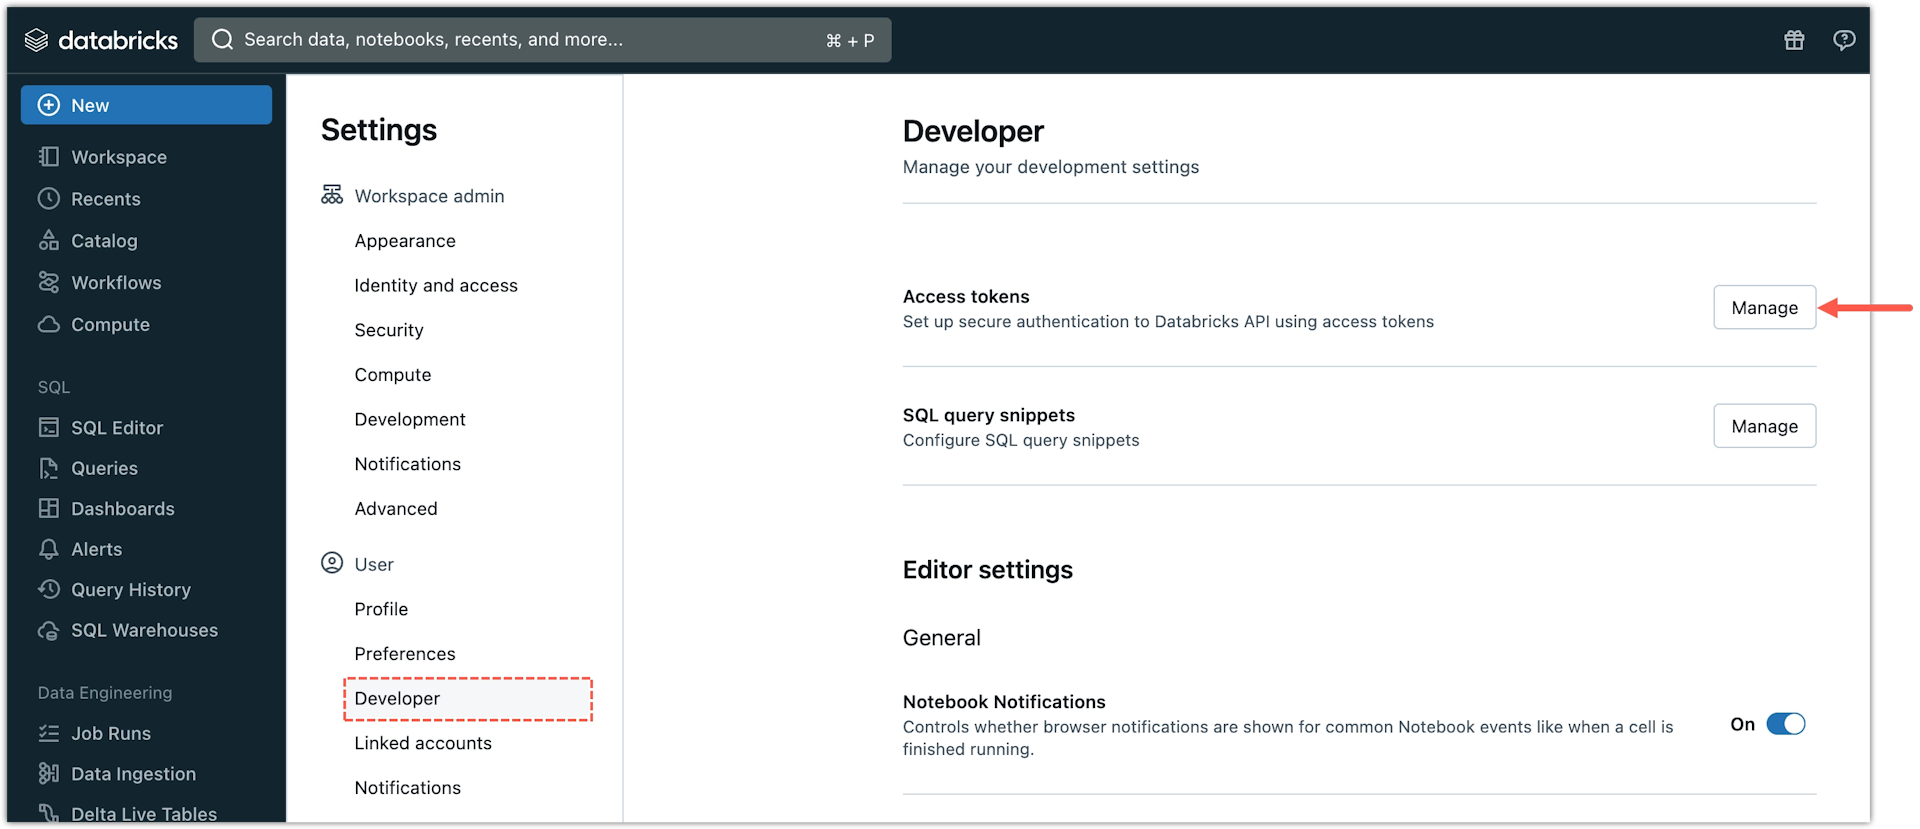
Under Settings, select Developer.
-
Click Manage for Access Tokens.
-
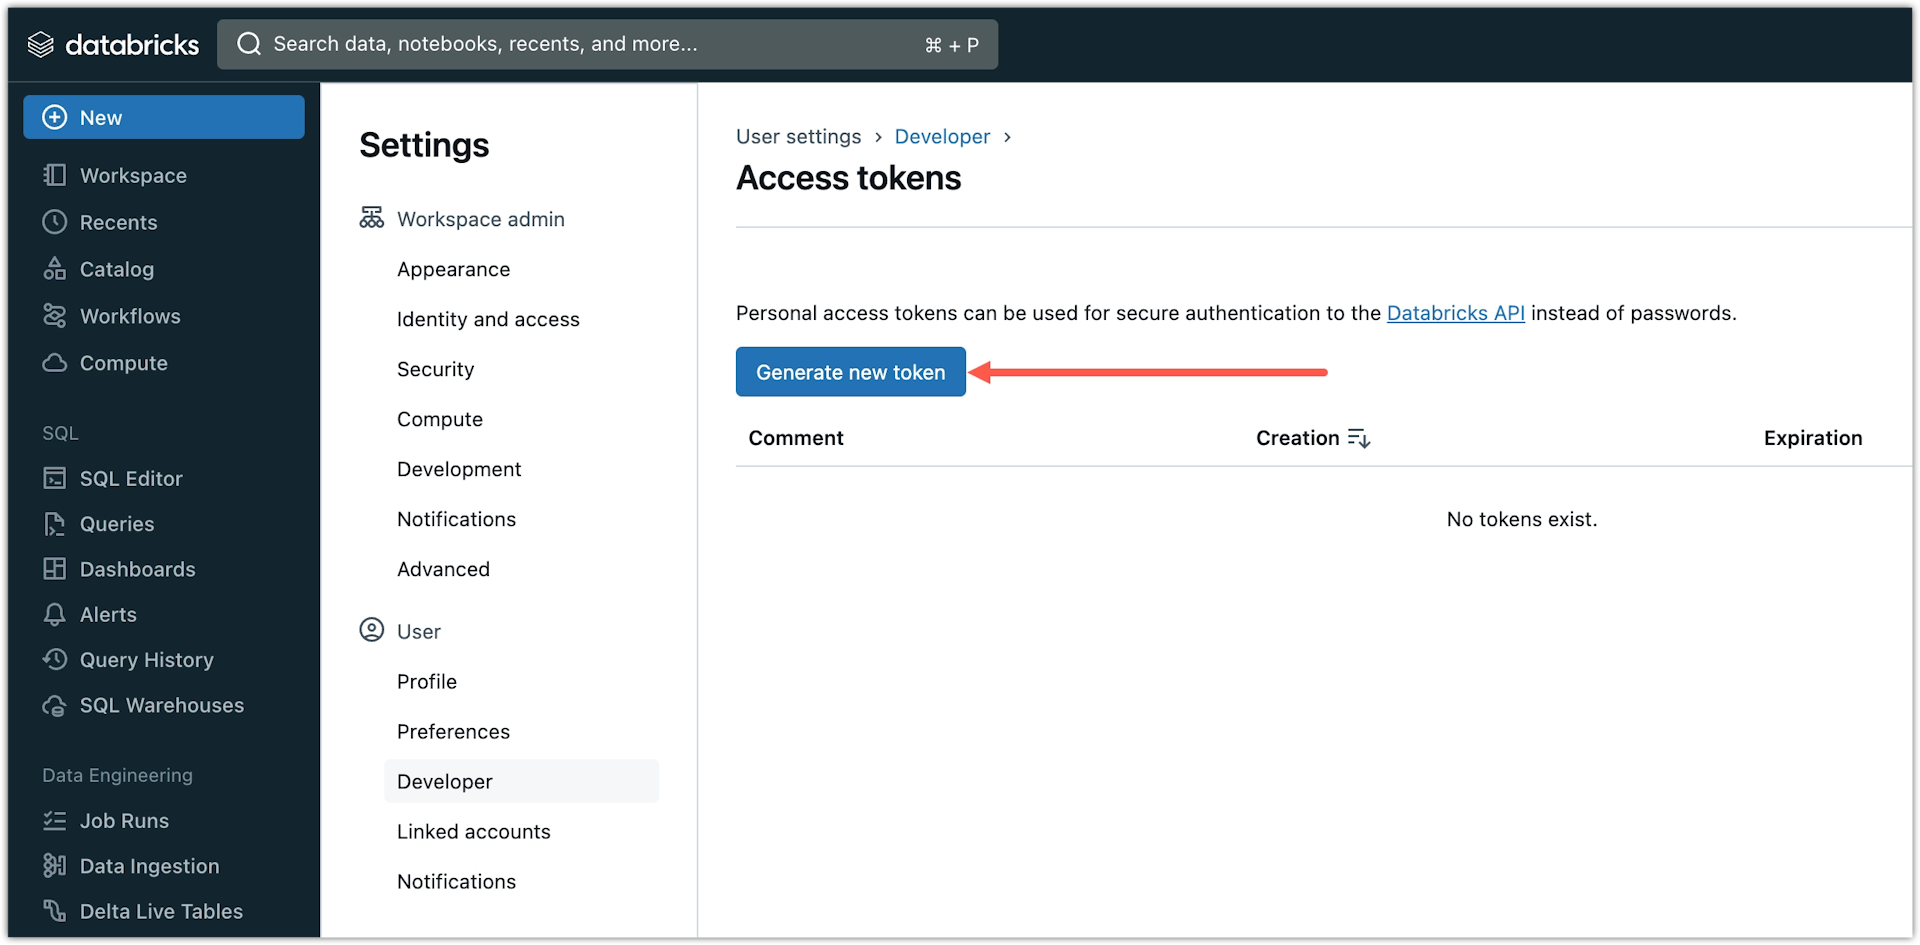
Click Generate new token.
-
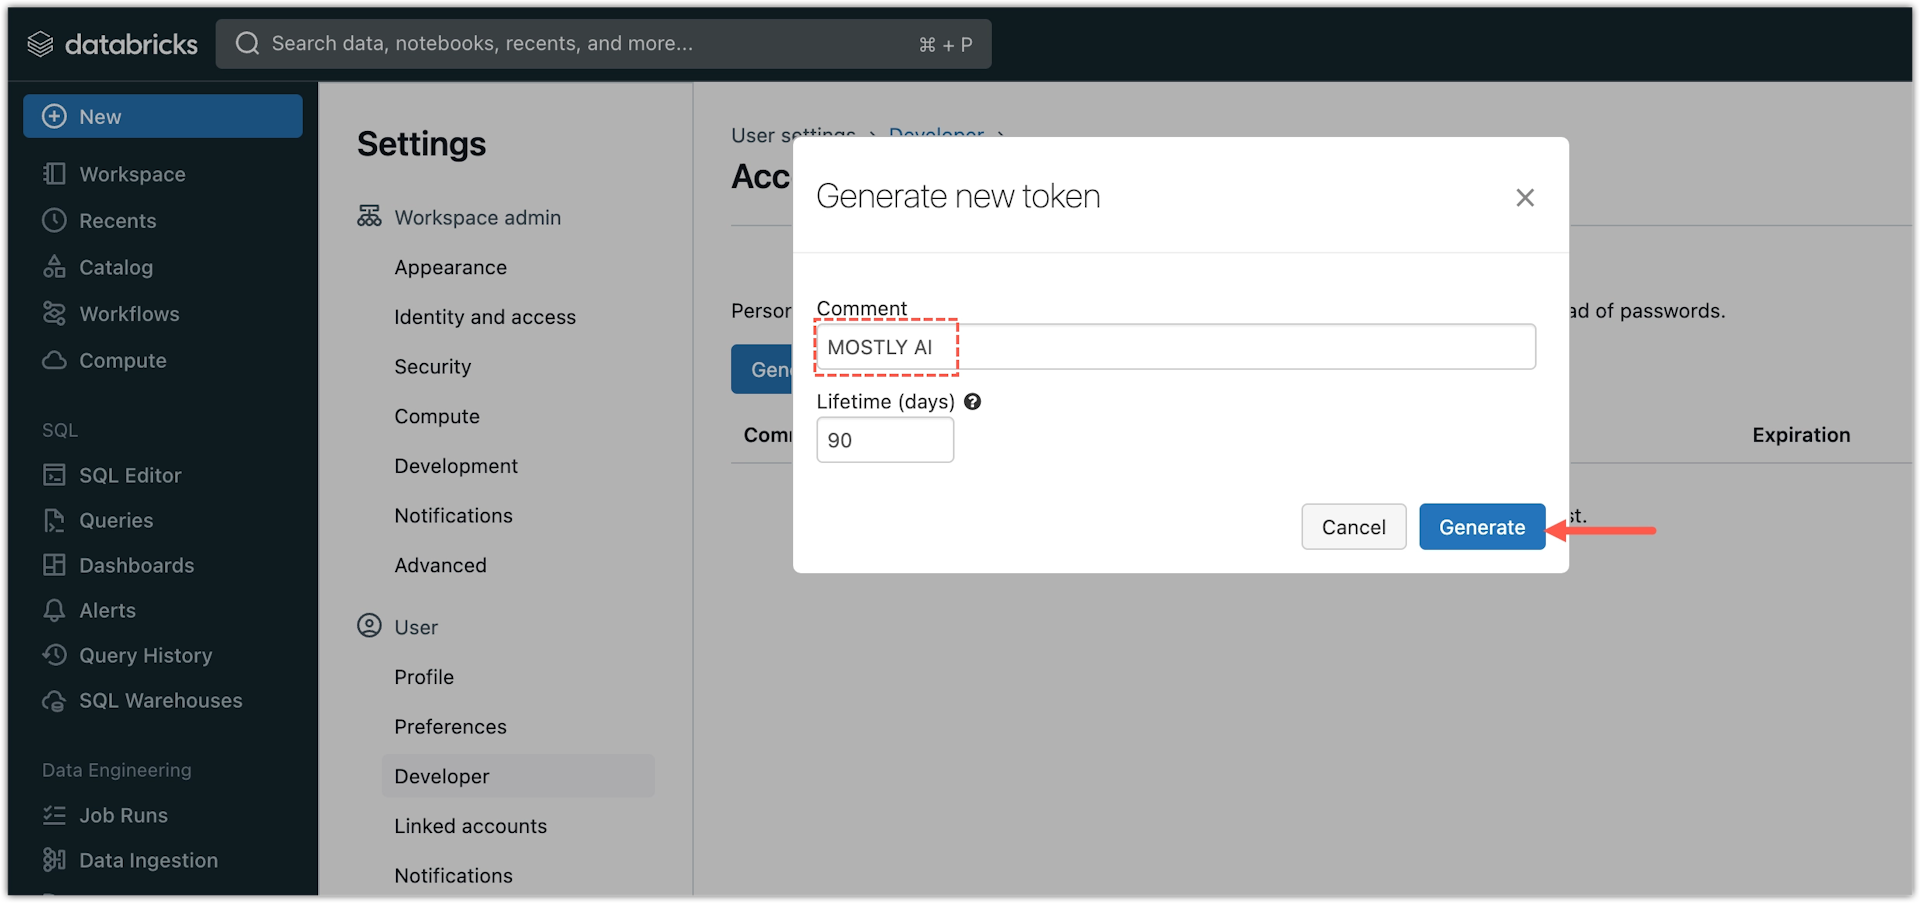
In the Generate new token window, enter a name that identifies where you intend to use the token.
💡Adjust the expiration of the token in the Lifetime (days) box.
-
Click Generate.
-
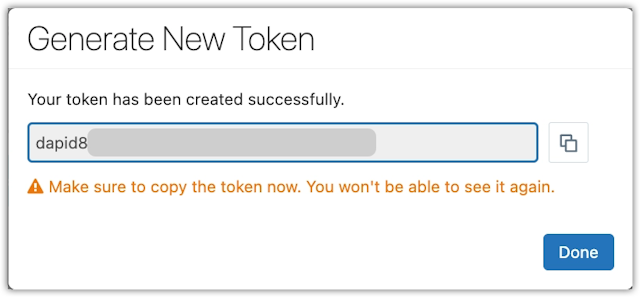
Copy the access token and save it in a secure location.
⚠️Before you close the window, save the token in a location you can access later.
Create a Databricks connector
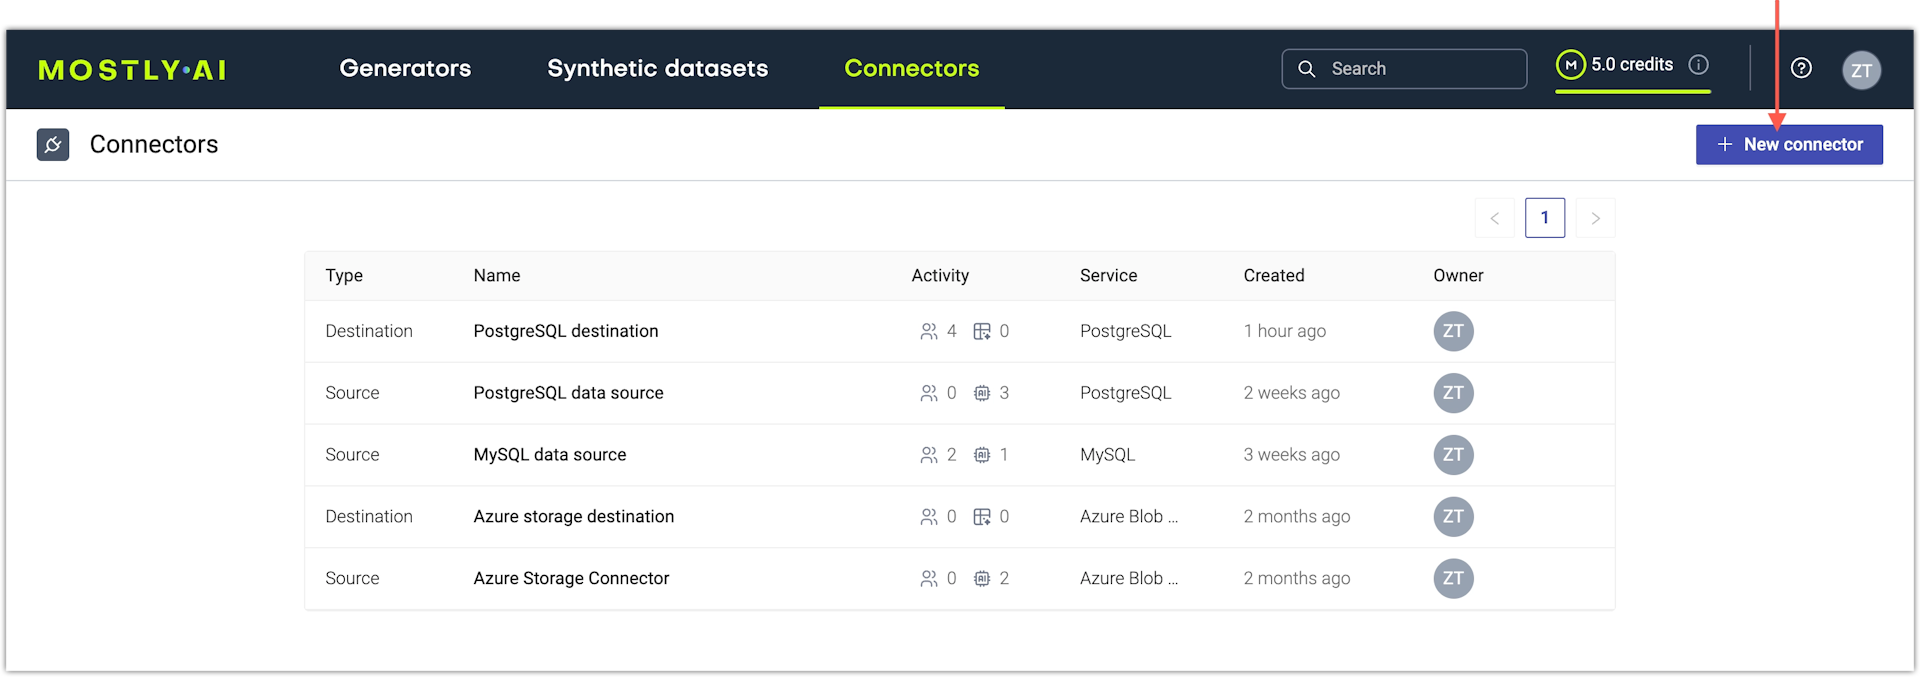
If you use the web application, create a new Databricks connector from the Connectors page.
Steps
- From the Connectors tab, click Create connector.
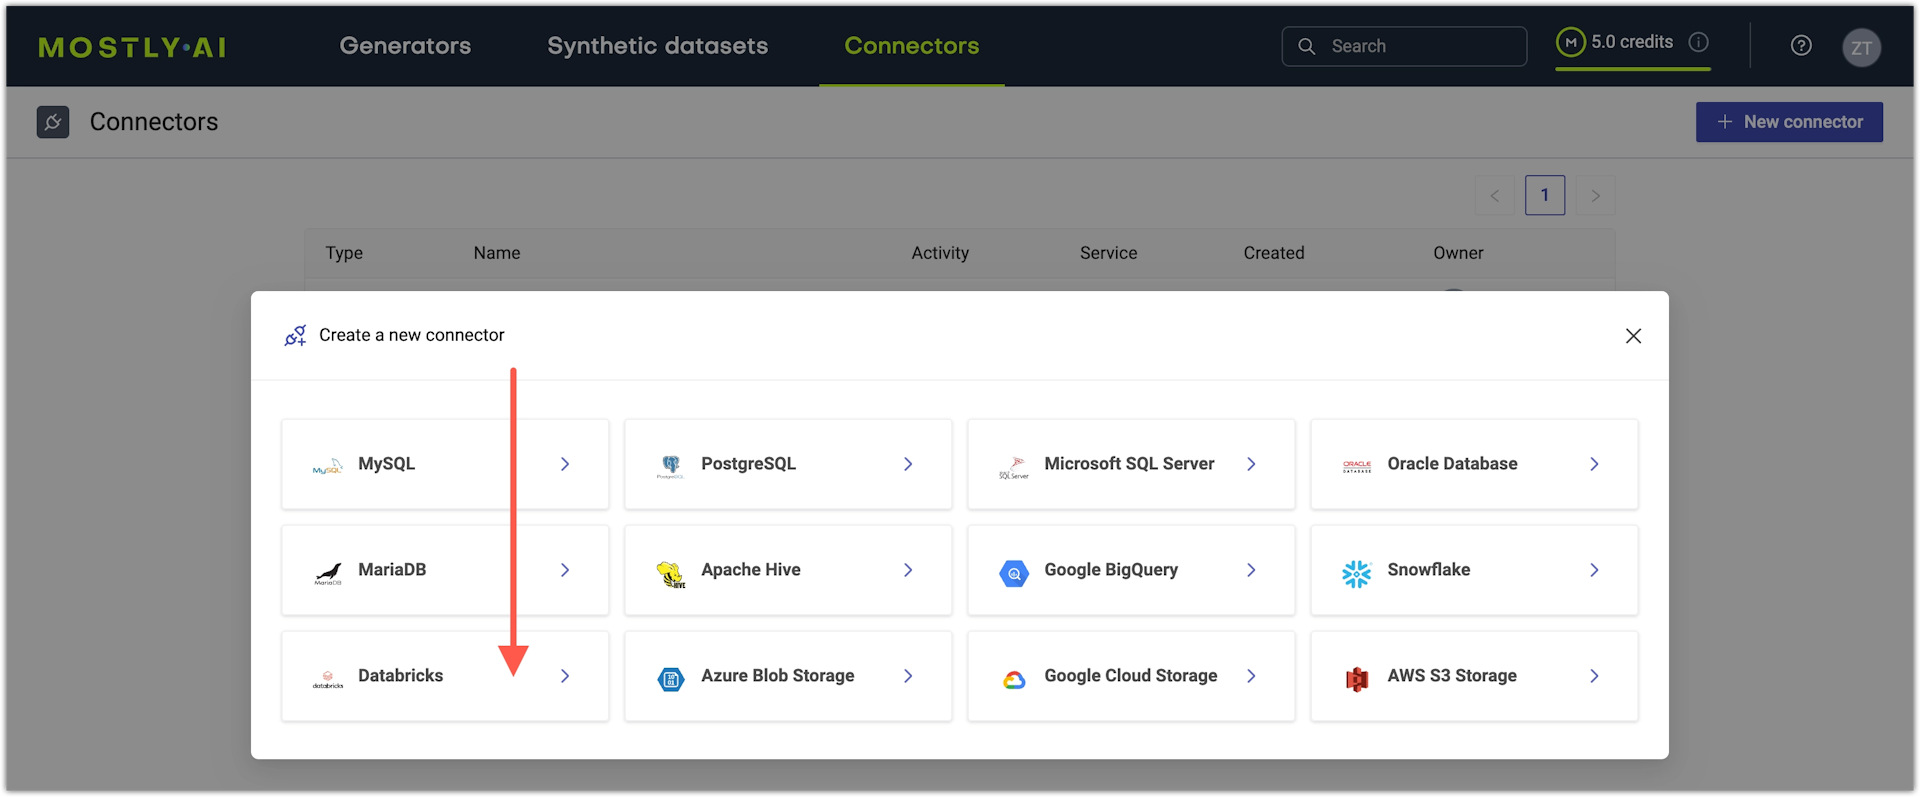
- On the Connect to database tab, select Databricks.
- Configure the Databricks connector.
- For Name, enter a name you can distinguish from other connectors.
- For Access type, select whether you want to use the connector as a source or destination.
- For Host, enter your SQL warehouse server hostname. For more information, see the Prerequisites above.
- For HTTP path, enter your SQL warehouse HTTP path.
- For Access token, enter your Databricks personal access token.
- For Catalog, enter the name of your Databricks catalog.
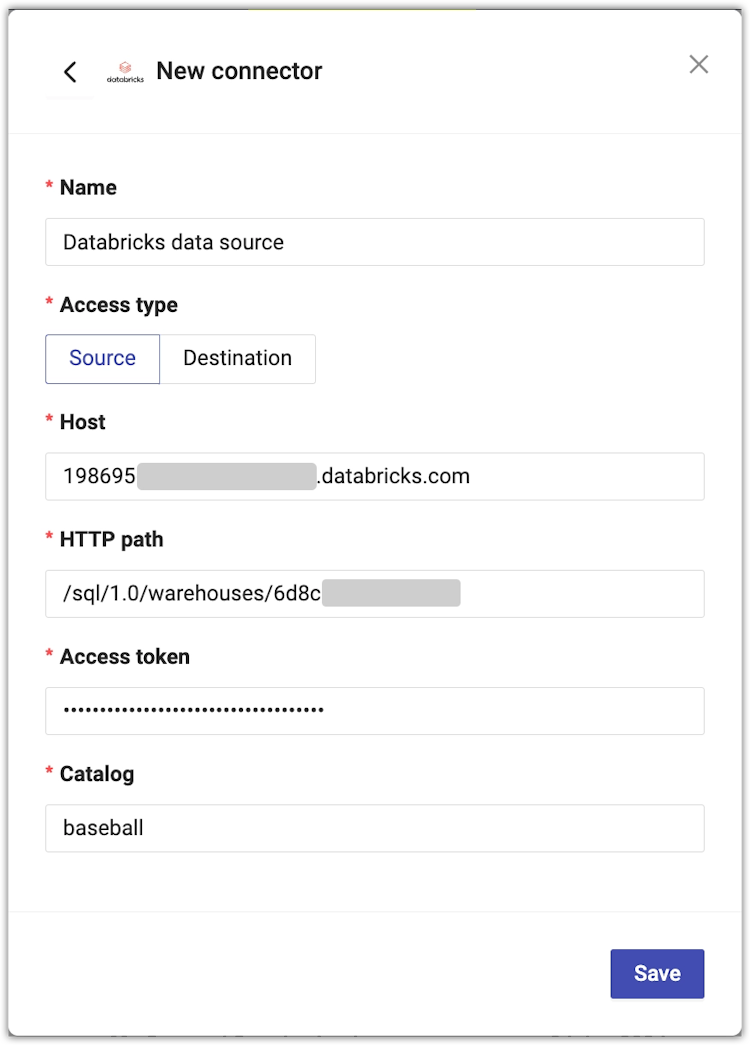
- Click Save to save your new Databricks connector.
MOSTLY AI tests the connection. If you see an error, check the connection details, update them, and click Save again.
You can click Save anyway to save the connector disregarding any errors.
Authenticate with a Service principal
With MOSTLY AI, you can use a Service principal account to access original data stored in Databricks.
In the web application, the Databricks connector configuration includes configuration details that support the authentication with a Service principal account.
Steps
- To use a Service principal for authentication in your Databricks connector, select the Authenticate with Service Principal checkbox.
- Configure the Databricks connector.
- For Name, enter a name you can distinguish from other connectors.
- For Access type, select whether you want to use the connector as a source or destination.
- For Host, enter your SQL warehouse server hostname. For more information, see the Prerequisites above.
- For HTTP path, enter your SQL warehouse HTTP path.
- For Catalog, enter the name of your Databricks catalog.
- For Tenant ID, enter your tenant ID.
- For Client ID, enter your client ID.
- For Client secret, enter your client secret.
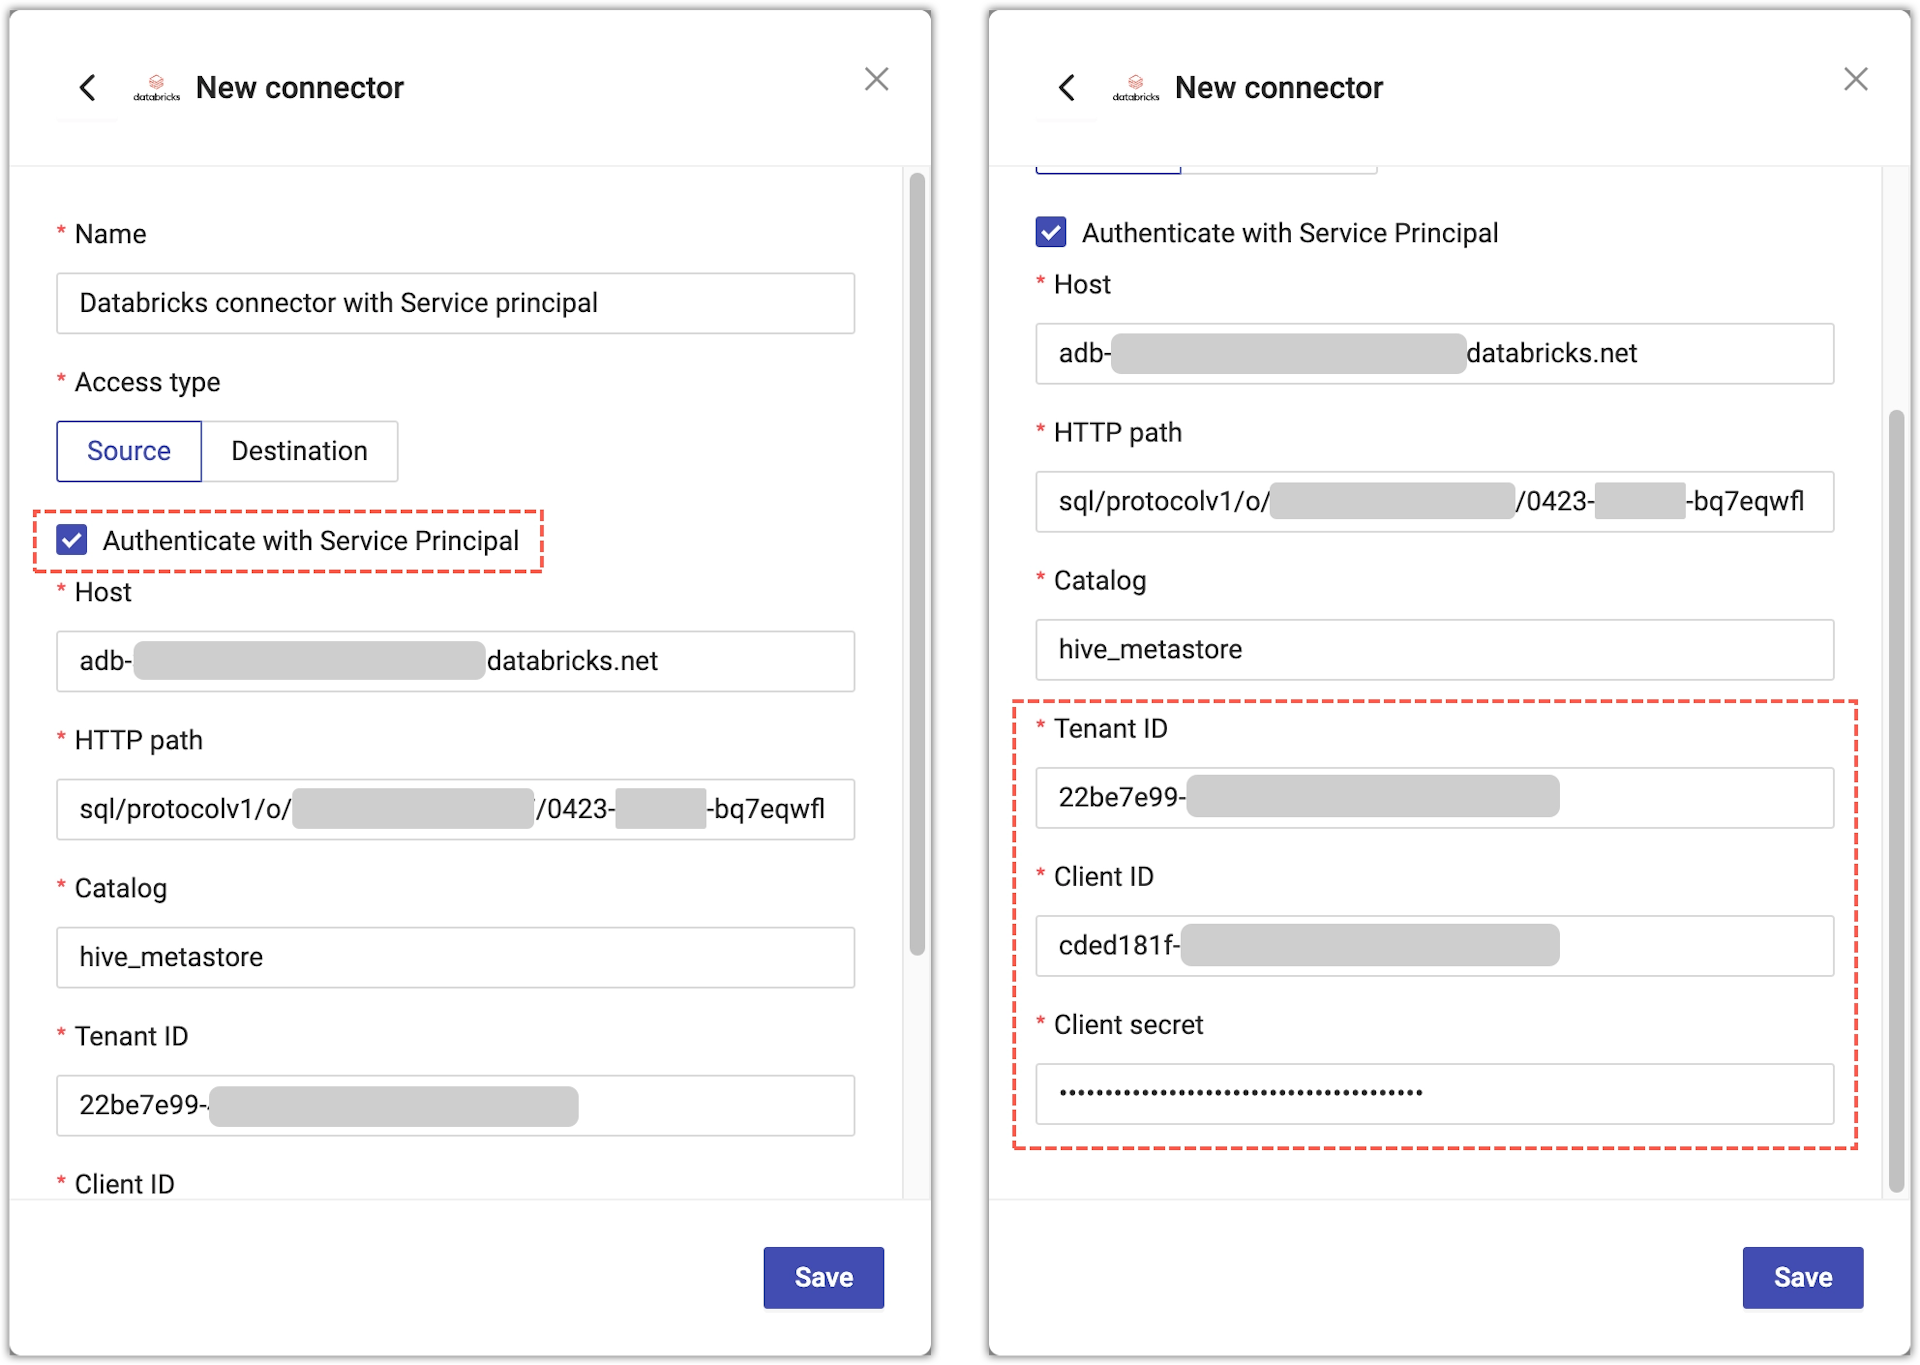
- Click Save to save your new Databricks connector.
MOSTLY AI tests the connection. If you see an error, check the connection details, update them, and click Save again.
You can click Save anyway to save the connector disregarding any errors.
What’s next
Depending on whether you created a source or a destination connector, you can use the connector as:
- data source for a new generator
- data destination for a new synthetic dataset