Manage users and groups
When you deploy and host MOSTLY AI for your organization, you can manage access to MOSTLY AI with the Keycloak and Access Management services.
Manage groups
With groups, you can manage a common set of access privileges for a set of users. Users can be members of zero or more groups. They inherit the access privileges assigned to each group.
Steps
-
Access Keycloak’s user interface by typing its URL in your browser’s address bar. It’s the same as MOSTLY AI’s URL, but with the
/authpath at the end of it.
For example,https://mostlyai.mycompany.com/auth. -
Keycloak’s welcome page appears. Select Administration Console and enter the Admin credentials that were created during installation.
-
If you are running a Docker-based version of MOSTLY AI, you can find these credentials in the
docker-compose.ymlfile located in the/opt/mostly-ai/etc/directory: The credentials are stored in the KEYCLOAK_USER and KEYCLOAK_PASSWORD fields.mostly-keycloak: image: mostlyai/mostly-keycloak:latest container_name: mostly-keycloak hostname: mostly-keycloak depends_on: - mostly-keycloak-postgres environment: - VIRTUAL_HOST=login.$MOSTLY_GENERATE_DOMAIN #login.mostly.mycompany.com - VIRTUAL_PORT=$MOSTLY_GENERATE_PORT #8080 - LETSENCRYPT_HOST=login.$MOSTLY_GENERATE_DOMAIN #login.mostly.mycompany.com - KEYCLOAK_USER=admin - KEYCLOAK_PASSWORD=adminpassword123456789 - DB_VENDOR=postgres - DB_ADDR=mostly-keycloak-postgres #mostly-keycloak-postgres - DB_PORT=5432 # 5432 - DB_DATABASE=mostly_keycloak # mostly_keycloak - DB_USER=mostly_keycloak # mostly_keycloak - DB_PASSWORD=mostly_keycloak # mostly_keycloak - PROXY_ADDRESS_FORWARDING=true - X509_CA_BUNDLE=/opt/mostly-keycloak-setup/enterprise_mostlylab.crt -
If you are running a K8s / OCP version of MOSTLY AI, you can find them (base64 encoded) in the section
Keycloak.secrets:secrets: ... admin_password: (base64 encoded) admin_username: (base64 encoded) ...
-
-
Once you’re in the Administration Console, click the drop-down menu in the top left and switch from the
masterto themostly-generaterealm. Then, select Groups from the menu on the left.
You can now see the user groups that are currently available.
Click New to create a new group or Edit to manage the access permissions of an existing group.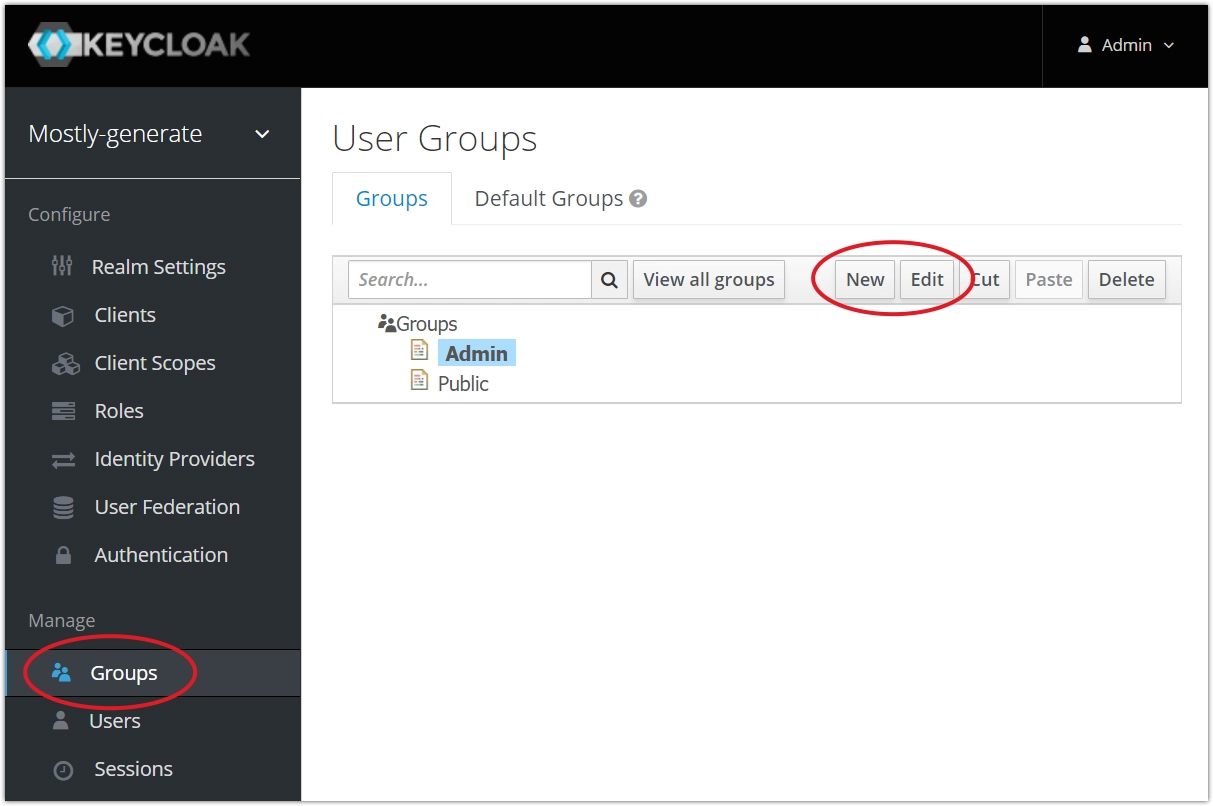
-
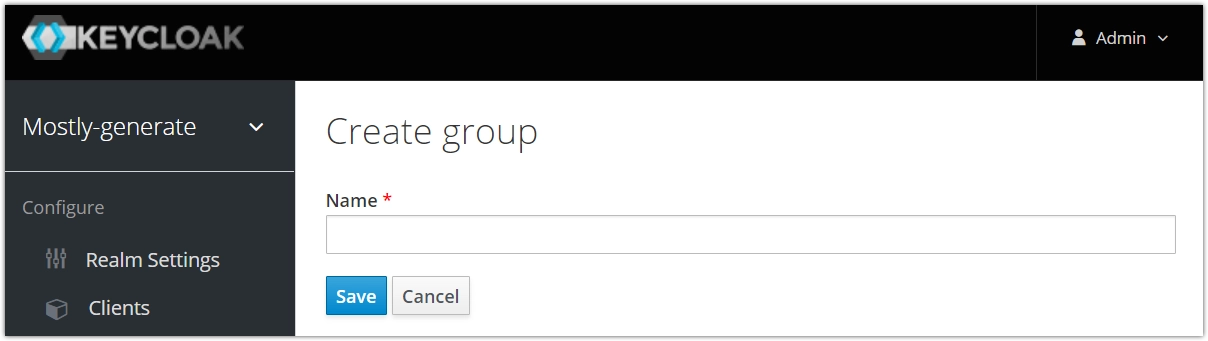
If you select New, a Create group page will appear where you can fill out the name of your new group. Click Save when done.
-
On the next page, select the Role mappings tab to see the available and assigned roles for your group. Select the roles you want to assign and click on Add selected. You can leave Keycloak once you’re done.
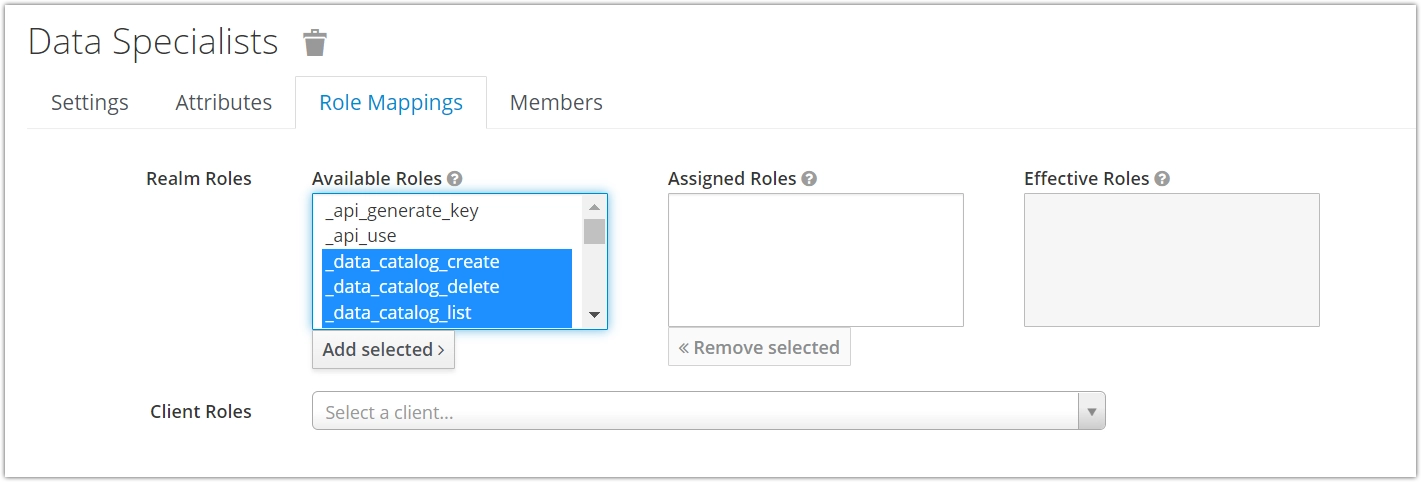
We recommend assigning the roles that start with Manage, Use, View, and Stop. These are composite roles that combine one or more granularly defined roles. You can identify these by the underscore (_) at the beginning of their name. The table below lists all the composite roles you can choose from.
Role Description ManageDataConnector Create, update, read, and delete connectors. UseDataConnector Use connectors for synthetic datasets and catalogs and see their details. ManageDataCatalog Create, update, read, and delete catalogs. UseDataCatalog Use catalogs to generate synthetic datasets and see their details. ManageJobs Start, stop, update, and delete synthetic datasets, and download its assets. StopJobs Stop a running synthetic dataset, exit the training and generation steps, and delete a synthetic dataset. ViewJobs View the synthetic datasets list and summary, including progress, QA report, and download their assets. ManageUser View the user list and user details, view the Active Directory connection details and update them, and syncronize Active Directory with MOSTLY AI’s user directory. UseAPI Use all endpoints of the public API. ManageAPI Create an API key for the public API. ManageGroupSharing Change which groups have access to a synthetic dataset, catalog, or connector. ManagePublicSharing Provide view access to a synthetic dataset, catalog, or connector to everyone. ManageOwnerSharing Change the owner of a resource. Reporting Enables the creation of the QA report.
If you create a group, MOSTLY AI will allow you to share Synthetic datasets, Catalogs and Connectors between the members of that group.
You can find a video here on how to create local users and define permissions for them: Creating Local Users and Setting Permissions
Manage users
Follow the steps below to manually add users. Alternatively, you can also integrate Keycloak with your company’s Active Directory by following these steps.
Steps
-
Access Keycloak’s user interface by typing its URL in your browser’s address bar. It’s the same as MOSTLY AI’s URL, but with the
/authpath at the end of it.
For example,https://mostlyai.mycompany.com/auth. -
Keycloak’s welcome page will now appear. Select Administration Console and enter the Admin credentials that were created during installation.
- If you are running a Docker-based version of MOSTLY AI, you can find these credentials in the
docker-compose.ymlfile located in the/opt/mostly-ai/etc/directory: The credentials are stored in the KEYCLOAK_USER and KEYCLOAK_PASSWORD fields.mostly-keycloak: image: mostlyai/mostly-keycloak:latest container_name: mostly-keycloak hostname: mostly-keycloak depends_on: - mostly-keycloak-postgres environment: - VIRTUAL_HOST=login.$MOSTLY_GENERATE_DOMAIN #login.mostly.mycompany.com - VIRTUAL_PORT=$MOSTLY_GENERATE_PORT #8080 - LETSENCRYPT_HOST=login.$MOSTLY_GENERATE_DOMAIN #login.mostly.mycompany.com - KEYCLOAK_USER=admin - KEYCLOAK_PASSWORD=adminpassword123456789 - DB_VENDOR=postgres - DB_ADDR=mostly-keycloak-postgres #mostly-keycloak-postgres - DB_PORT=5432 # 5432 - DB_DATABASE=mostly_keycloak # mostly_keycloak - DB_USER=mostly_keycloak # mostly_keycloak - DB_PASSWORD=mostly_keycloak # mostly_keycloak - PROXY_ADDRESS_FORWARDING=true - X509_CA_BUNDLE=/opt/mostly-keycloak-setup/enterprise_mostlylab.crt - If you are running a K8s / OCP version of MOSTLY AI, you can find them (base64 encoded) in the section
Keycloak.secrets:secrets: ... admin_password: (base64 encoded) admin_username: (base64 encoded) ...
- If you are running a Docker-based version of MOSTLY AI, you can find these credentials in the
-
Once you are in Keycloak, click the drop-down menu in the top left and switch from the
masterto themostly-generaterealm. Then, click on Users in the left side menu and then on the Add user button on the Users page.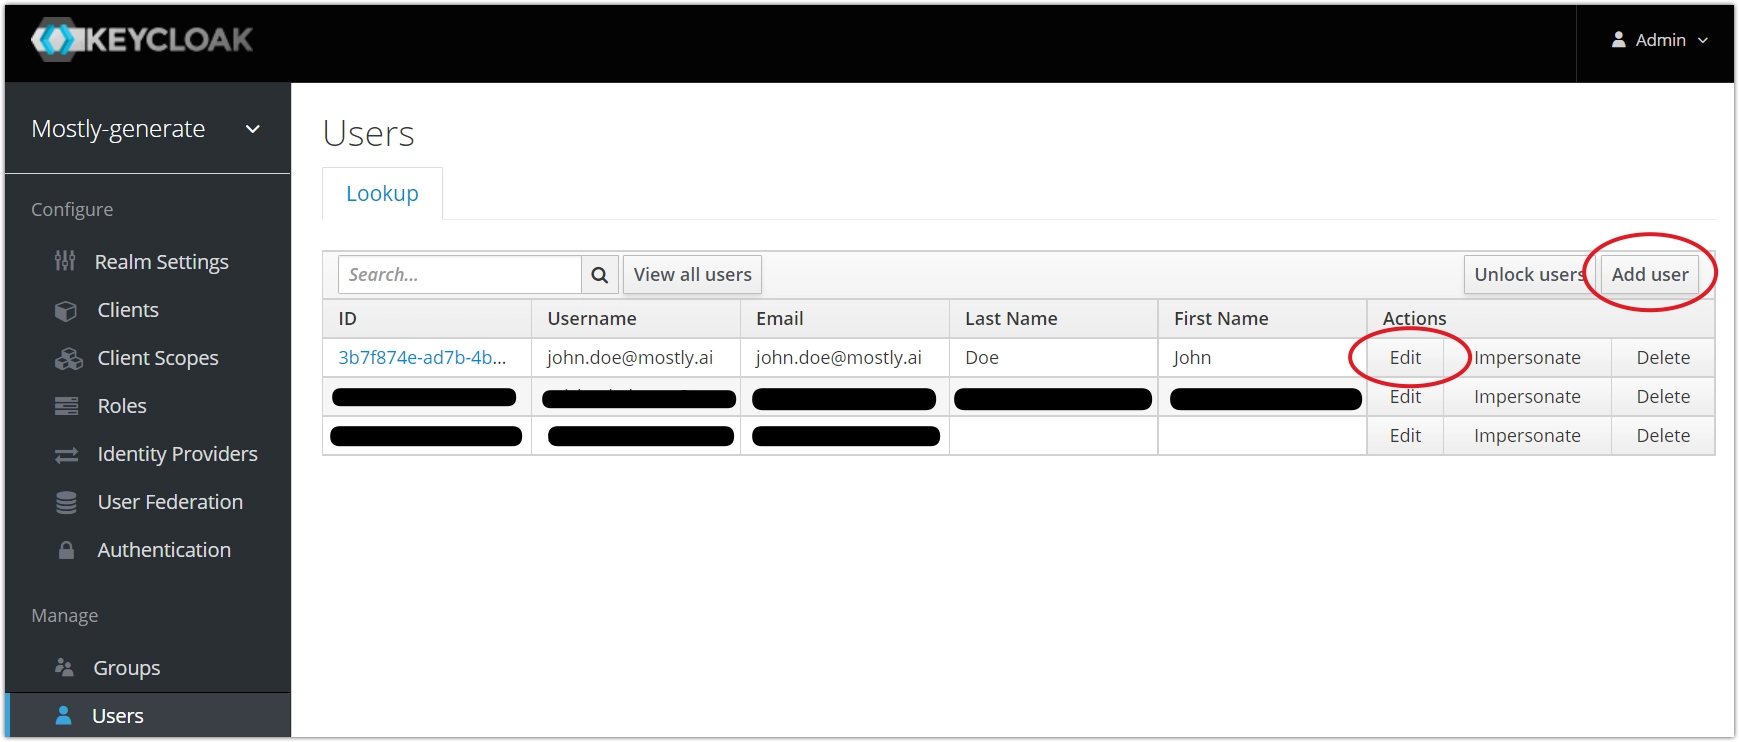
-
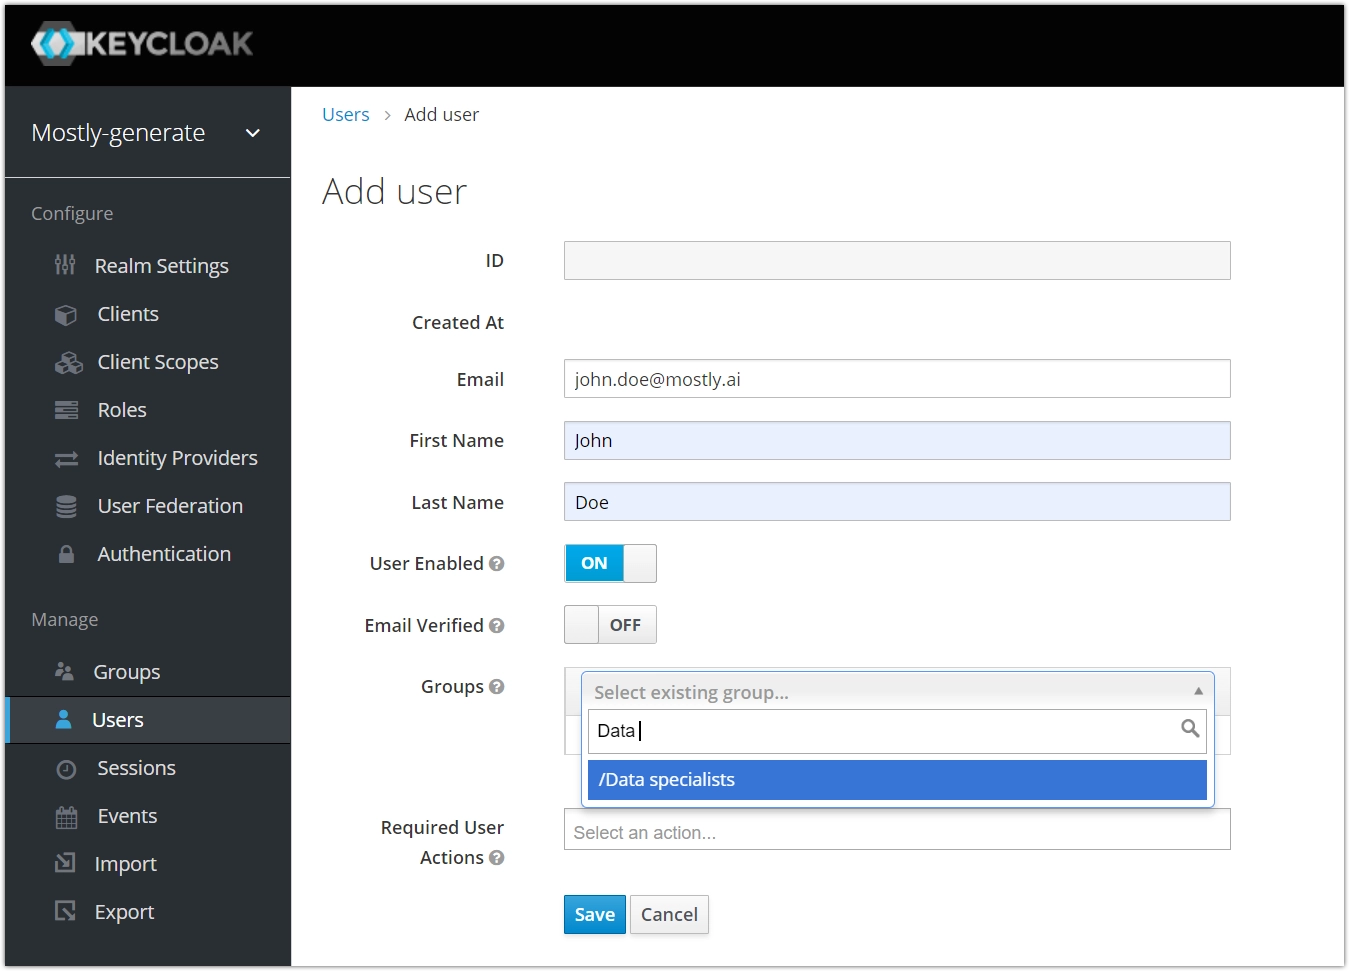
If you’ve clicked on Add user, a new page appears where you can fill out their Email, First Name, and Last Name. Click Save when done.
-
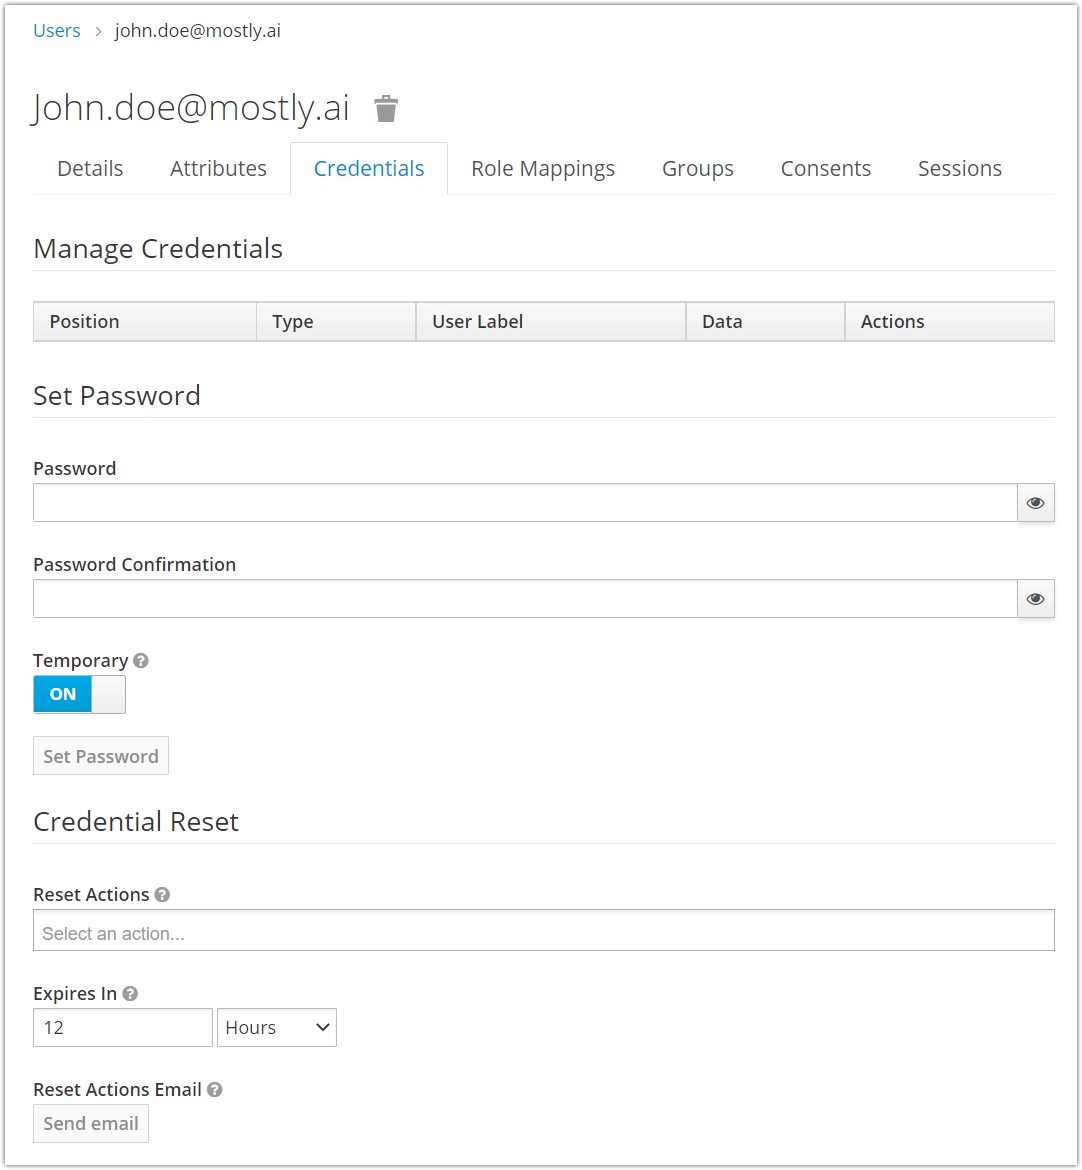
Next, the user profile page appears. Select the Credentials tab to set a password for this user account. Once you’ve entered the new password in the Password and Password confirmation fields, click Set password and confirm.
-
Switch to the Groups tab to assign the user to one or more groups.
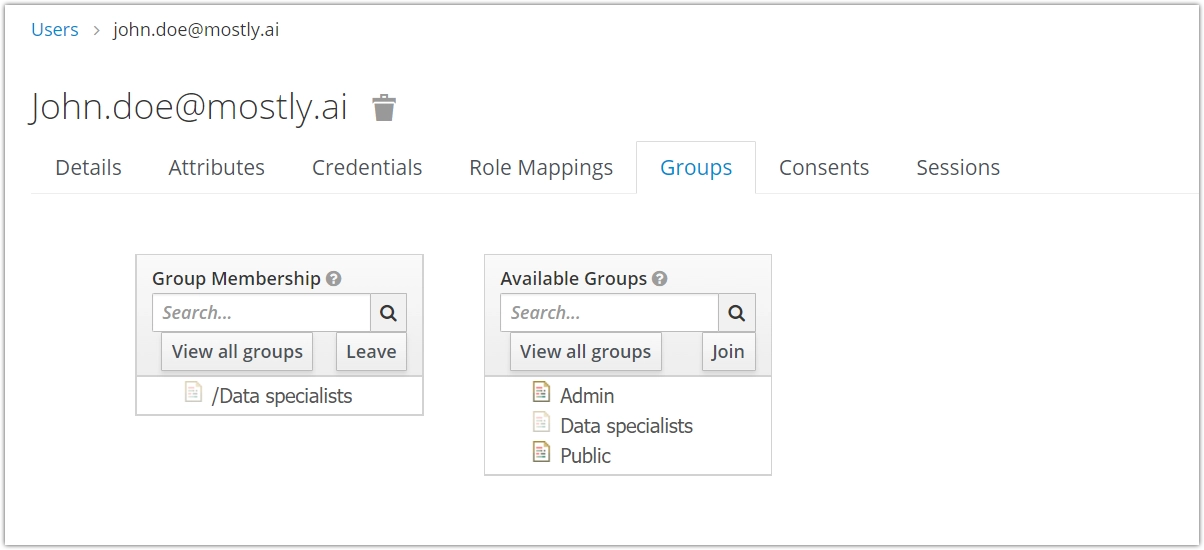
IMPORTANT: Make sure that your new users are at least in the Public group, plus any new group you create and want them to be a part of.
Integrate Keycloak with Active Directory
Take the following steps to integrate Keycloak with your company’s Active Directory:
Steps
-
Access Keycloak’s user interface by typing its URL in your browser’s address bar. It’s the same as MOSTLY AI’s URL, but with the /auth path at the end of it.
For example,https://mostlyai.mycompany.com/auth, -
Keycloak’s welcome page will now appear. Select Administration Console and enter the Admin credentials that were created during installation.
- If you are running a Docker-based version of MOSTLY AI, you can find these credentials in the
docker-compose.ymlfile located in the/opt/mostly-ai/etc/directory: The credentials are stored in the KEYCLOAK_USER and KEYCLOAK_PASSWORD fields.mostly-keycloak: image: mostlyai/mostly-keycloak:latest container_name: mostly-keycloak hostname: mostly-keycloak depends_on: - mostly-keycloak-postgres environment: - VIRTUAL_HOST=login.$MOSTLY_GENERATE_DOMAIN #login.mostly.mycompany.com - VIRTUAL_PORT=$MOSTLY_GENERATE_PORT #8080 - LETSENCRYPT_HOST=login.$MOSTLY_GENERATE_DOMAIN #login.mostly.mycompany.com - KEYCLOAK_USER=admin - KEYCLOAK_PASSWORD=adminpassword123456789 - DB_VENDOR=postgres - DB_ADDR=mostly-keycloak-postgres #mostly-keycloak-postgres - DB_PORT=5432 # 5432 - DB_DATABASE=mostly_keycloak # mostly_keycloak - DB_USER=mostly_keycloak # mostly_keycloak - DB_PASSWORD=mostly_keycloak # mostly_keycloak - PROXY_ADDRESS_FORWARDING=true - X509_CA_BUNDLE=/opt/mostly-keycloak-setup/enterprise_mostlylab.crt - If you are running a K8s / OCP version of MOSTLY AI, you can find them (base64 encoded) in the section
Keycloak.secrets:secrets: ... admin_password: (base64 encoded) admin_username: (base64 encoded) ...
- If you are running a Docker-based version of MOSTLY AI, you can find these credentials in the
-
Once you’re in Keycloak, click the drop-down menu in the top left and switch from the
masterto themostly-generaterealm. Then, click User Federation from the menu on the left ldap from the drop-down menu to navigate further.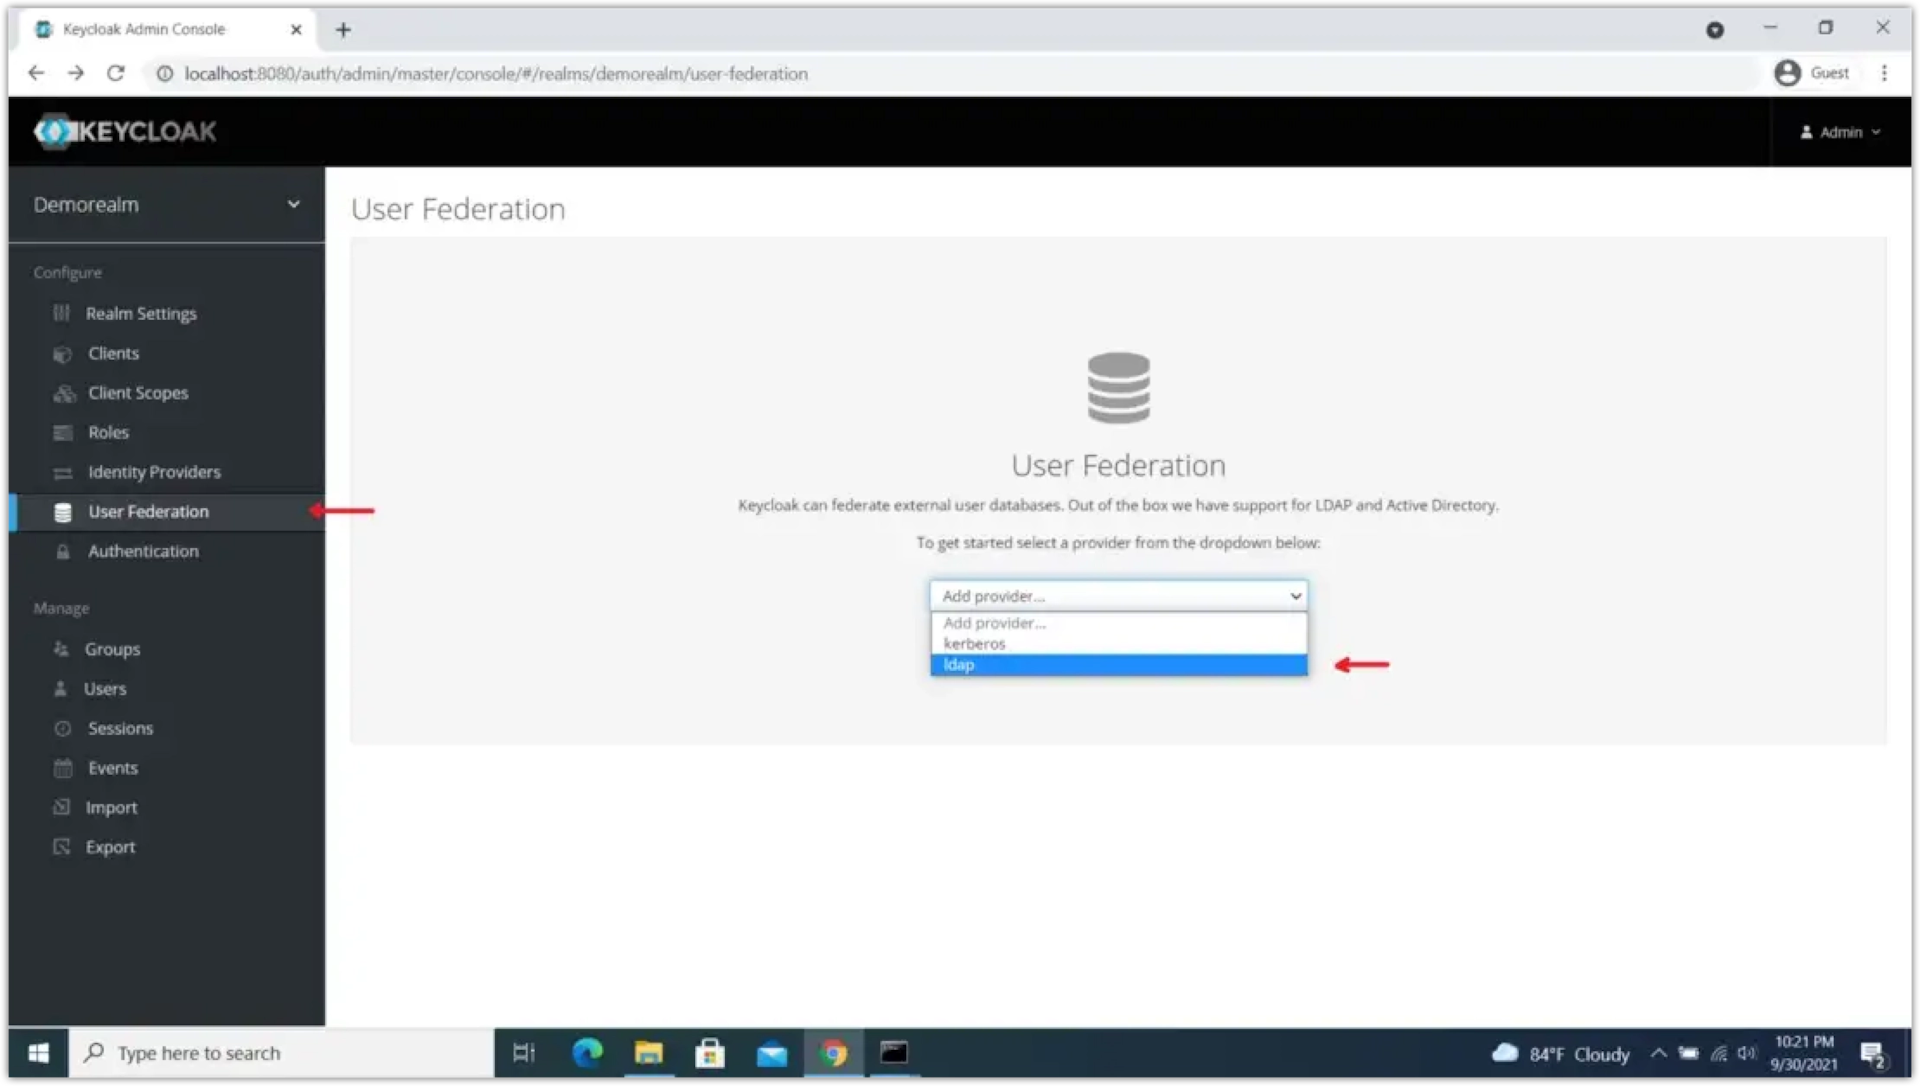
-
Next, fill out the fields on the Add user federation page. You can find descriptions for each field below the screenshot.
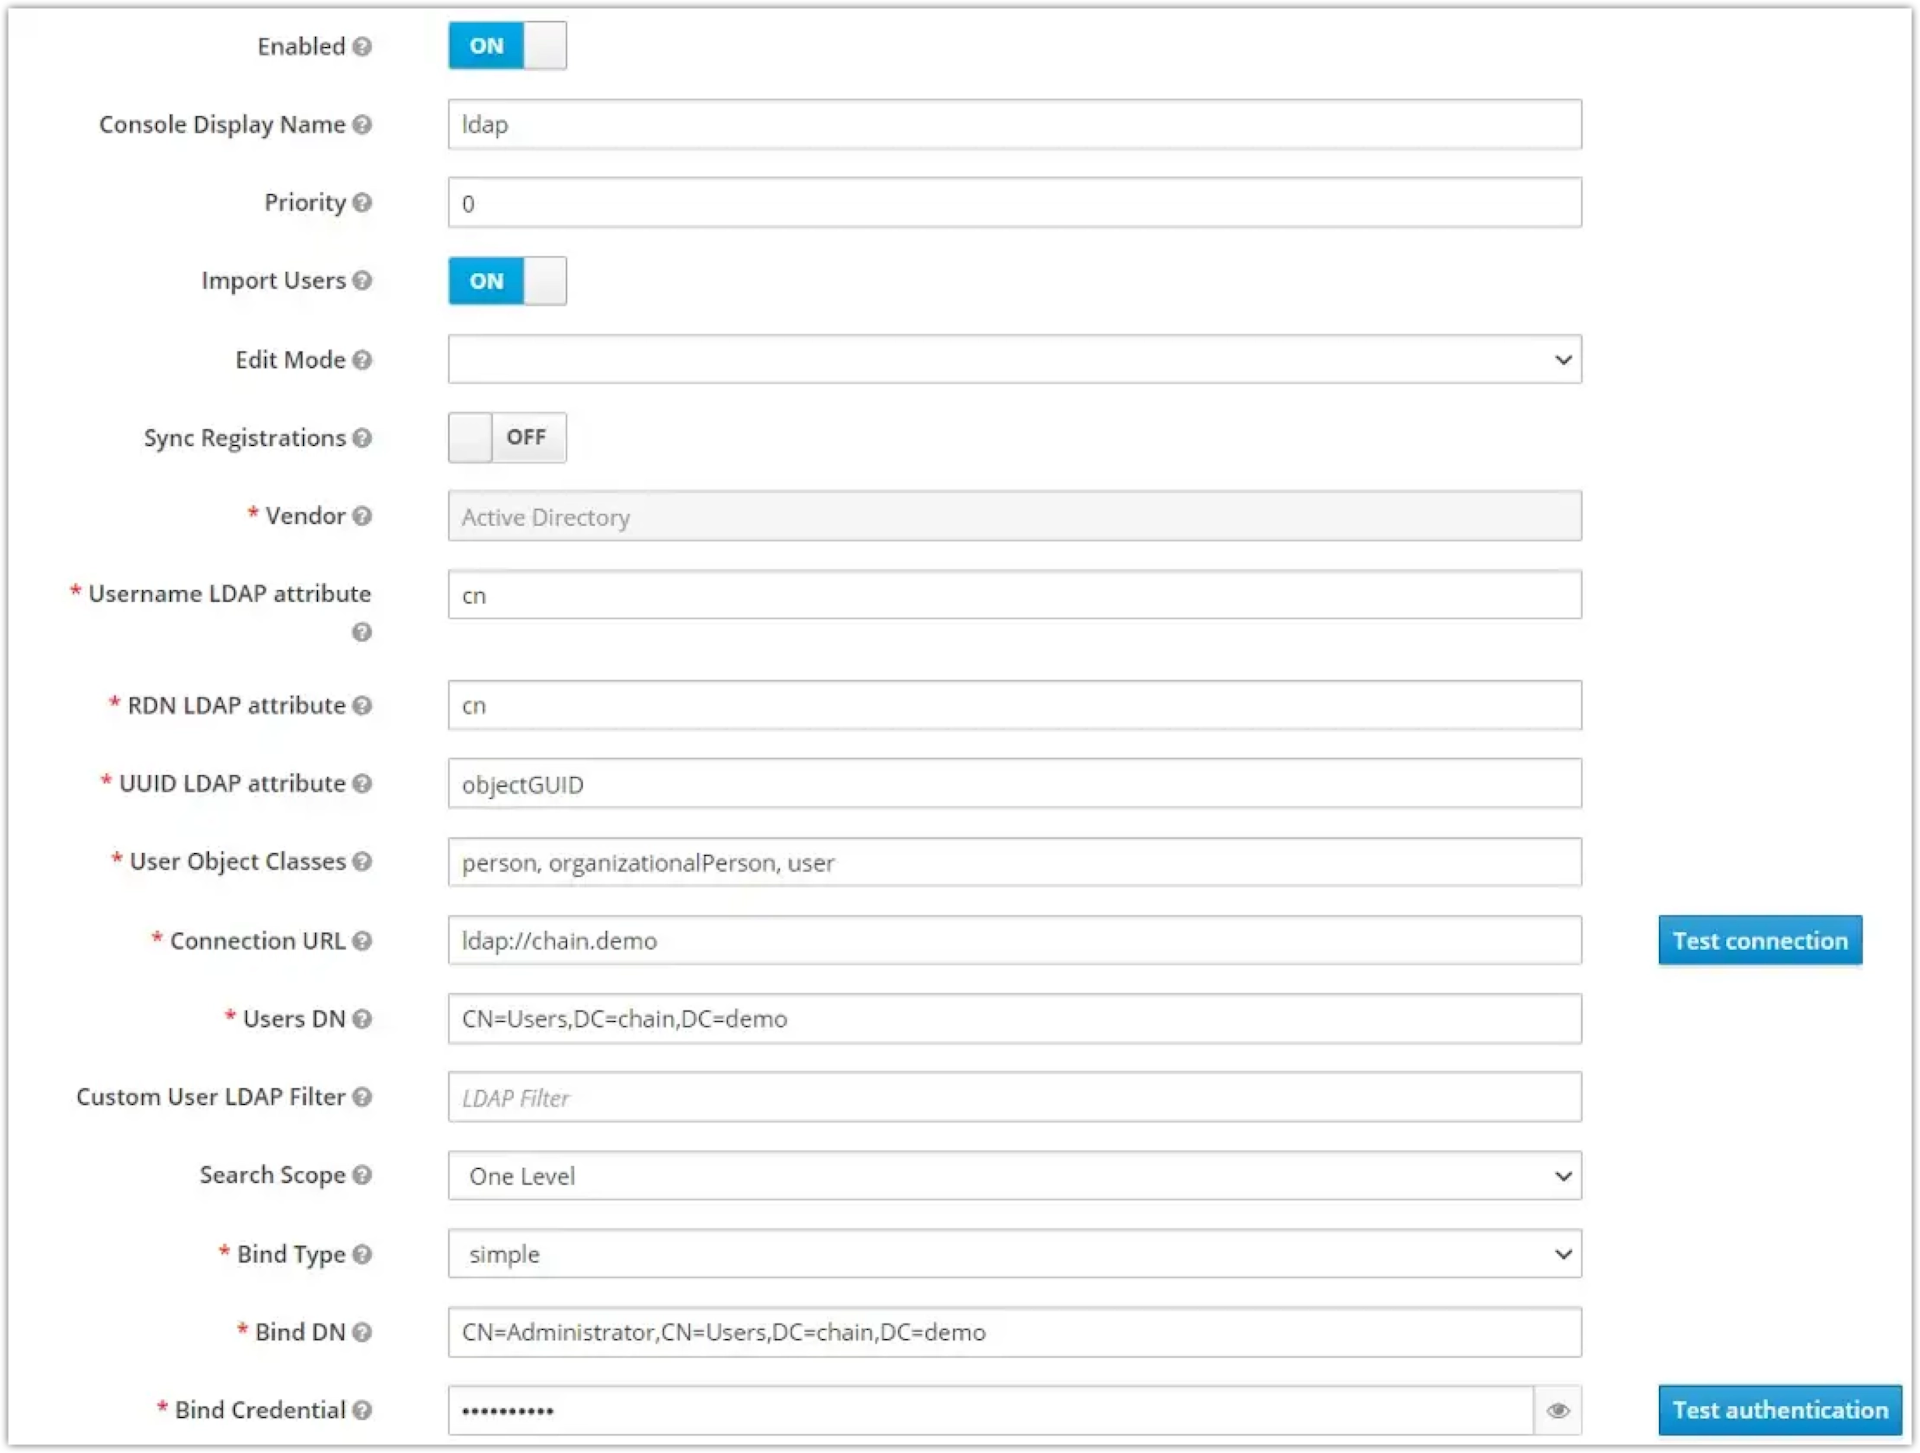
Username LDAP attribute Specify the LDAP attribute that becomes the user’s username in MOSTLY AI. Examples of suitable attributes are mail,sAMAccountName, orcn.RDN LDAP attribute Specify the LDAP attribute used as the RDN (top attribute) of a typical user DN. Usually, it’s the same as the Username LDAPattribute.UUID LDAP attribute Specify the LDAP attribute used as a unique object identifier (UUID) for objects in LDAP. For Active Directory, this is objectGUID.User Object Classes Enter the values of the LDAP objectClass attribute for users, separated by commas. Example: person,organizationalPerson, user.Search Scope Select Subtree or One Level — if the node listed in Users DN contains nested nodes with users, select Subtree. Otherwise, select one level.Connection URL Specify the the domain name or IP address of the Active Directory server. Users DN Specify the subtree where the users reside using comma-separated relative distinguished names (RDNs). Custom user search filter Use a filter to select users from the full list of users in the Users DN node. Bind type Specify the authentication mechanism for connecting to the Active Directory server. Bind DN Provide a Bind DN to authenticate MOSTLY AI on the Active Directory server. Bind credential Enter the Bind credential (password) for the Bind DN.